.avif)


3 Tips for Better Power Apps Forms

Forms in PowerApps can be a pain to the end-user if we don't keep them in mind. With these few adjustments, we can wrangle lengthy forms, prevent users from clicking things they shouldn't, and give them feedback to make sure they're aware of what's going on at all times.
Use Tabs for Long Forms
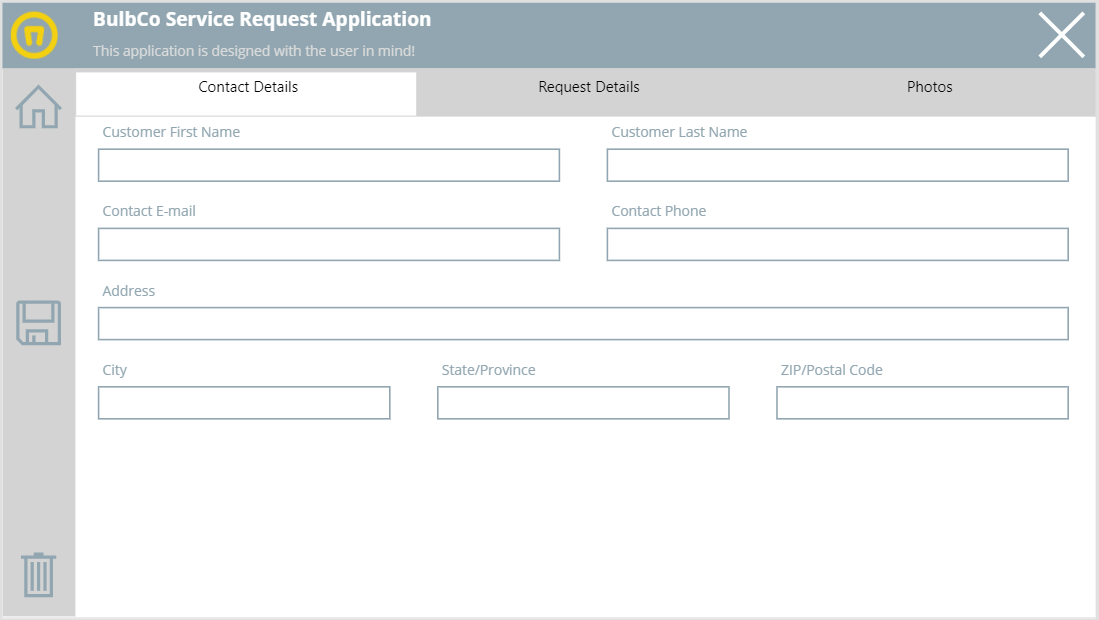
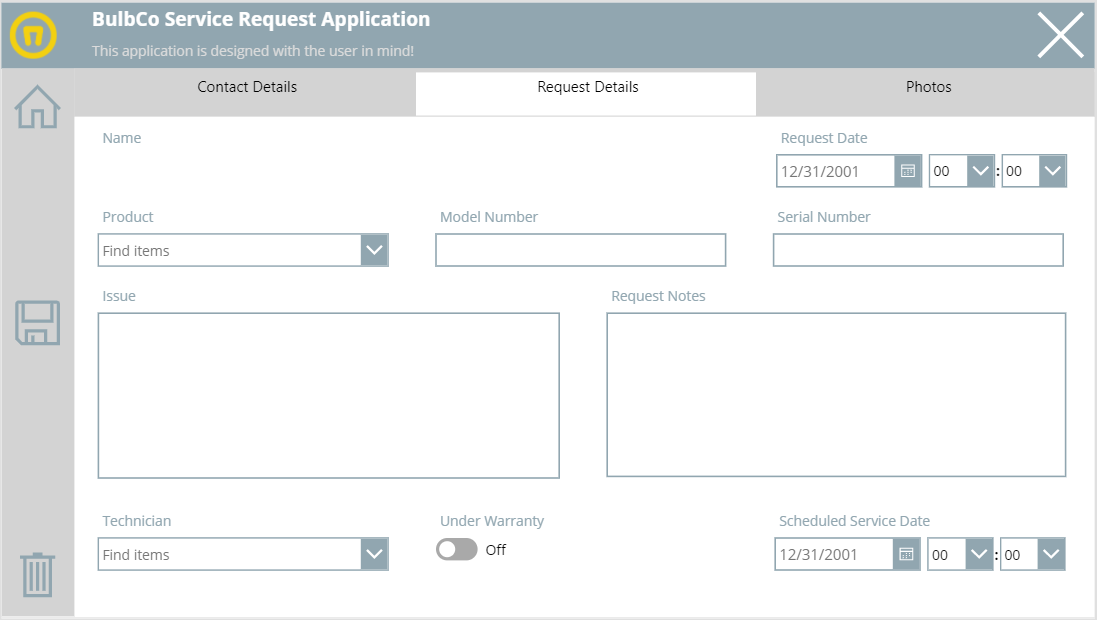
The first technique I want to highlight is using a Tab Control for forms where you have many fields or if you need to segment the collection of your data based on context. There are a number of examples demonstrating how to implement this on the internet. The best method I’ve found is to build this as a component so that it can be reused in other apps. Fortunately, the Power Apps community has created one for us to start with which can be found here: https://github.com/microsoft/powerapps-tools/tree/master/Components
The Tab Control component is easily configurable to meet your needs. The basic principle is that you’ll have a screen and form created for each tab in your form. On each of these screens, you’ll include the Tab Control component and provide the same configuration for each Tab Control on each screen.
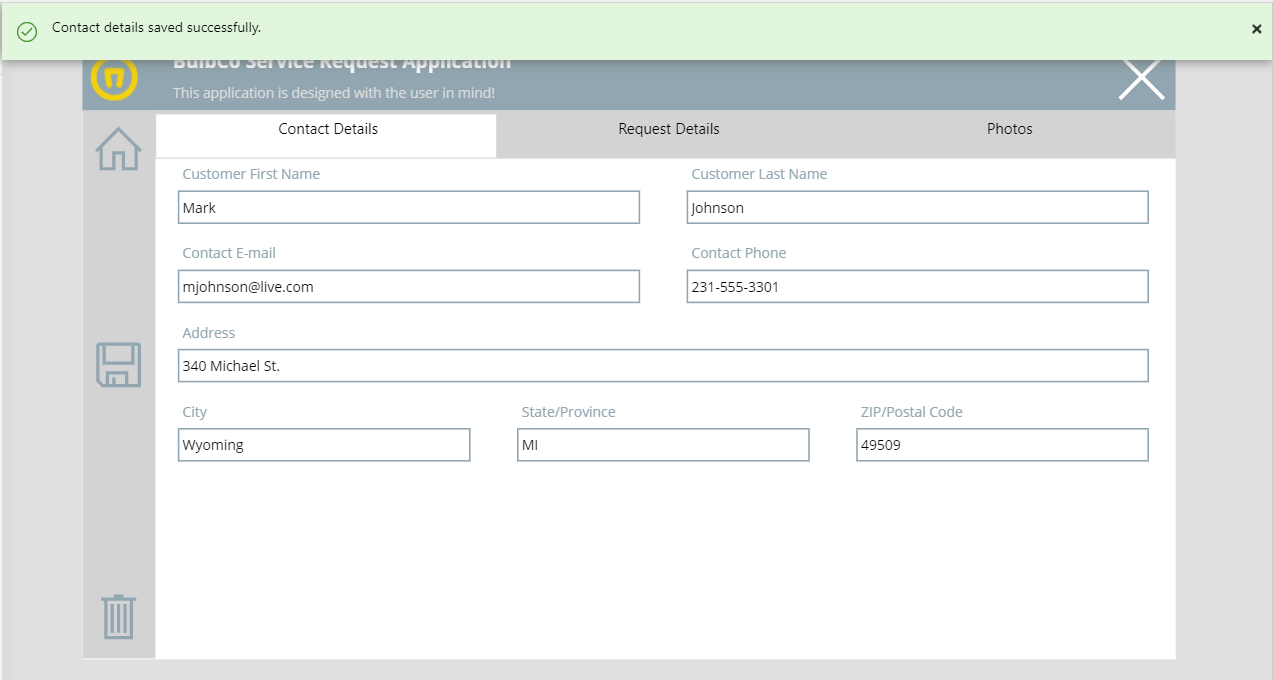
What makes this particularly useful in your form and benefits the user is a couple of things. First, in case you have many fields you need the user to fill out, you can use the tabs to create more form real estate and eliminate scroll bars. Second, it often makes sense to organize your input based on the context of the data. For example, we’re creating a service request where we want to capture client contact details as well as the actual request details. Organizing these things into different tabs enables the user to have contextual focus while gathering the information and can be used to guide them through the data capture process.
One additional suggestion I’ll make here is that instead of defining the Table used for the “Items” property of the Tab Control within the Tab Control component itself, create this table in your App.OnStart event.

If you do this, then when you configure the Tab Control component, you can set the `Items` to your table variable like this…

Then, you can set the Items property on the Tab Controls on each of the other screens the same way. This will save you time and headaches if you ever need to add, remove, or change a tab on your form. You can simply update the table in your App.OnStart event and be done (you don’t have to remember to make the change on the other screens).
Disable Actions Based On The Context of the Form
The next tip I’d like to share is a suggestion to disable actions or buttons unless or until the form is in a valid state for that action. For example, if you use the same form for new and edit, which is pretty typical in Power Apps, you might want to disable or hide your delete button when the user is creating a new record. You might also consider disabling the save button until the user has entered the necessary data.
To do this, I simply changed my `Icon Color` and `DisplayMode` properties based on the Form’s Mode for my Delete button and based on the state of the form fields for my Save and Next Tab button. First I set the `DisplayMode` for my Delete button as follows:

If the Form Mode is set to `New` then we disable our button by setting its `DisplayMode` to `View`.
Then, to make this button appear disabled, I’m setting the `Icon Color` property based on the `DisplayMode` of the Icon / Button.

The save button uses a bit more complexity to set its `DisplayMode`, but the `Color` uses the same logic. In this case I’m checking to see if a hidden `Title` field is empty. In this simple example, I just care that we have a composite title value. In the real world we might do something more complex like checking multiple form fields.

Like many other things, there are a few different ways to do this, and most of you will find documented out on the web.

SELF ASSESSMENT
Is your business getting full value from your M365 subscription?
Billions of dollars are wasted each year on underused subscriptions. Take 3 minutes to find out where your tools are driving results, and where they’re holding you back.
Find Out Now
Is Team Communication Holding You Back?
Find Out in Just 2 Minutes.
Take our quick scorecard to uncover communication gaps and hidden barriers within your team.
Notify Users After They Take Action
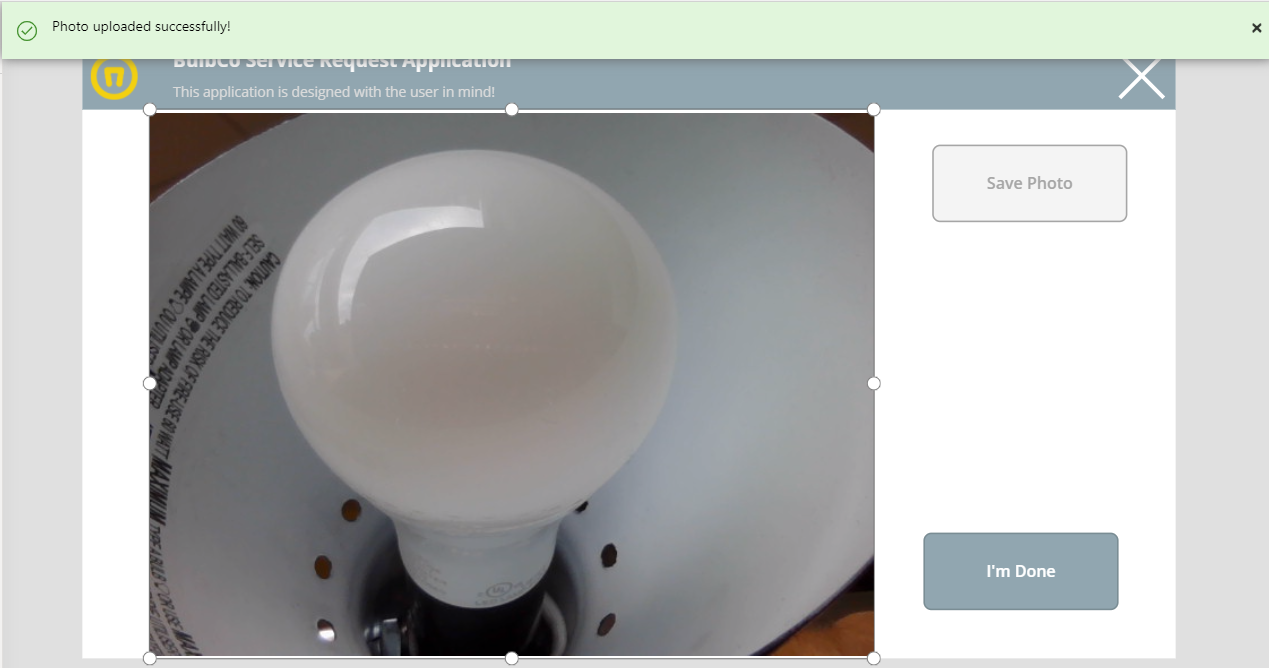
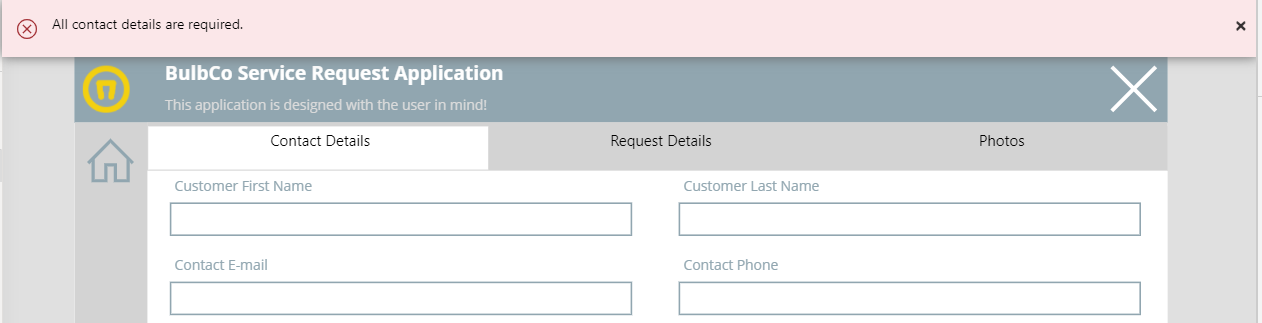
My third tip is to take advantage of the built-in status communication by using the Notify method. This method is pretty easy to use and is a great way to provide feedback to the user. Giving your users peace of mind when it comes to saving data can count for a lot when it comes to confidence in your application.
A very common use of this mechanism to let the user know that their data was persisted. This could be the result of saving data on your form, but you might also have scenarios where it takes a bit more to complete a task. Maybe you’re using a Flow to send a file somewhere or send a notification. Knowing that this happened successfully can be a big deal for the end-user.
You can also use this same method to signal to the user that they haven’t got everything right yet and stop them from moving on.
Little things like this can make a big difference.
Conclusion
We think keeping the user in mind while building our forms can lead to better engagement and make them a little nicer to use. We’d encourage you to try these tips out next time you’re building a form in Power Apps!
.jpg)