


A Non-Developer's Guide to Using Power Apps

No-code/low-code options have become more available than ever. If you've been looking to build Power Apps but aren't sure where to start, walk through one of the templates with us and learn how the intent behind the app determines how it works.
Intro
Getting started in the Power Apps environment can be a daunting undertaking, especially if you have no previous developer experience. Starting from a premade template that Microsoft has already created is a great way to learn not only how the data behind it is structured, but also to understand the purpose-driven logic of the app's functionality. In this article I break down the Site Inspection template from a beginner's perspective. I’ll explain the intent of the application, show how the app accomplishes that goal, and open the door for customization.
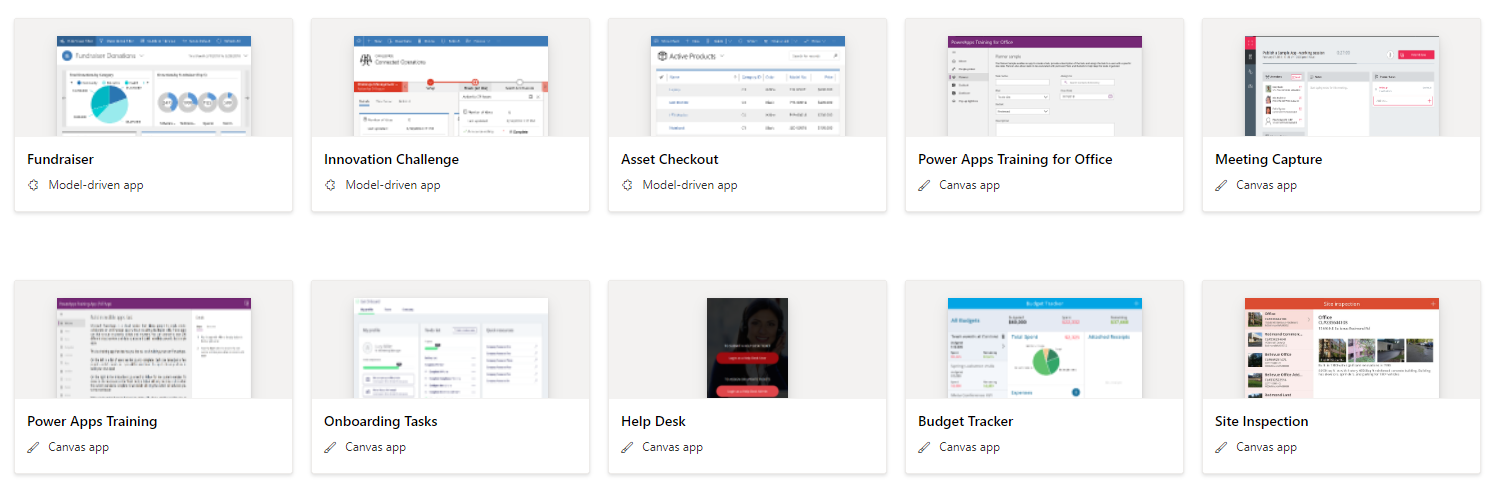
Reviewing Power App Templates
Microsoft has a wide assortment of templates in the Power Apps application. Your first instinct may be to jump right into these and see how they work, but I found it useful to simply click around and review the details on some of them before opening one up.
Apps can serve an array of services and processes, and sometimes the title or thumbnail of these templates give a clear indication of what its purpose is before opening it. Examples like Budget Tracking and Suggestion Box templates are obvious, but what's the difference between a Service Desk app and a Help Desk app?
Before creating any of these templates, select one and review the description so you get a general idea of what the app is meant to do. Getting this type of insight helps orient you not only how the app functions but the value and purpose that an end user will get out of it. For the Site Inspection template, we can infer a few things:
“Whether you're in real estate, property management or insurance, Site Inspection lets you document, catalog, and reference real estate sites of all kinds with images, location, site details, and more. This app will open with sample data.”
The description tells us that this template is generic enough to be cross-functional for a variety of job needs regardless of the business you are in. It takes in information provided by the user and catalogs it in a way that makes it more organized and easier to review. The description calls out specific fields like photos, an address, and details that make the cataloging of these “inspections” categorized in a way that would be scalable as an organization uses the application.
Power Apps can be looked at in many ways depending on what a specific user is trying to do with the tool. In most cases, it’s not just about reading the data and making it accessible, you want to be able to write and update data or delete it right within the app altogether. When you start thinking about the types of users and what they’ll need to do on the app then you’re better suited to define how that content gets surfaced.
Getting Around the App
The app is pretty easy to get into and can be created from the templates list. This one has some differences between the mobile and desktop experiences that we’ll discuss in a later section, but for now we’ll talk about the desktop format.
Once the template is set up and you go into preview mode, it is simple to get around the screens and take in the information displayed. A rollup to the left shows a list of all the sites that have been inspected and loaded into the app, and selecting one updates the panel on the right to display more info. You might be familiar with other apps where you must use multiple screens and views when you select data, but this app is different because it makes use of the start screen, so you don’t feel like you actually “leave” the dashboard to see more content.
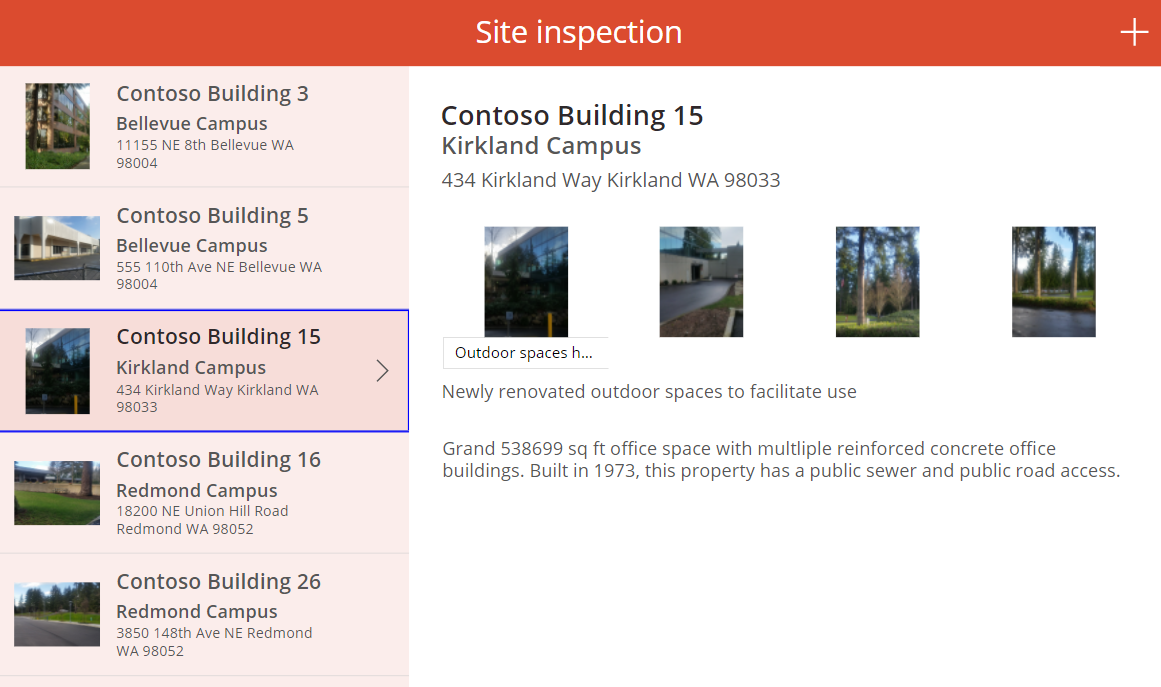
The app starts you off with some basic metadata about each site, but fortunately since this is a low-code development tool, it’s easy to add more data if you need it. From the main display you can see a title, subtitle, notes, description, address, and multiple photos being aggregated to form one inspection. It’s important to note that each photo can also have a caption in case you need to add extra detail.
Adding and Updating Inspections
Once an inspection is selected on the main app page, you can edit or delete them with one click of the button. Because these are plain text fields you’re able to enter in exactly what content you need and begin uploading photos once you’ve granted the app access to your camera/camera roll.
Here is where we find a limitation of the app. Once a site inspection has been created, no more photos can be added to it, and you also cannot reorganize images once they have been added. This is unfortunate if you forget to upload an image but could be a benefit if each inspection is intended to be a one-time submission for record retention. Since the first image uploaded for a site inspection is displayed as the main thumbnail for the inspections on the main page, you want to consider which photo best represents the entire site inspection and begin with that one first. Once saved, the photos on an inspection can’t be modified except for the captions on each image unless you delete all of them and start over.
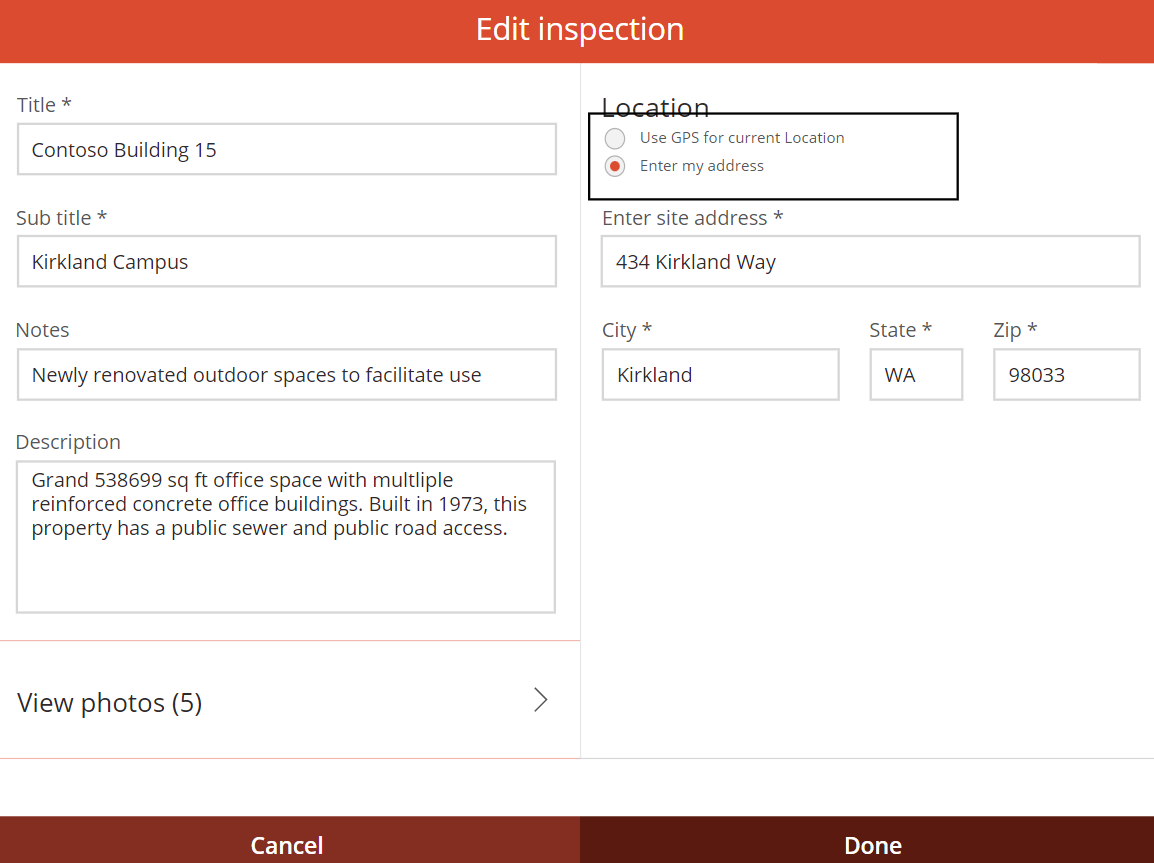

The rest of the fields on the inspection can be updated at any time and creating a new site inspection uses the same form. If you’re on mobile, the app can target your GPS location and use the closest address found there, but you may find that entering the address yourself is the most accurate for sites in cities and more industrial areas that may have clustered addresses nearby.
Limitations
Overall, you'll find the inspection app is pretty user friendly when it comes to the input of the site details. There are a few limitations though, some of which we’ve mentioned:
- Photo organization: Drag and drop sorting would be welcome
- The mobile version of the app only shows the list of sites on the start screen
- The mobile version’s photo captions display over the images, and aren’t formatted well
One could assume that the intention behind this tool is to create site inspections via mobile and follow-up on that content via tablet after the fact.
So many other additions to this application immediately come to mind once you see what data is already recorded in the examples. While the app doesn’t have a filter option, it would be great if a user could see a list of sites based on universal qualities like square footage, employee capacity, and accessibility. Since this app enables GPS, we wish there was an embedded Google Maps *ahem* Bing Maps… view to show where these images were taken and even directions to get there.
Now you can start to see all the potential there is from starting from a template and making it your own. It can be daunting if you’re new to Power Apps, but taking small steps and using sample content is the best way to get your feet wet.

SELF ASSESSMENT
Is your business getting full value from your M365 subscription?
Billions of dollars are wasted each year on underused subscriptions. Take 3 minutes to find out where your tools are driving results, and where they’re holding you back.
Find Out Now
Is Team Communication Holding You Back?
Find Out in Just 2 Minutes.
Take our quick scorecard to uncover communication gaps and hidden barriers within your team.
Connecting to Data
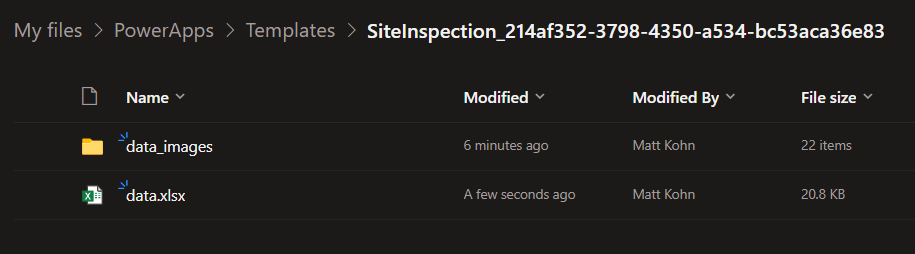
When you want to customize a template, a good starting point we like to check off the list is being intentional about where the data is stored. In this case, let’s look at how the app is utilizing OneDrive as the app’s storage space. Microsoft keeps all of your site inspection content tucked in an automatically created folder in your OneDrive under PowerApps > Templates > SiteInspection_########.
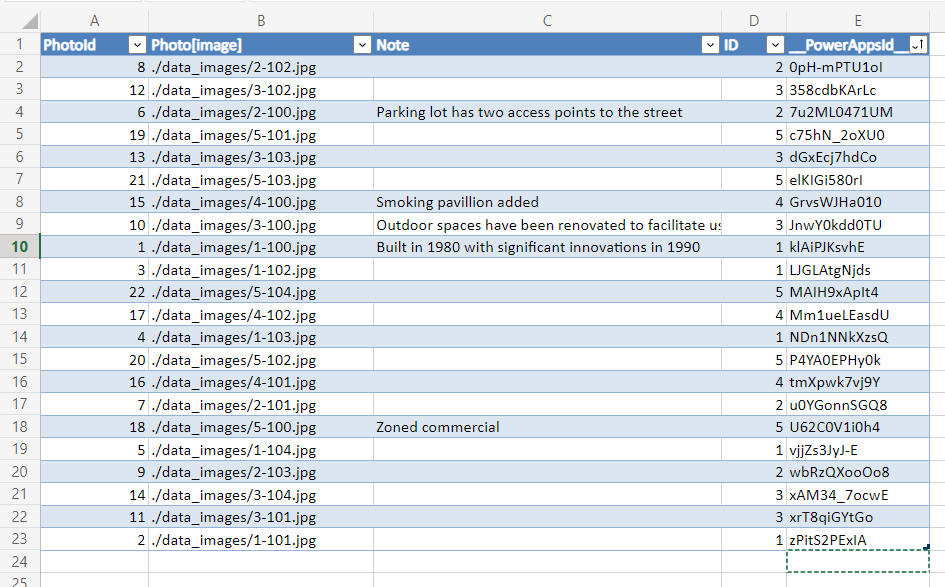
From there you get a folder containing all the sample JPEGs from the template and the Excel Workbook that stores the inspection records as well as the photo records with their notes.

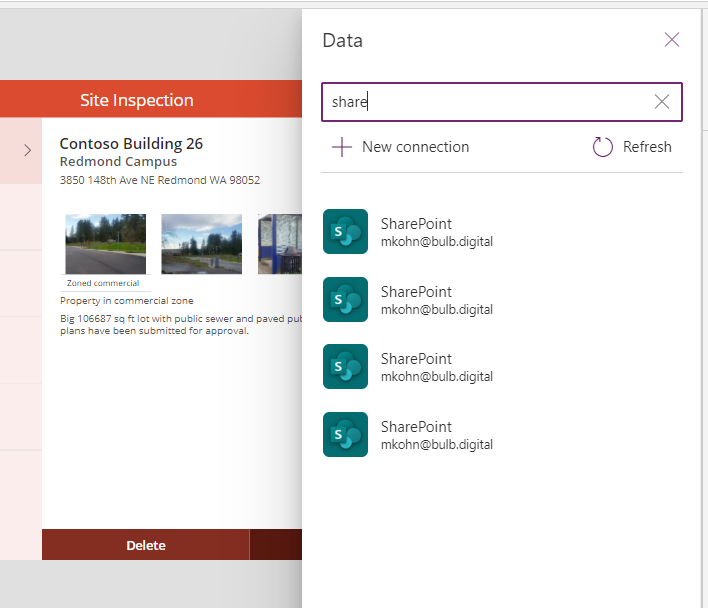
What if you want this to be accessible to others in your organization? OneDrive isn’t the best option in this case. You should consider connecting the data to a more collaborative space like SharePoint. Like most Power App templates, you can rewire this app to hold data in a SharePoint list and Image asset library. We can do all this right from the view tab in Power Apps.

Connecting to a list and library in SharePoint to substitute out the Excel workbook in OneDrive is just one of the steps needed to set this app up entirely. You still need to go into the app and rewire the data sources for all the content that dynamically rolls up on the screen.
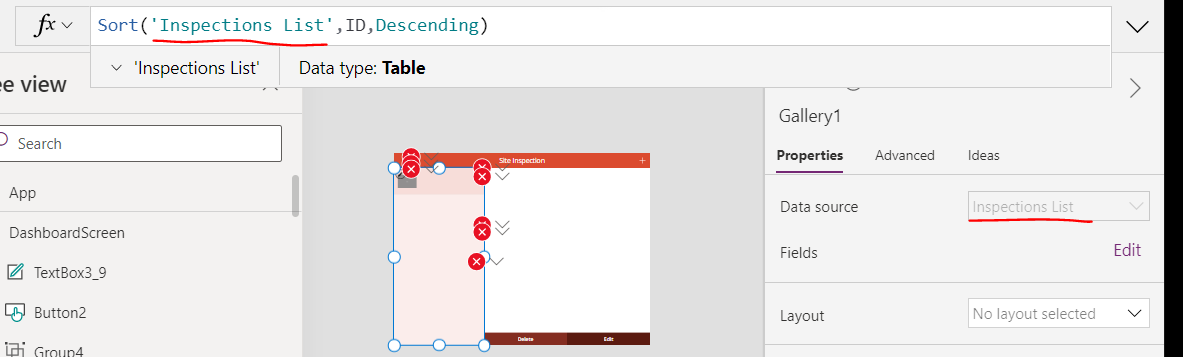
For example, the rollup of site inspections on the main dashboard will still be targeting that OneDrive connection. Instead of removing it and breaking all the connections in the app, work your way through the app components and update the data sources to use the list and library in your SharePoint site.
Selecting data on components in the app and checking out the data syntax in the function bar also hints at how the content is sorted and filtered, including what columns you need to recreate the data in your SP environment. I recommend having sample content already created in the list with some images uploaded to the library to ensure the data source has been properly connected.
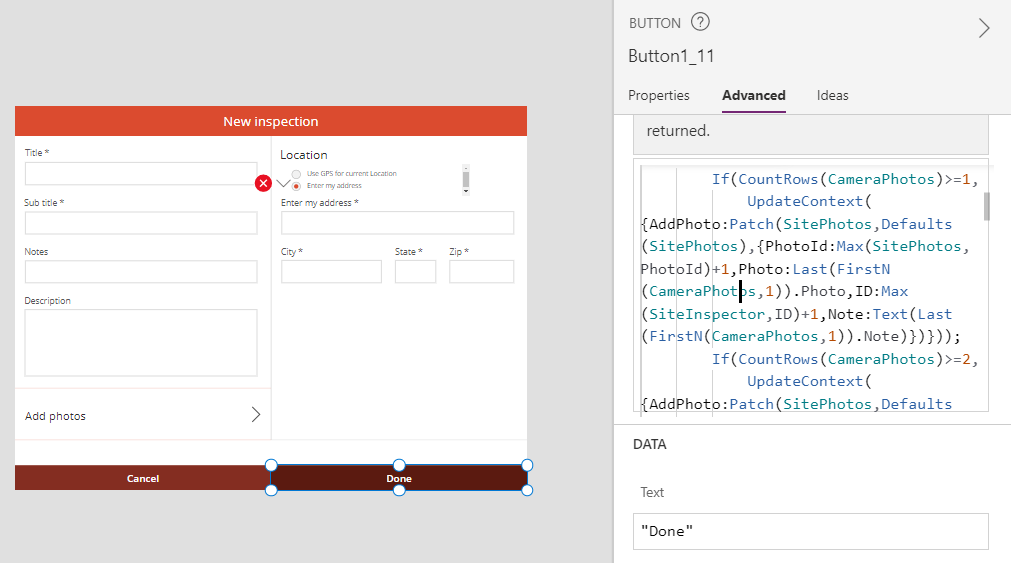
Most of the reworking will come from the buttons that write back to the SharePoint lists and libraries. All the data collection references in the app need to be updated and any references to columns in the workbook need to be replaced with the column’s name in your SharePoint site (if they are not named the same already).
If you’re not used to building apps from scratch in Power Apps, I highly recommend spending a lot of time understanding how the app is connected to the workbooks stored in OneDrive first and start learning about general data connections before attempting to rewire everything for a new data source. Because the app uses a variety of data types, the work to reconfigure them to a new data source is a bit more complex than just directing something like text or budgeting information into a new table.
Summary
Overall, this app is a great tool for beginners that aren’t familiar with updating multiple types of data. It combines general text and notes with location information and multiple image files with their own captions very elegantly into one inspection component in the app.
Uploading images or creating them on- site is the intention of the app, and you should find it easy to dive right in and begin creating. You just want to be wary of the one-time upload process for the images and double-check the address if you use GPS to pin your location.
If you want to start using something like the site inspection app at your organization, it’s likely that you’ll want to make tweaks to it, so it’s important to become familiar with the existing components and how they work together. After that, the sky is the limit!


.jpg)