How to Use Power Automate

Previously known as Flow, Power Automate is all about automating tasks and connecting different systems together. Its goal is to boost productivity by allowing users to easily create time-saving workflows using pre-built connectors.
Start With a Template
Templates are a great way to both get flows started quickly and give you inspiration for flows you could create/use.
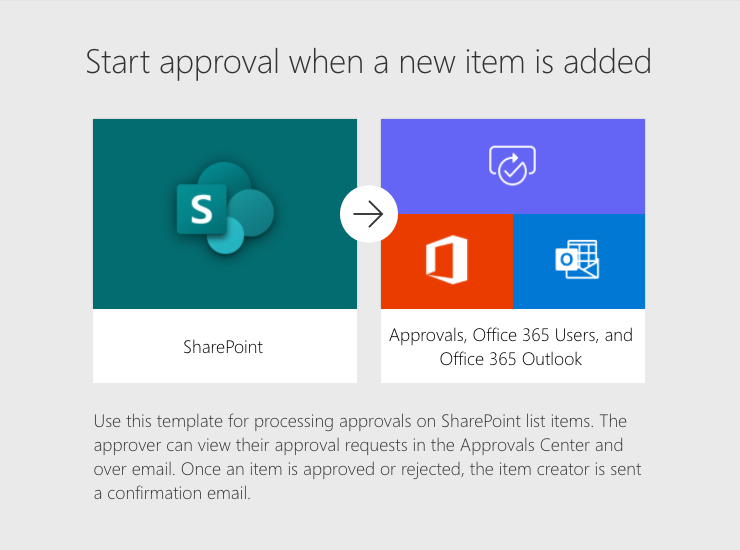
For this example, we’re going to take a look at a simple approval template that creates an approval when an item is added to a SharePoint list. A couple scenarios that this flow could help with:
- Creation of a new policy or procedure document requires approval from a certain person
- You're scheduling a list of employee outing and need approvals
- Vacation requests need to be approved

Approval Flow
In this case, let’s say someone requests time off through a Power App that was created to capture the details of the request. Start time, end time, etc. The Power App could then store that request in a SharePoint list to keep track of all the employee’s requests. But what has to happen from there? Typically, a manager has to approve the request, and there’s actually an approval process built into Power Automate that can handle the whole thing start to finish.
Select the `Start an approval when a new item is added` template.
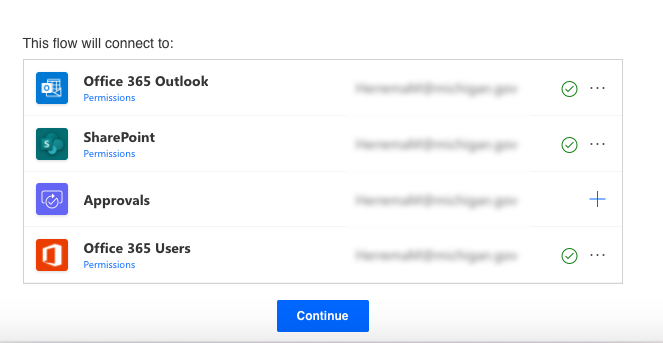
Scroll down to see the different connections it needs access to. On your first time using Power Automate, you’ll have to authenticate and look for green check marks next to each connection. If you don't see green check marks, follow the guidance to get each connection set up. Click `Continue`.
This will generate your approval flow. On this screen, you'll see the start (trigger) for the flow at the top, the process “flow” down, and end at the bottom. So since we started from a template, there are some fields we’re required to fill in. Start at the top and fill those fields in.
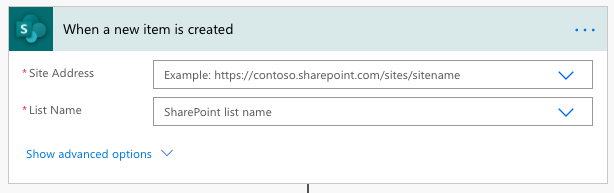
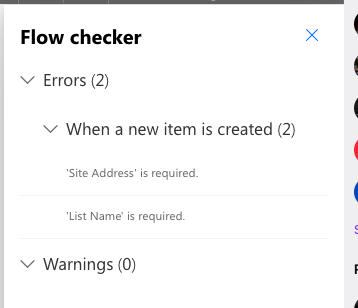
For the "When a new item is created" trigger, it needs a site address and list name. Select the site and list you’d like to use.
Next is the "Start an approval" step, which just needs you to specify who the approver should be. It is probably also a good idea to change the "Title" of the approval to be a little more descriptive.

In this approval flow, you’ll notice a few forks in the process. This happens when either something has a yes/no option or has the potential to fail.
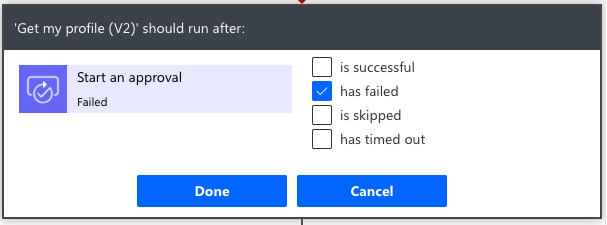
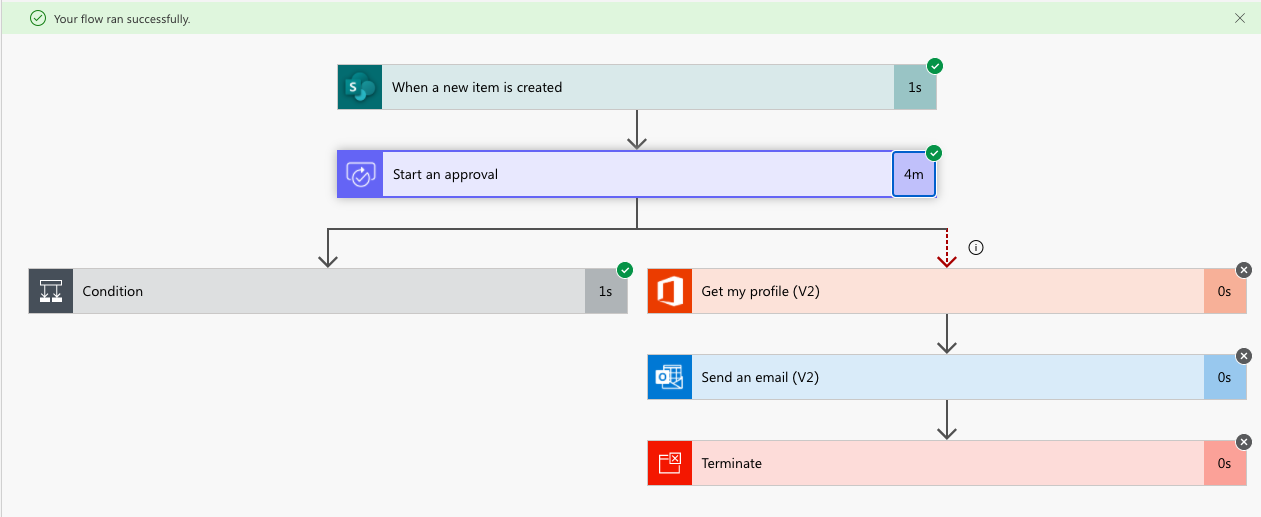
In this case, the approval creation process could fail. It shouldn’t, but it could. If that were to happen, we’d want to know. So if it does happen, this flow is configured to retrieve the flow owner’s profile, and send an email to them to notify of the failure.
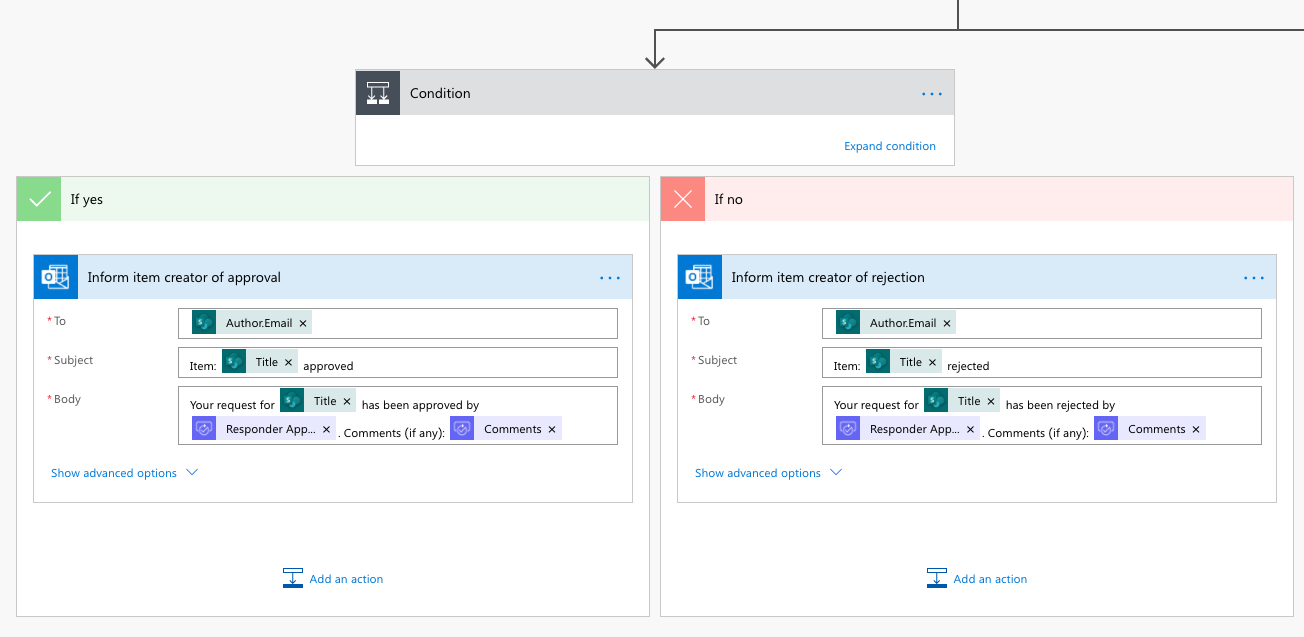
Now let’s assume it doesn’t fail and creates the approval. You’ll notice a "Condition” step that will cause the flow to go one of two ways. If the approver approves the request, the item creator will be notified it was approved, and vice versa for a rejection. I’d encourage you to take a look at the different fields available for each step and customize it as needed.
Saving and Testing
When you’re done customizing the flow, click `Save`. If you have errors, the “Flow checker” will pop in from the side and notify you of the errors. It’s always a good idea to refer back to this flow checker after making changes to make sure everything is in good shape.
After resolving the errors, we can test it out. Click the `Test` button in the top right. There are two options for testing, where you can either perform the trigger action or use data from previous runs if available (helpful if you need to make an adjustment to fix a flow and want to try it again with the same exact inputs to see if it’s fixed).

Select the option to perform the trigger action yourself, and add an item to the list you selected earlier. The approver should be notified of the approval request in their email inbox. From there they can approve or deny, and add a comment.
Go back to your flow test screen, and you’ll see the flow ran successfully. The requestor will then be notified of the results, and you should be good to go!
Building the Flow Yourself
In our last example, we used a template, but there may be times that an out-of-the-box template won’t do what we need.
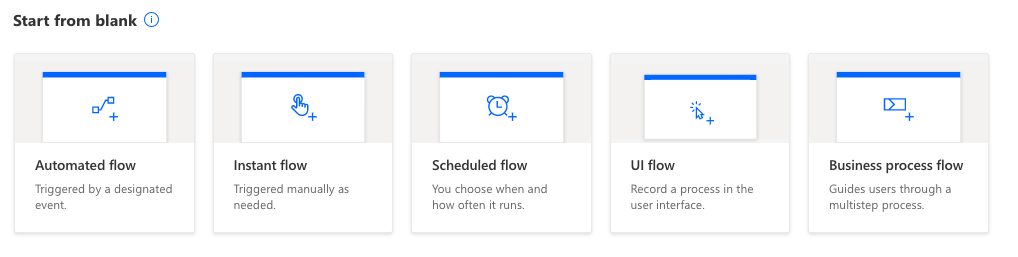
When you start from blank, you can choose from Automated flow, Instant flow, Scheduled flow, UI flow, or a Business Process flow. We’re going to focus on an automated flow here, but you should check out the capabilities of the other options another time.
Create an Automated Flow
Let’s build a Flow that can create a Planner task when someone submits a Form response. Think "someone found a bug or had a recommendation, and when that happens I want to make sure a task gets created in Planner".
Select `Automated flow`, and in the next popup select `When a new response is submitted`, and click `create`.
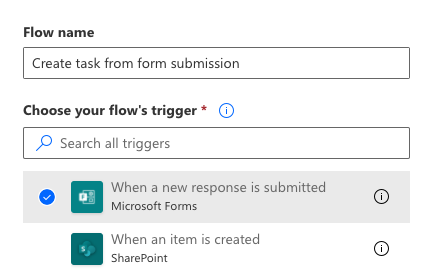
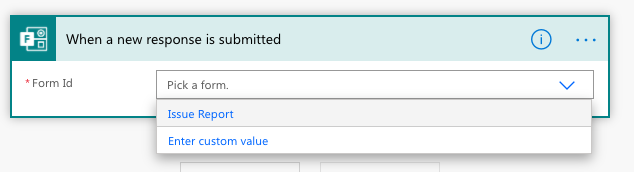
Select your form in the Trigger action (This assumes you have a form setup already. If you don't... we'll wait here 😁).
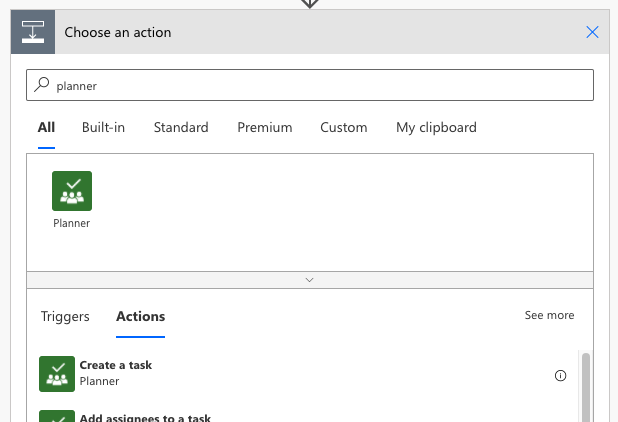
Click `New Step`.
Search for Planner, and select `Create a task`.
Select the Group, then the Plan where you want to create the task.
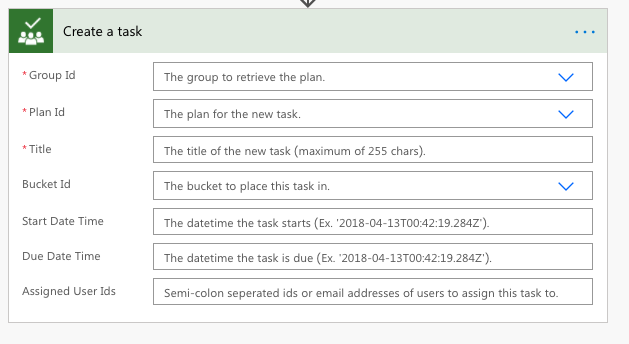
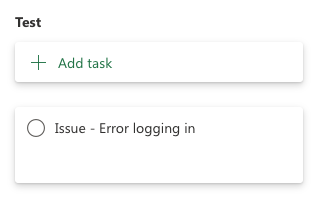
For the Title, let’s add info from the form submission. We’ll make the title be `Issue - ` plus whatever was reported. When you’re typing in the Title field, notice the popup that allows you to add Dynamic content. That popup will display all the options/variables to use in the flow.
You’ll note that we only have “Response Id” as an option. Well, that doesn’t seem like the thing we want. If you hover over that option, note the “Use with ‘Get response details’ action to fetch the content of the form response”. This is a common occurrence in Power Automate, where you have to fetch additional details if you want to use something other than the basics of the trigger. So we'll follow the directions the popup gives, stay the course, and get the info we need.

Retrieving the Form Response Details
So it sounds like we need to use another action before our task creation. Click the plus sign above the Task creation step, and click `Add an action`.

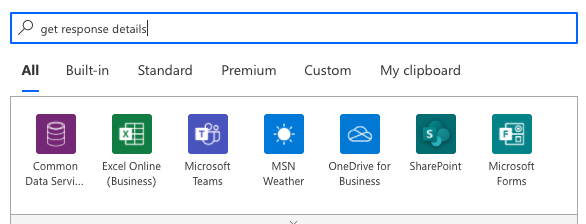
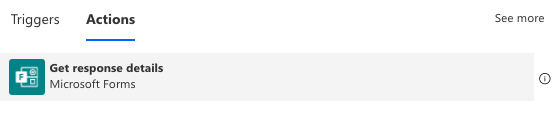
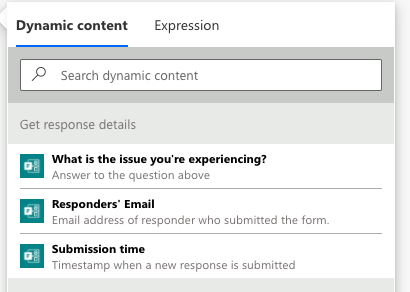
Search for `Get response details`, and filter by Microsoft Forms. You’ll then see the action we need. Click it, and we’ll have a couple more fields to fill in. In the Form Id input, select the same form you did in your first action. In the Response Id field, we’re going to add dynamic content. You’ll see Response Id again. Select that. Now we’ll have some more details to add to our task.
Open the `Create a task` action, and select the `Title` field again. You’ll notice we have a few more options here, categorized by action. Under the `Get response details` section, select the answer to the question we want to add to our task.
Your title field should look something like this.

From here you can set the bucket it goes to, set dates, and who it’s assigned to. All we'll set right now is the bucket, but feel free to customize as you wish.
Save your flow, and let’s give it a test.
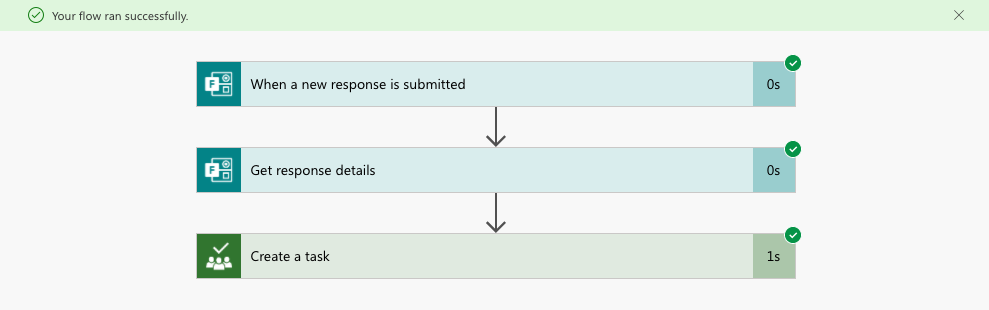
Again, click the test button, select that you’ll perform the trigger, and head to your form to try it out. Fill out your form and submit.

It looks like our flow ran successfully, let’s go check Planner.
You should see the task has been created with the input from the form. Now your Project Manager could assign someone to look into that issue and set a due date for it.
We did it! We’re just scratching the surface of Power Automate’s capabilities, but start with something basic like this use case and see what you can make for yourself!

SELF ASSESSMENT
Is your business getting full value from your M365 subscription?
Billions of dollars are wasted each year on underused subscriptions. Take 3 minutes to find out where your tools are driving results, and where they’re holding you back.
Find Out Now
Is Team Communication Holding You Back?
Find Out in Just 2 Minutes.
Take our quick scorecard to uncover communication gaps and hidden barriers within your team.
.avif)