


Model Driven Apps 101: Building Customized Solutions for Your Business Needs

In this article we’re going to introduce you to Model Driven Apps. We’ve created other content related to Power Apps, Canvas Apps, Dataverse & Power Automate, so now it's time to spend a little time talking about Model Driven Apps.
Today, I’m going to show you how to get started and hopefully highlight some real value for your organization. The first thing to say is Model Driven Apps are a good option when you have complex data but want to build fast. The user experience model-driven apps is good to use when data is the most important thing about your application and speed matters.
I want to look at Model Driven Apps from the perspective of someone who doesn’t know where to start. Maybe you’re intimidated simply because you’re not familiar with them. Maybe the implication of additional license costs has you reluctant to take a peek.
First things first, you are going to need a Power Platform Development environment, or a dedicated Sandbox environment with Dataverse enabled. As a best practice, I don’t recommend doing any of this in your organization’s Default environment. Hopefully your organization has some governance in place to keep you between the ditches, but if not, you should shoot for one of the two options noted above.
Once you have an environment, you are ready to start creating. Any time you’re going to build a Model Driven App, it would be wise to do so within a Solution. To be clear, you don’t have to do it this way. You can jump right in and create a new Model Driven App, but in this article, we’re going to take a solution first approach. Besides being a great way to organize and put a container around your components, I have two key reasons behind this approach. First, in my experience, the approach to and reasons for building a Model Driven App is similar in nature to the approach used to create Access Apps. People generally approach both of these from a data first perspective. Second, if you are building it “App first,” then you will find yourself inside an editor that is great for structuring the user experience elements of your app but makes it difficult when you are trying to structure and organize the functional components of your application.
We are going to tackle this from a functional component and solution first angle. So let’s create a solution.
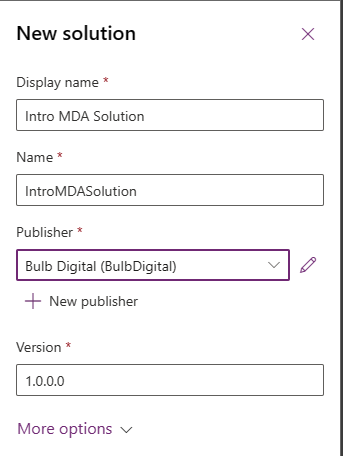
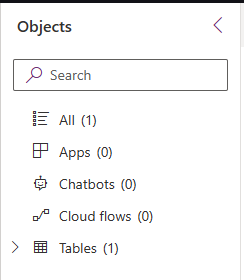
Now that we have a solution, we have a home for all the pieces of our application. Note that we have a nice hierarchical structure of our solution objects in a tree view on the left of the maker studio.
Next let’s talk about Tables.
When taking this approach, I like to start with underlying structural elements like data. What is it we are going to be tracking or managing with the application?
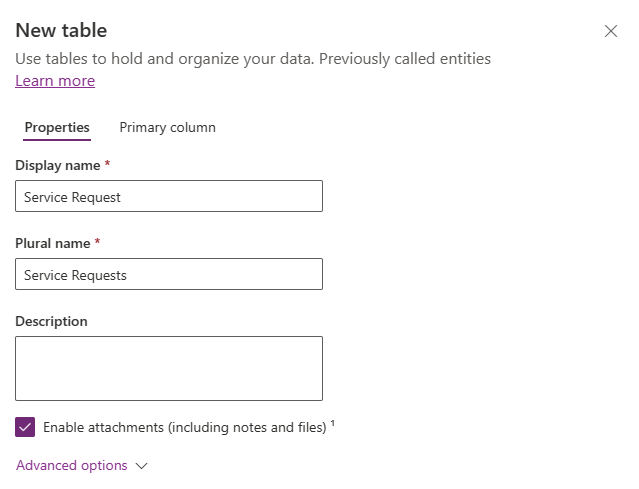
In this example, let’s track customer service requests. We’ll do this in a new table called Service Requests. Start with the New menu at the top and create a new Table named Service Requests.
Before we get too far, let’s look at another aspect of creating a table called the Primary column. Every table in Dataverse is going to have a Primary column. It will either be called Name or Subject, depending on the type of table you create (Standard or Activity). This column is mainly used as a way to provide a “handle” to the record. It will appear as a navigation link within the data and allows a user to easily navigate to and manage the record.
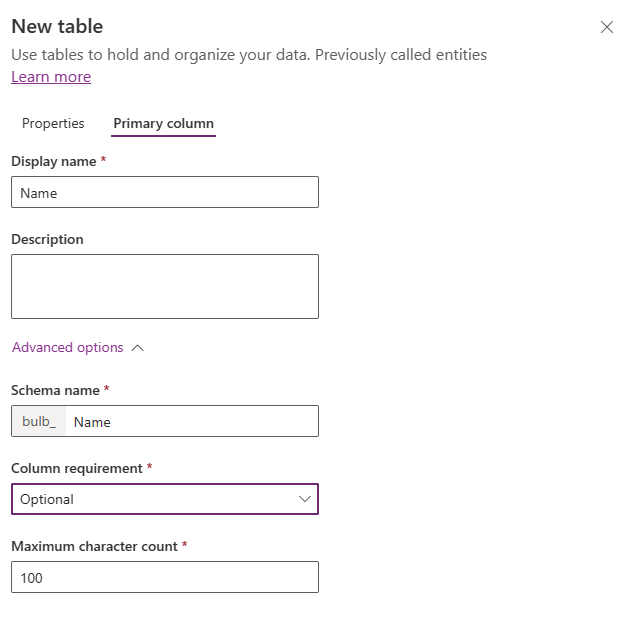
Pro tip: It is important to consider how your users might interact with this field. Often, filling this field can feel redundant and frustrating to the user. If I foresee this problem, I like to make it Optional and then I build a cloud flow to automatically populate it based on other data in the record.
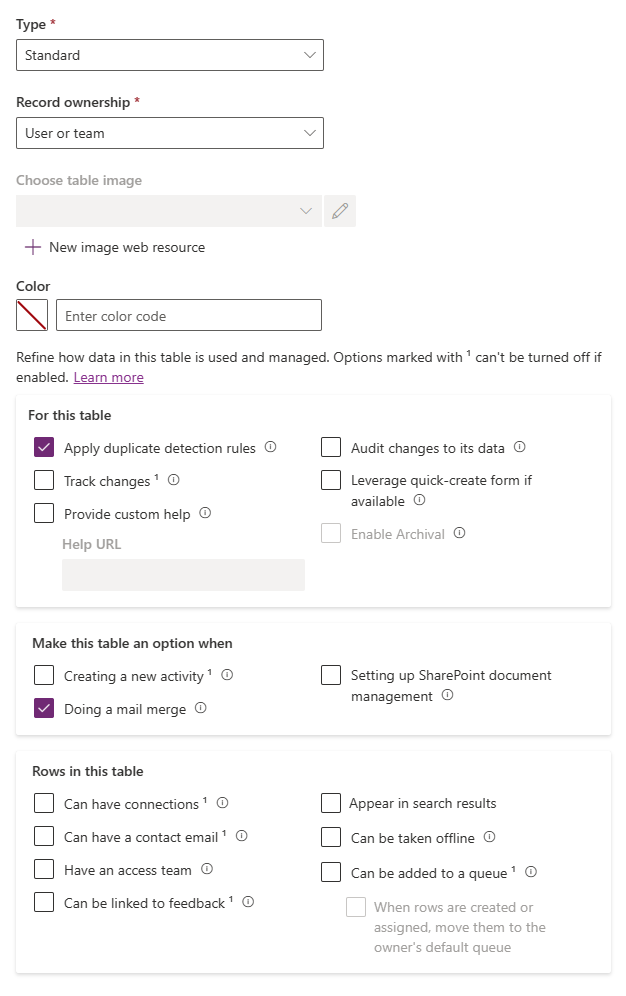
Next let’s touch on some of the advanced table properties. Some of these like Type and Record ownership cannot be undone once you set them so it’s important to get them right before you go too far. Suffice to say that can be a deep topic so I will go deeper into these types later. For now, we’ll stick with a Standard table, and we’ll use the default Ownership setting of User or team.
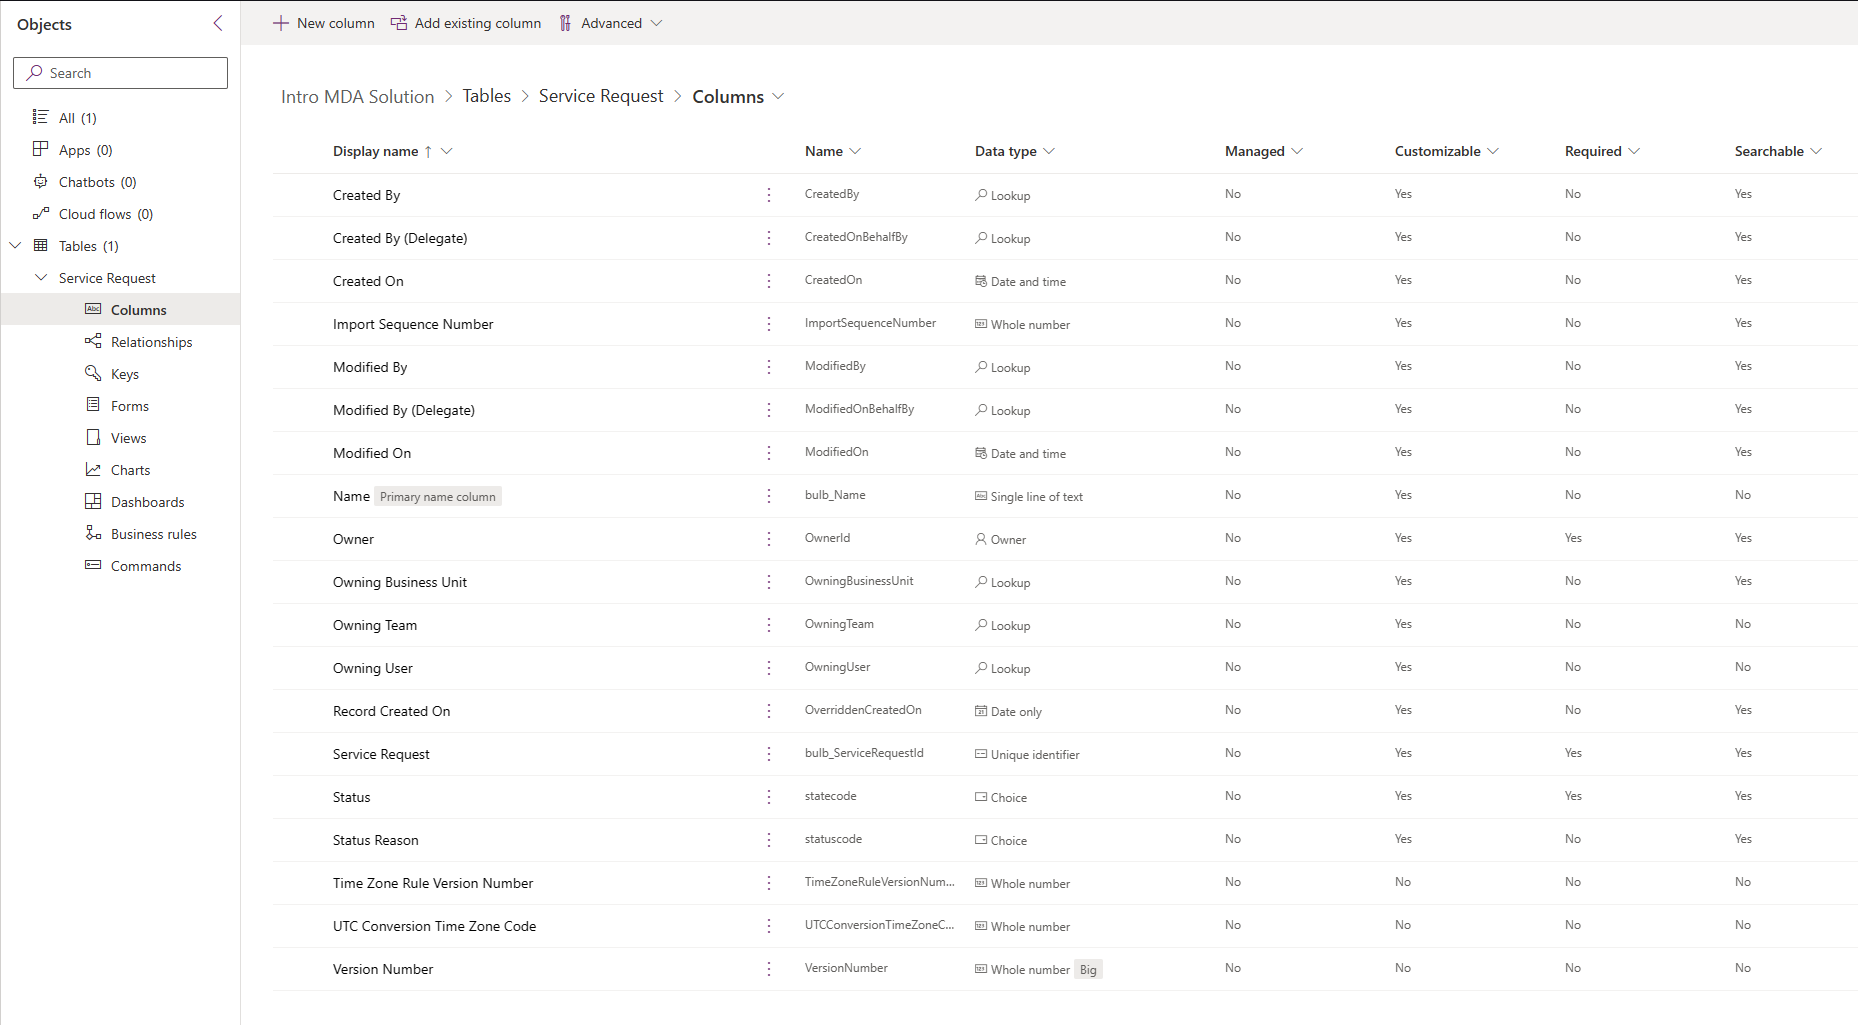
Now that we have a Service Requests table, we can add some fields to it. First note that right out of the gate, our table has several fields already built in. All of the default fields will be useful to us at some point. It’s so nice that they’re automatically created and managed for us.
For this exercise I am going to add the following fields:
- Request Type (Choice)
- Description (multi-line text)
- Contact (Lookup)
- Escalated to Product Team (Yes/No)
Alright, now we have a table for some data.
Now let’s discuss how we can look at that data with Views.
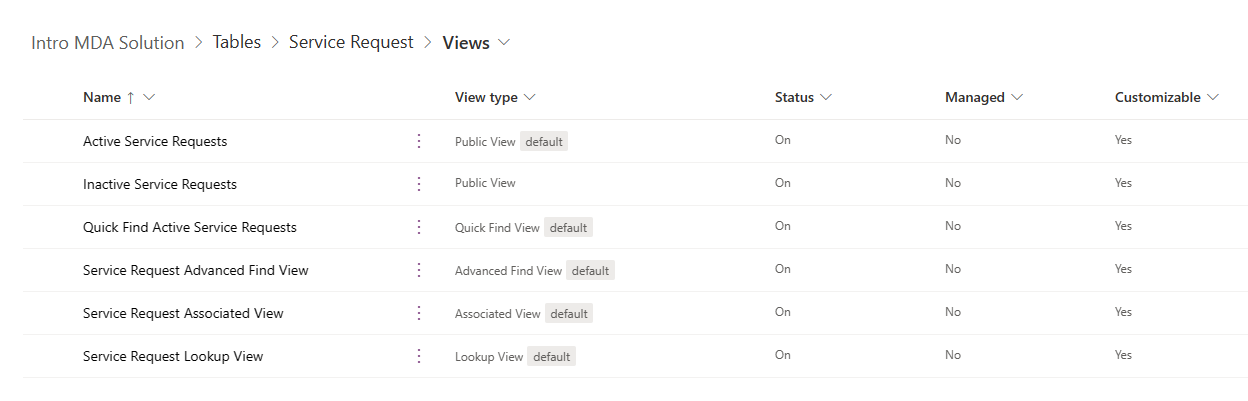
Right out of the gate, for any table you create you’re going to get some basic views like the ones shown here.
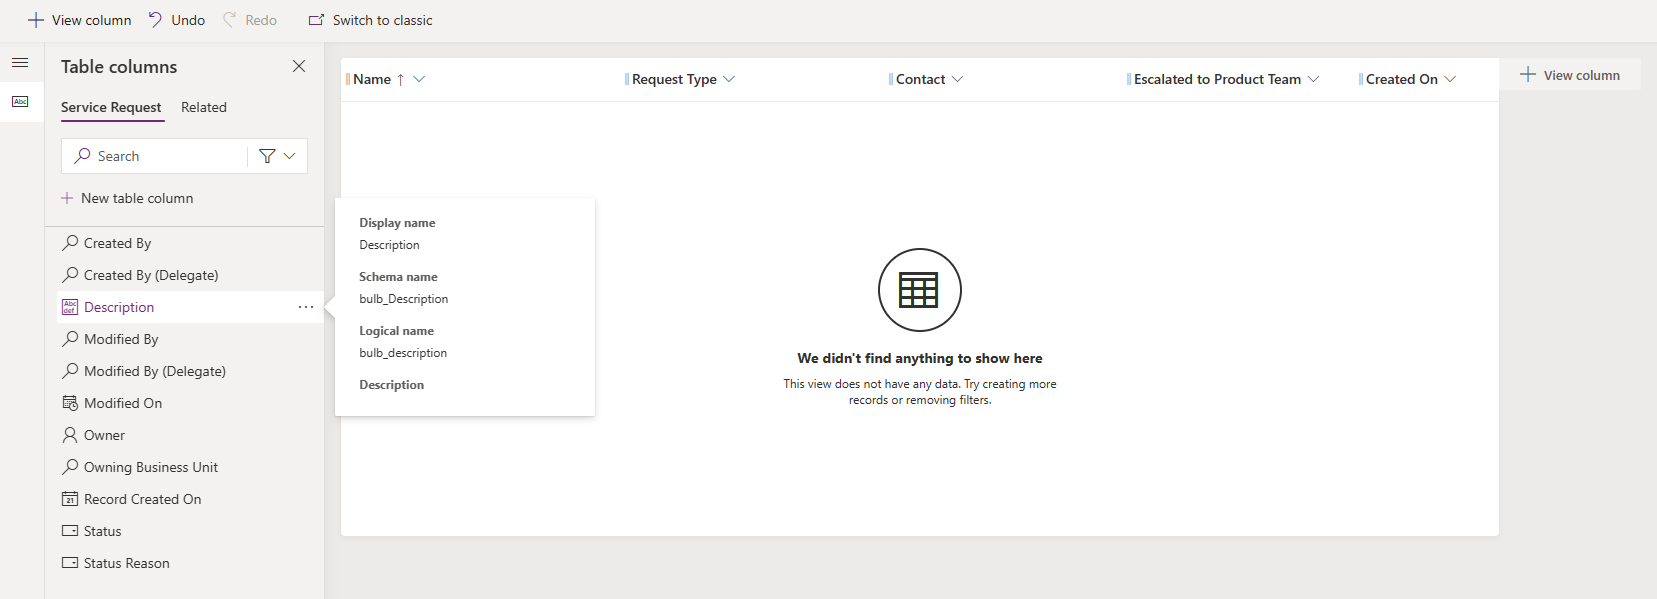
Each of these views has a built-in purpose within Dataverse and can be leveraged in your Model Driven App. However, to start, none of these views is configured with your fields in mind, so you’ll need to add them. Start with the Active Service Requests view and add the fields you care about. Simply click on the view to edit it.
Note that you can also change the name of the view, add a description, apply a Sort and manage the criteria for the view from the Edit filters option on the right.
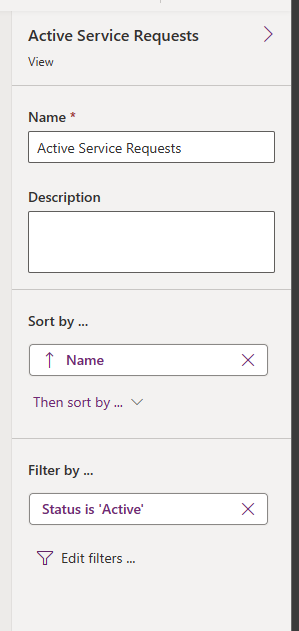
Pro tip: Every table in Dataverse is going to have a Status field. You’ll notice this field is automatically referenced in many of the views. This field is used by the built-in Deactivate option for all records. Think of it as a kind of “soft delete”. Most views are by default looking for “active” records and so if we set the status of a row to Inactive, the row is essentially hidden in most scenarios. Remember, your app is going to be shared with others. This provides you the ability to remove delete permissions for most users, but still allows them to function without the clutter of unwanted rows.
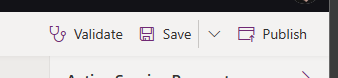
Once you’ve modified your view, the last thing you need to do is save and publish your changes using the menu in the upper right corner.

SELF ASSESSMENT
Is your business getting full value from your M365 subscription?
Billions of dollars are wasted each year on underused subscriptions. Take 3 minutes to find out where your tools are driving results, and where they’re holding you back.
Find Out Now
Is Team Communication Holding You Back?
Find Out in Just 2 Minutes.
Take our quick scorecard to uncover communication gaps and hidden barriers within your team.
Now that we’re ready to view some data, let’s create some by using Forms.
Just like views, we also have a series of built-in forms for our Service Request table. You’ll get these basic forms for any table you create in Dataverse.
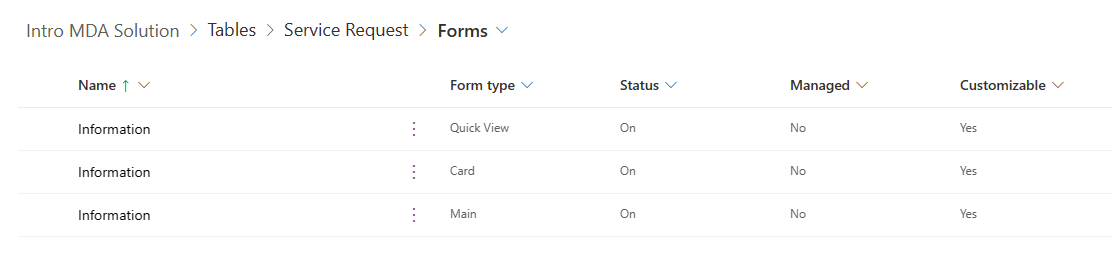
The primary form used out of the box is going to be the Main form, so we’ll focus on that one. Again, the out-of-the-box forms don’t know enough about our requirements to add our fields automatically, so we need to do it. To edit the form, you can simply click it.
Adding fields to the form is pretty easy, simply select the section where you’d like them to appear and then select the fields from the Table columns on the left.

Last thing we want to remember to do here is Save and Publish our form.
Now, there are actually a wide range of things you can do with forms. I’m just going to quickly mention some for you to dig into further that you may find valuable:
Components & Form Layout – from the panel on the left if you select Components, you’ll have a rather large list of options to choose from. These range from layout options for your form like sections and tabs, all the way to embedded canvas apps, websites and Power BI reports. You can also use options here to dictate what controls should be used for specific fields. For example, the out of the box behavior for a Yes/No column is going to be a dropdown, but this can also be a checkbox or toggle. The components menu is where you’ll find these options.

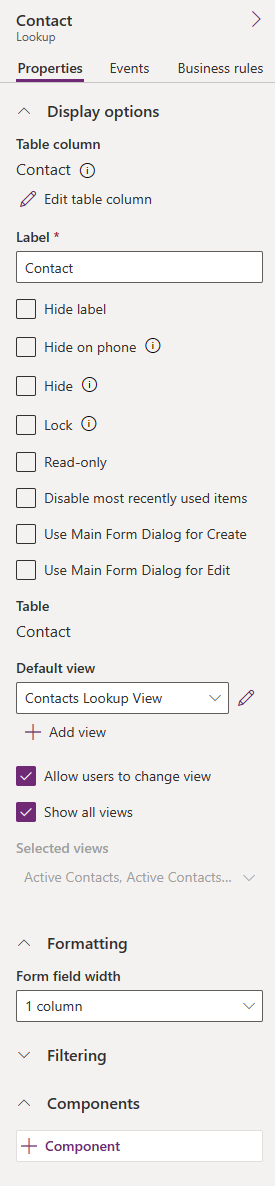
Properties Tab – on the right side, you have a Properties tab, which is activated based on what component you have selected. This is where you will be able to specify properties for individual fields, set components used, and dictate options for the end users as it relates to the component.
Events & Business Rules – Also on the right are tabs for Events and Business rules. Like properties, these are specific to the component or field selected. Both of these allow you to define behavior that should result from a specific field or form condition. We’ll dive more into business rules next.

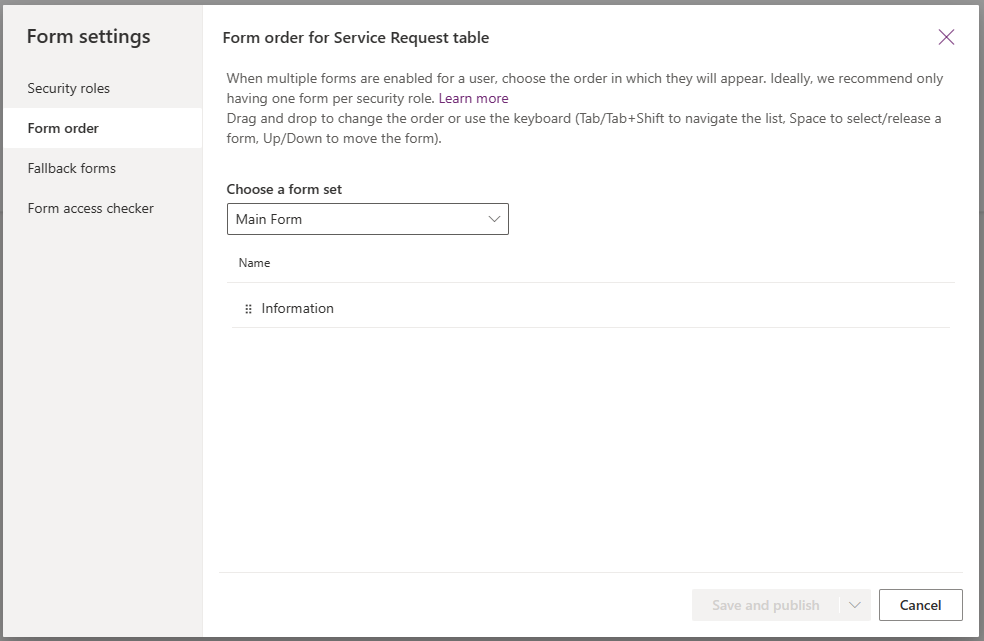
Form Settings – Form settings is a topic for a deeper dive, but just to give you a peek, this is where you can configure different behavior based on the role the user has. Think data entry vs. program analyst vs. admin. Each type of user can manage the same data through different forms that cater to their role. These settings are accessed through the Form settings menu item at the top.
Ok, now we have fields on the form. Let’s apply some Business rules.
So in this simple and contrived scenario, we’re simply going to have a business rule that hides the Escalated to Product Team field if the Request Type is “Network Issue”. To do this, we can use the New business rule option in the Business rules tab. Or, we can step back out to our Service Request table and create the Business rule from the Business rules related to the table. Either one will get you to the same place.
Unfortunately, creating business rules takes us back over to the classic Power Apps / Dynamics editor. Hopefully that’s going to change soon, but for now we’ll deal.
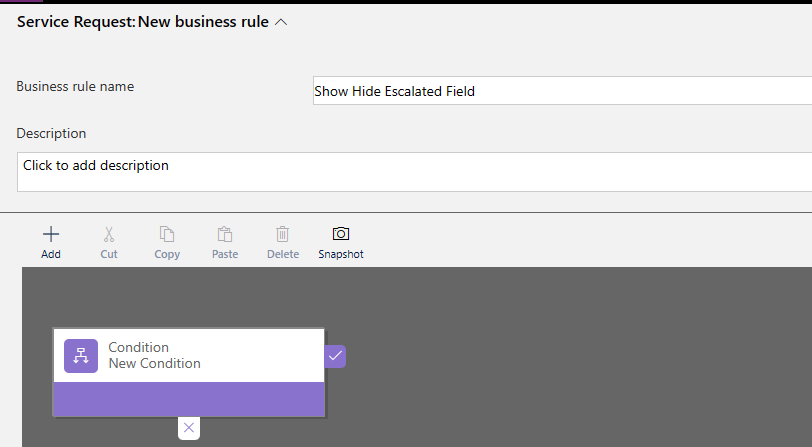
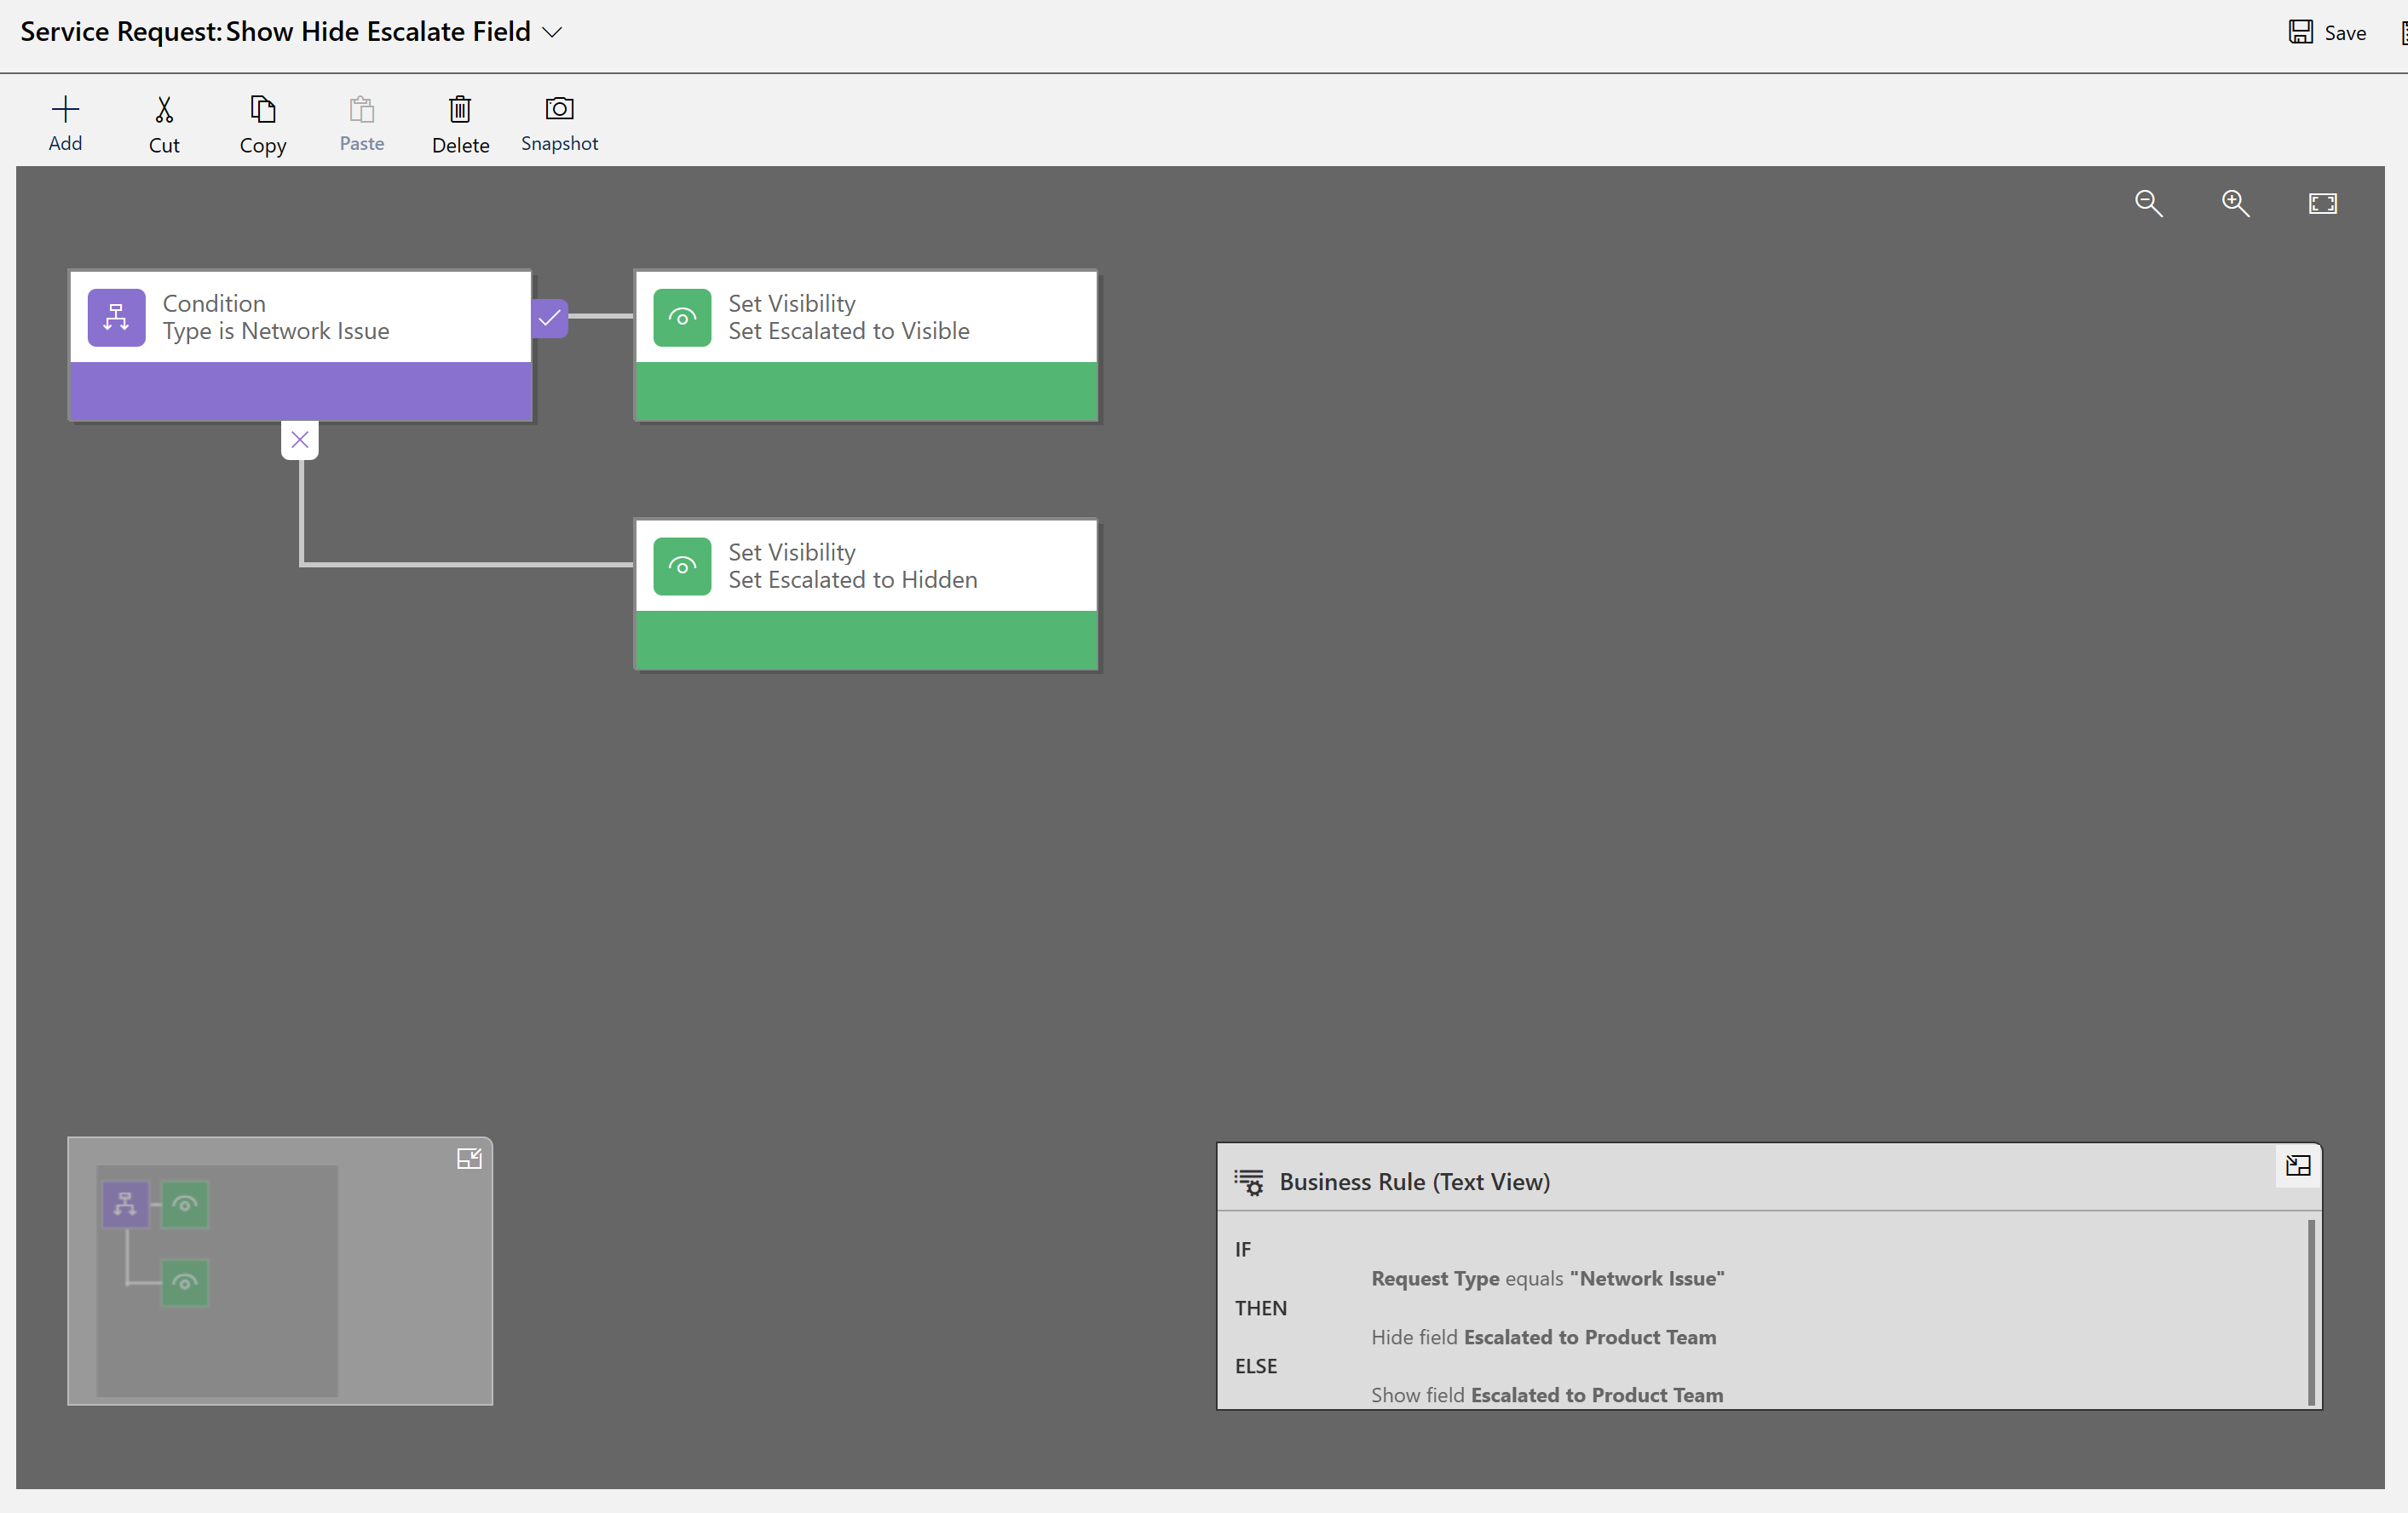
In our new business rule, the first thing we should do is name it. Sometimes people forget this because the classic editor has that property collapsed by default. I’m going to call it “Show Hide Escalated Field”.
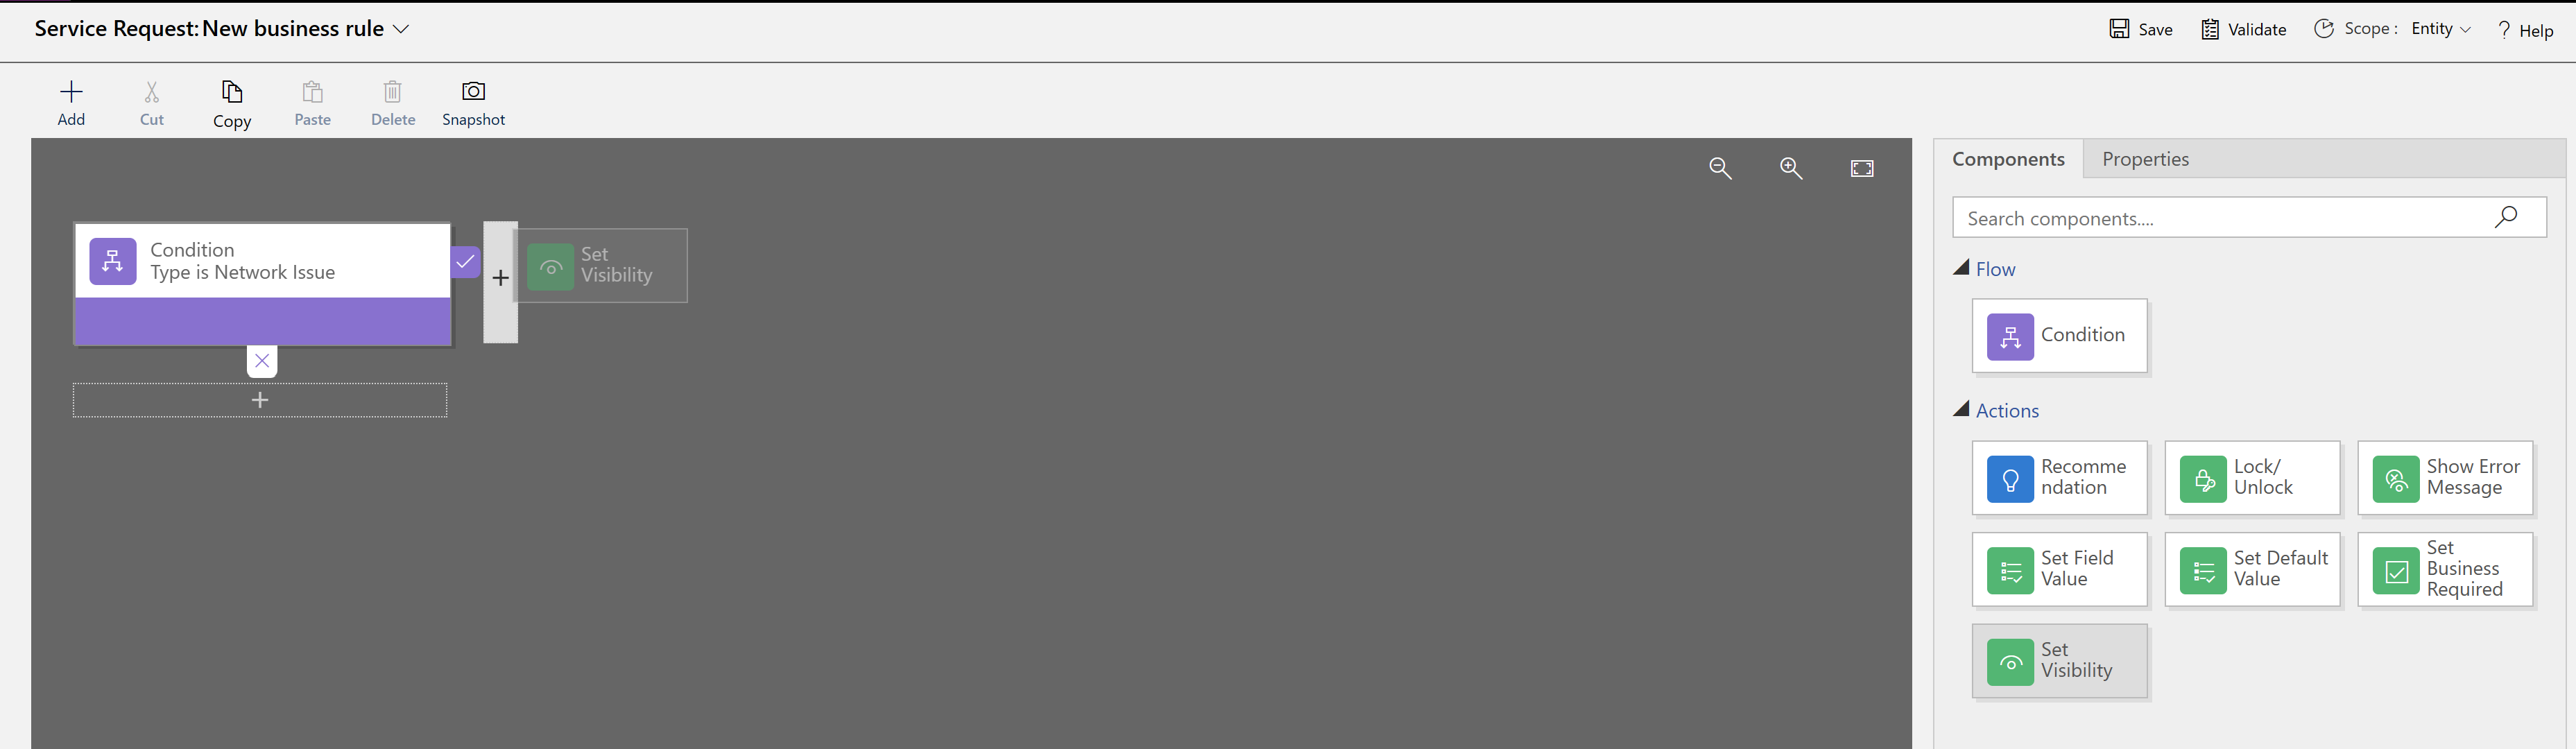
Then we can set the condition to check if the Request Type is equal to Network Issue. Once you’ve set the condition, don’t forget to click Apply.

Now, we’re ready to add our actions. In the true case (to the right of the condition), we’ll set the visibility property on the Escalated to Product Team field. Switch to the Components tab and drag a Set Visibility Action over to the right of the condition.
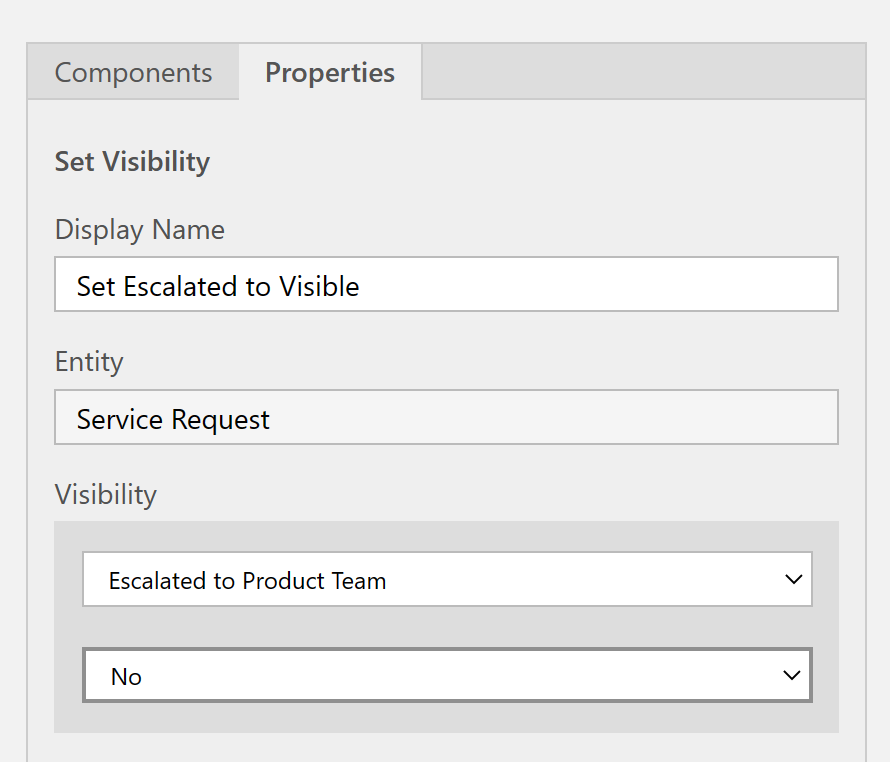
Configure this action to set the Escalated to Product Team field visibility to No. Remember to click Apply!
Next, do the same thing and drag a new Set Visibility Action (Visible = Yes) below the condition (the false result). When complete, your business rule should look like the screenshot below. Notice the business rule “text view” in the lower right corner can be a helpful summary of your rule.
Last thing we need to do here is save and activate. Once you Save, the Activate button will be enabled. A couple things to note here. First, in order to update or make changes to the rule in the future, you’ll need to inactivate or turn off the rule first and then reactivate it once your changes have been made. And second, note the Scope menu option. We’re leaving this set as Entity, but you can also select one or more forms where this business rule should be applied.

And now we’ve got all the pieces in place and we’re ready to build our app.
Yup, that’s right, we don’t have an app yet, we just have some pieces. Let’s head back to the Solution explorer and add a Model Driven App.
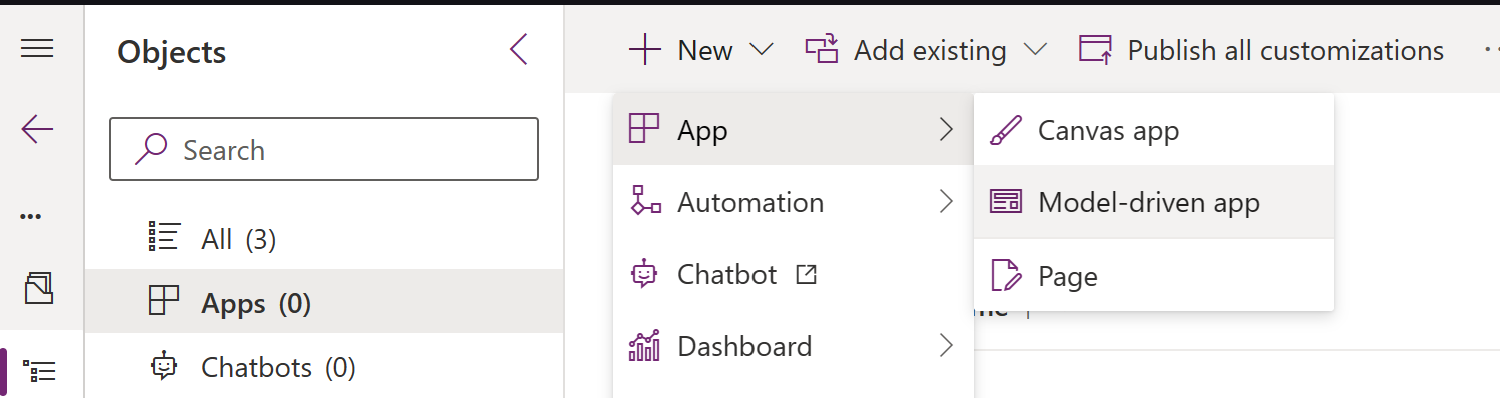
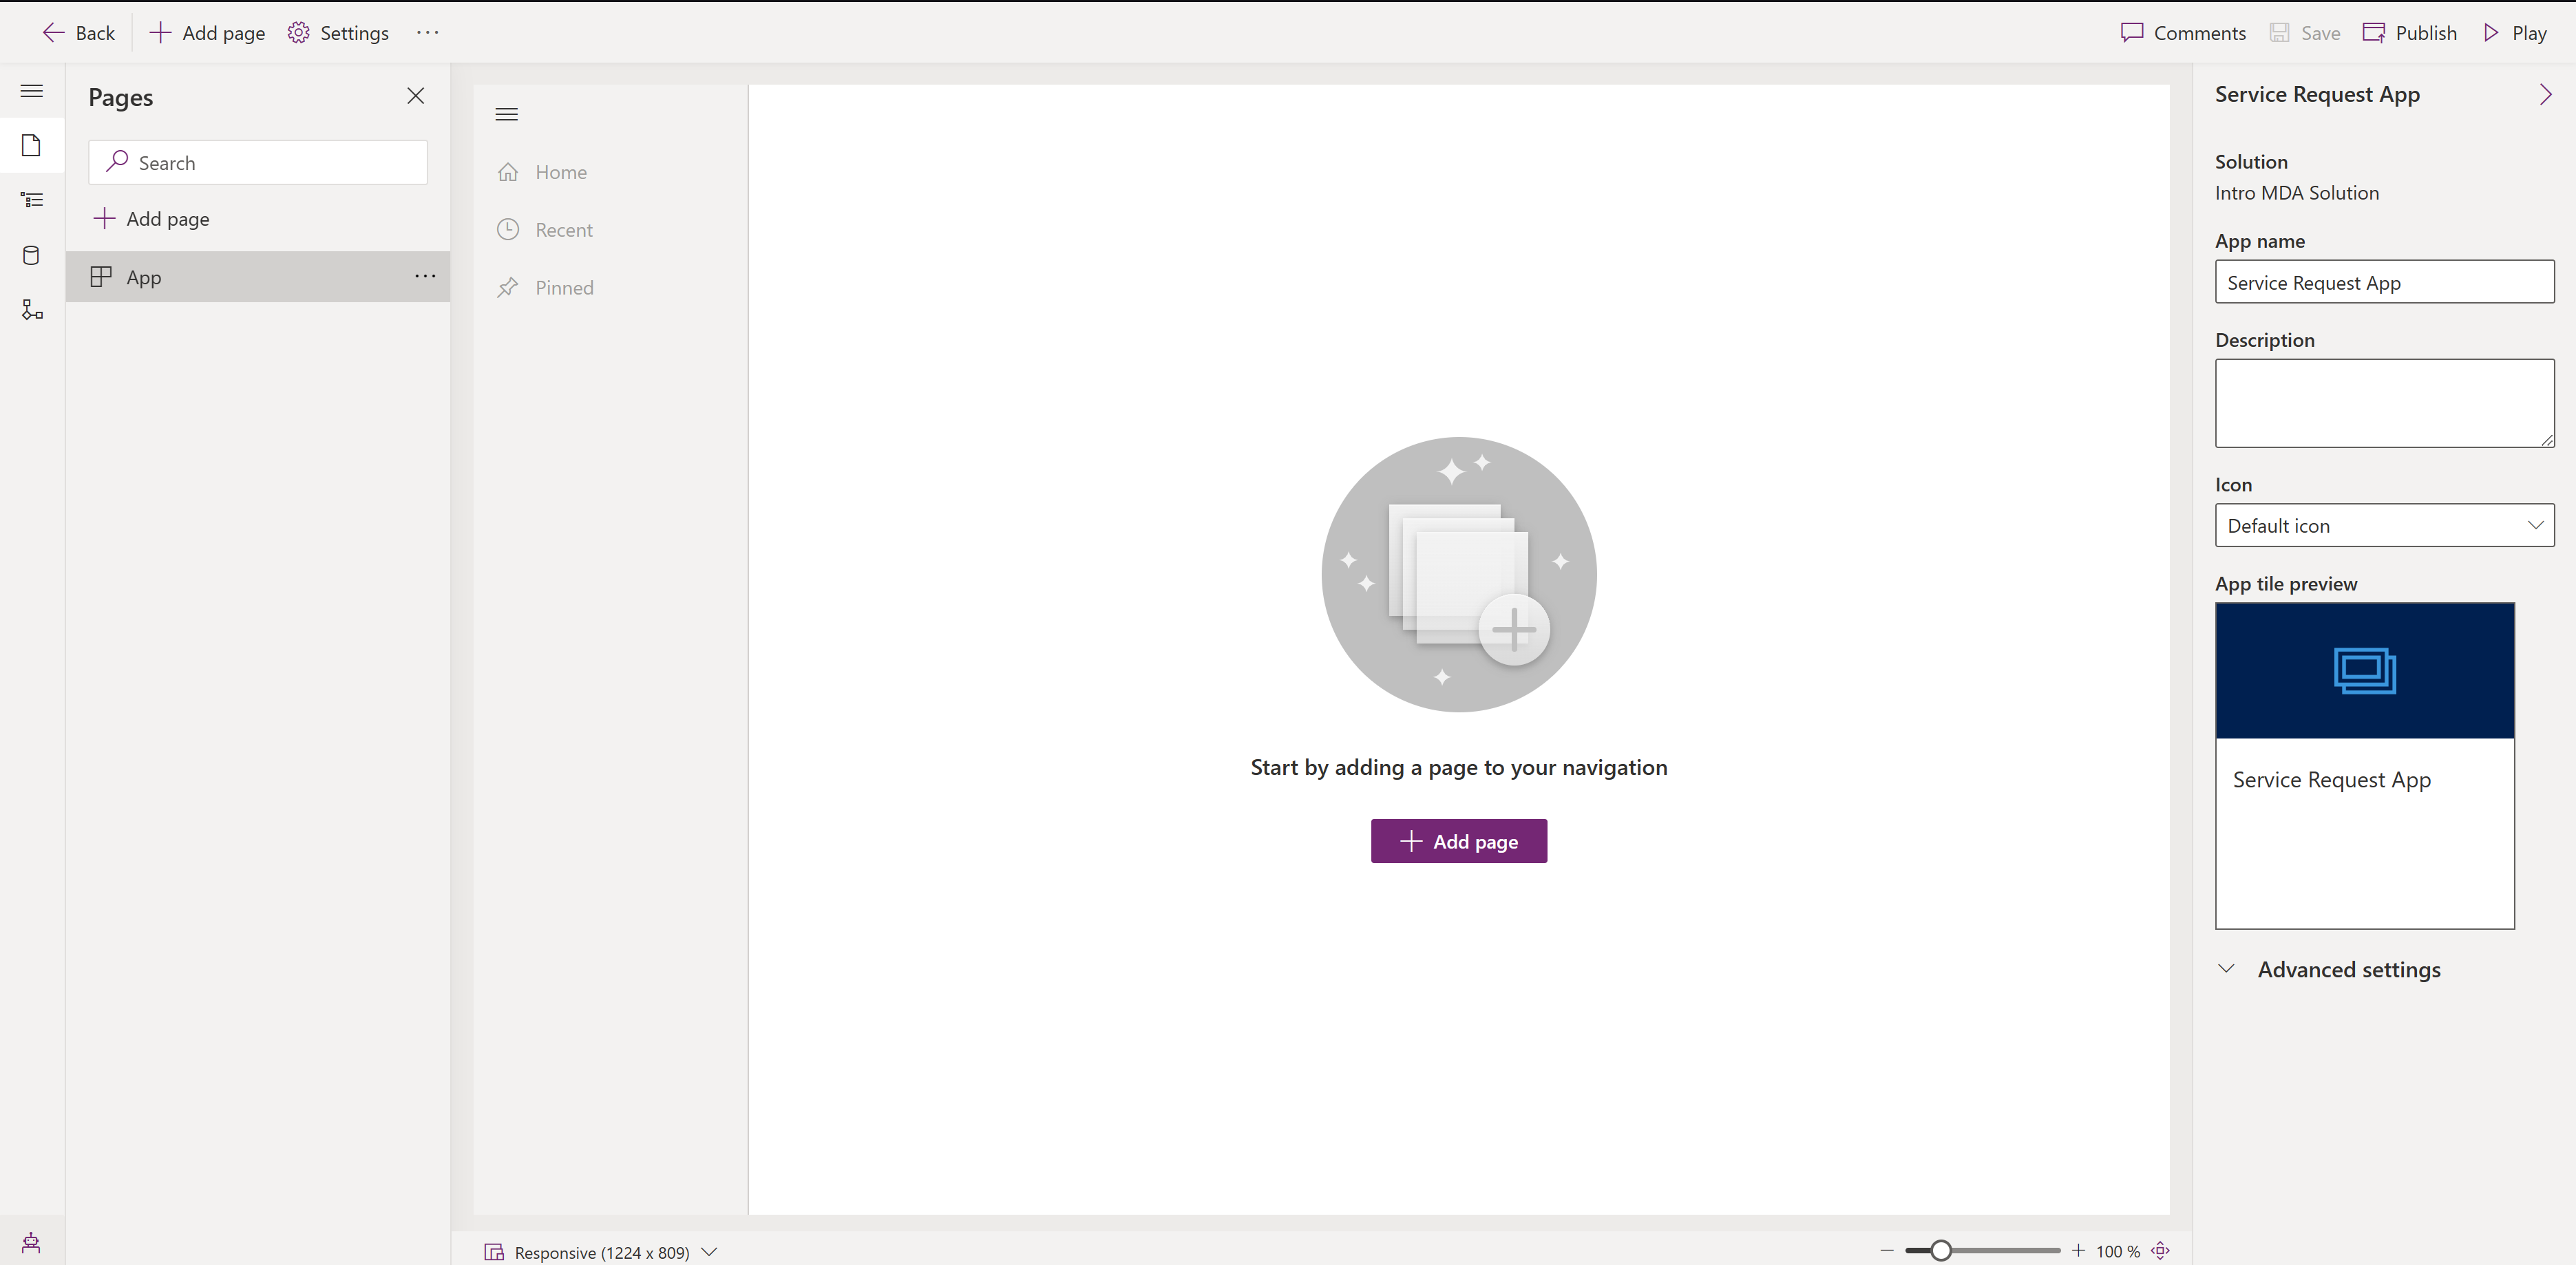
Provide a name for the app and click Create.

Alright, here we are in the App Editor. A few things I’ll point out to orient you. First, on the right we have some properties for our app. On the left we have panels for Page, Navigation, Data, and Business Process Flow components in our app. And right in the middle we have a hint at our next step, Add page.
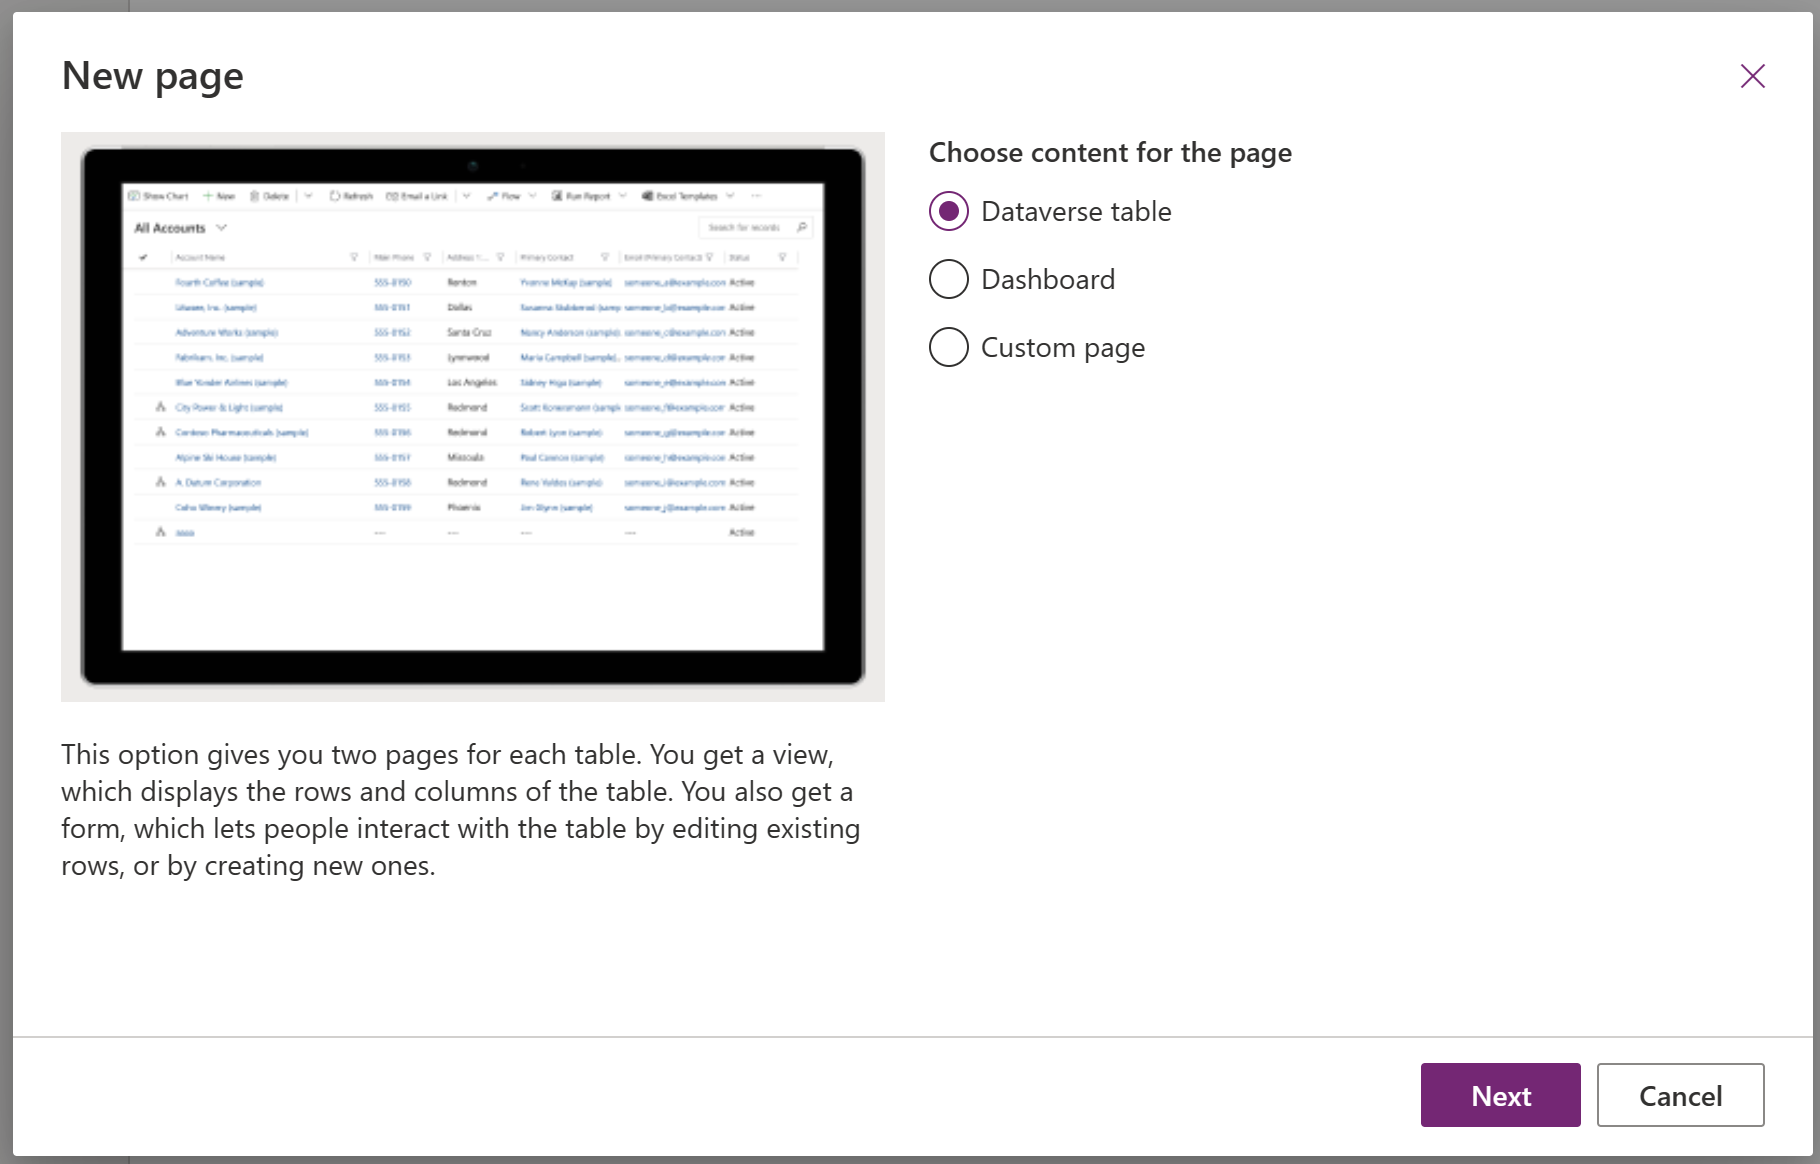
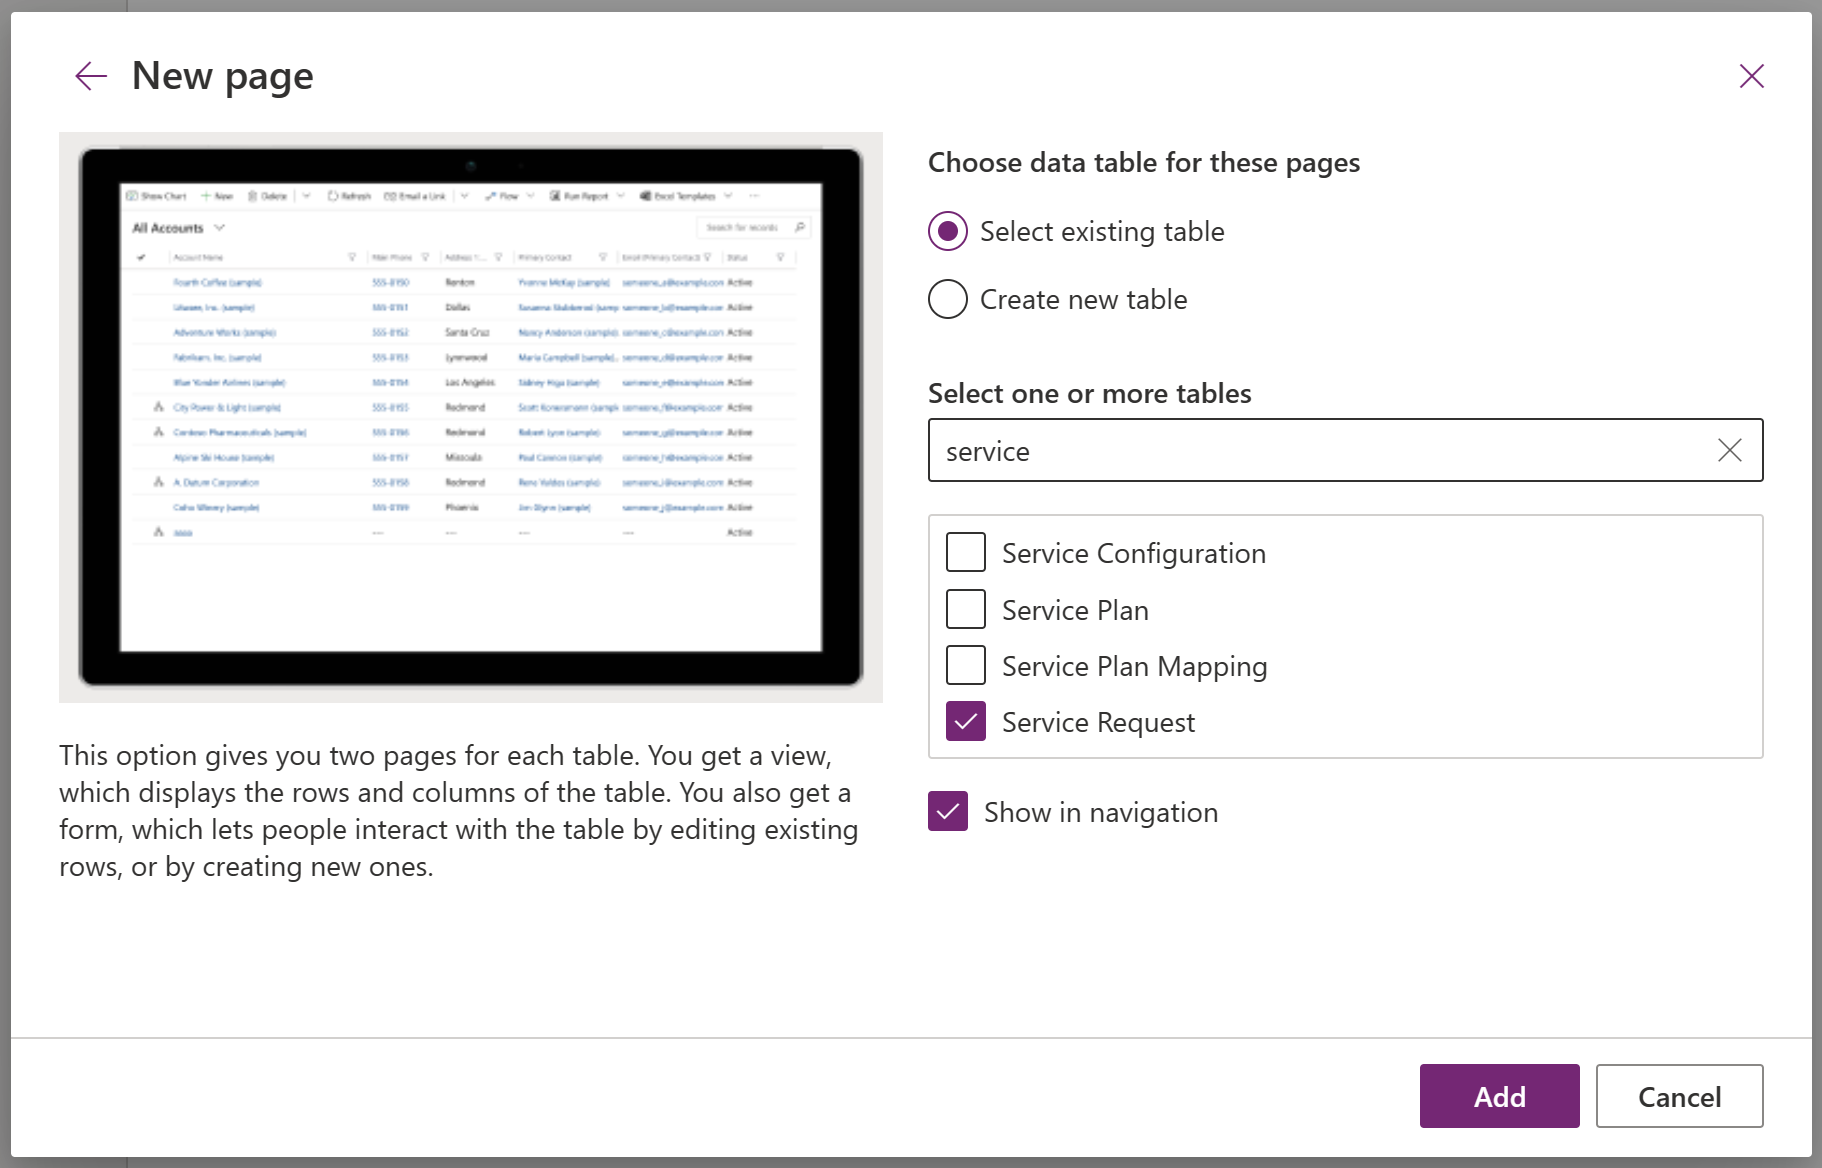
When adding a page we have a few options. Dataverse table, Dashboard, and Custom page. For our scenario we’re going to stick with Dataverse table just to get up and running.
Now we can select the tables we’d like to include and also that we want those to be added to the Navigation. In my example, I’m also using the Contact table as a lookup on my Service Request, so I’m going to select both Service Requests and Contacts, adding both to Navigation also.
Now we get a first look at our app. Notice a couple navigation items for Service Requests and Contacts are already there for us.
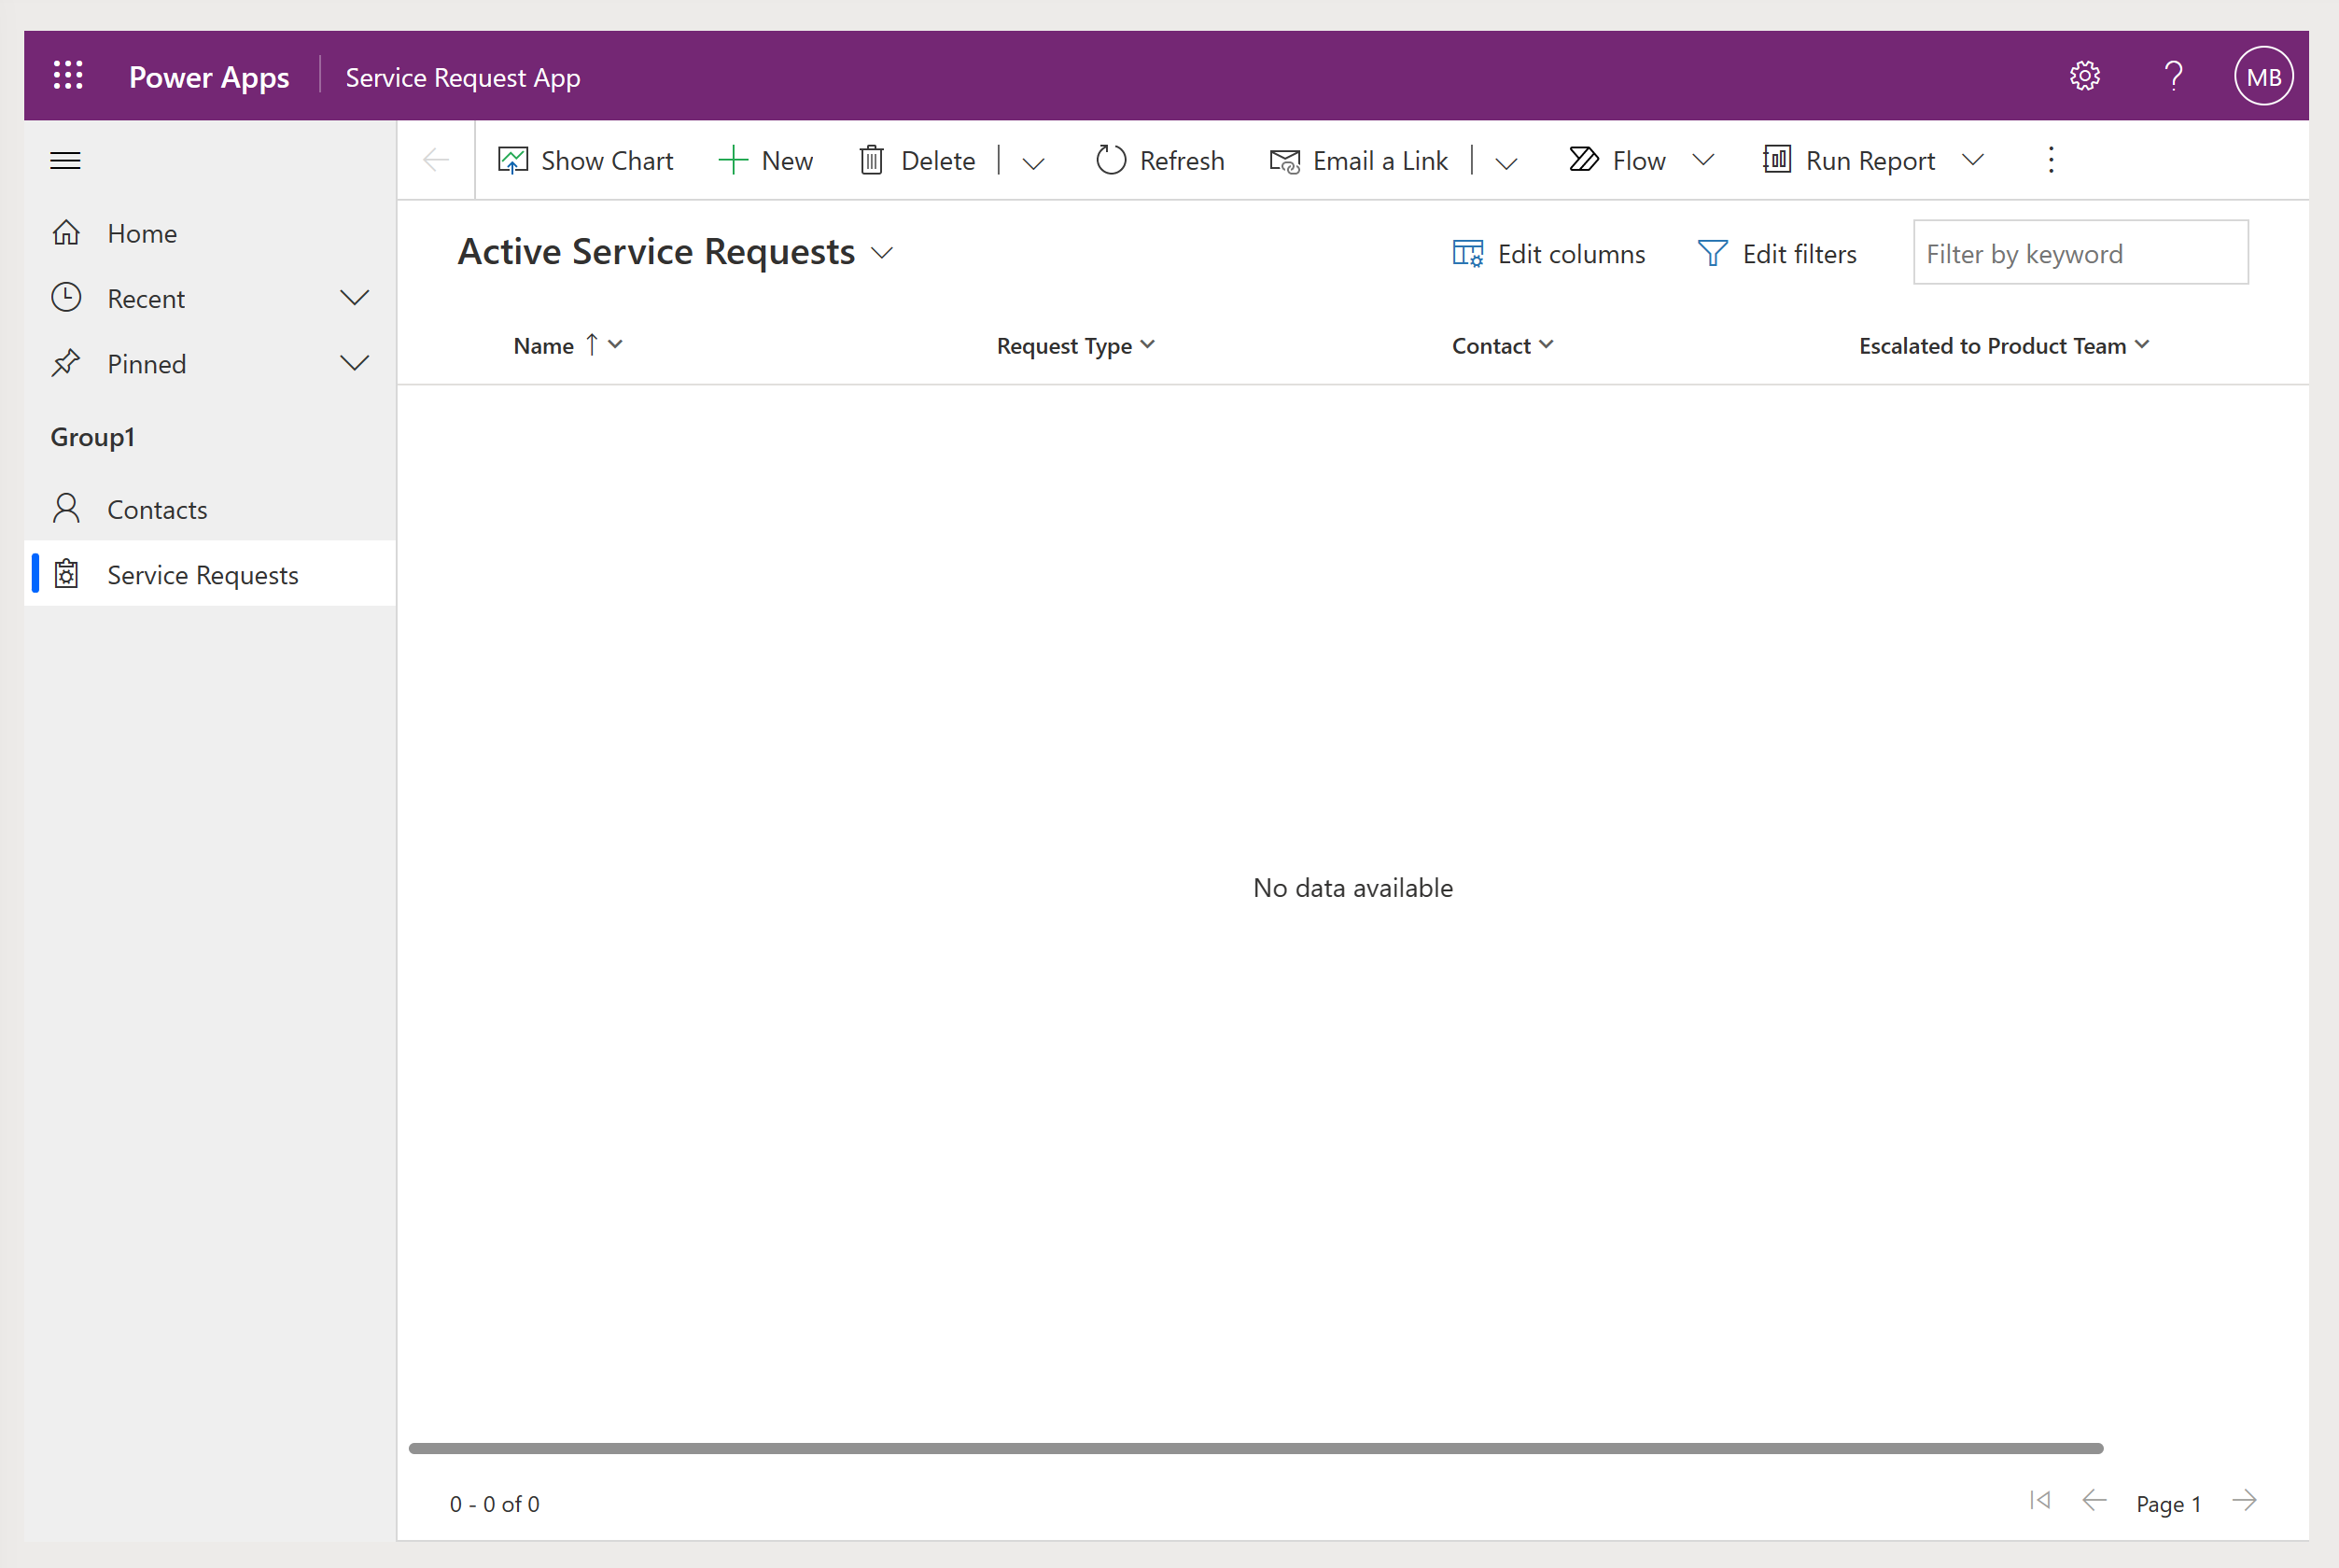
Before we start using our app, let’s review the “structure” or our app at this point. In the panels on the left, starting with the Pages, notice both Service Requests and Contacts, both views and forms are listed.

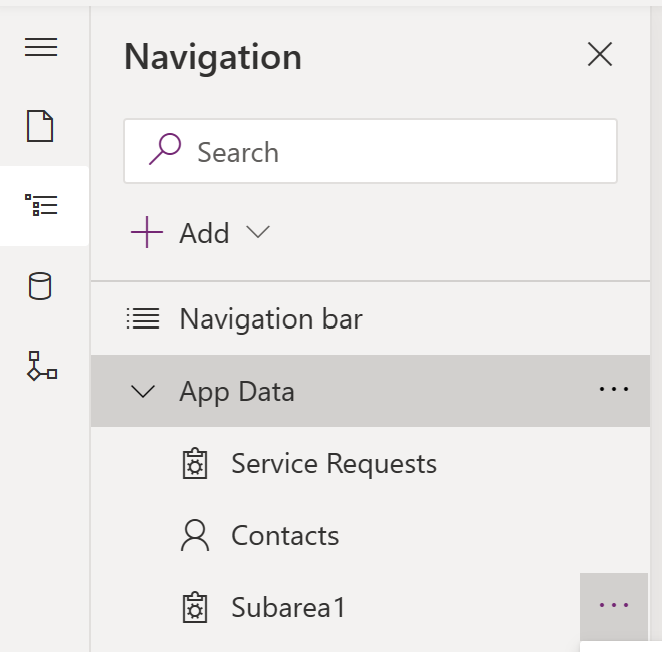
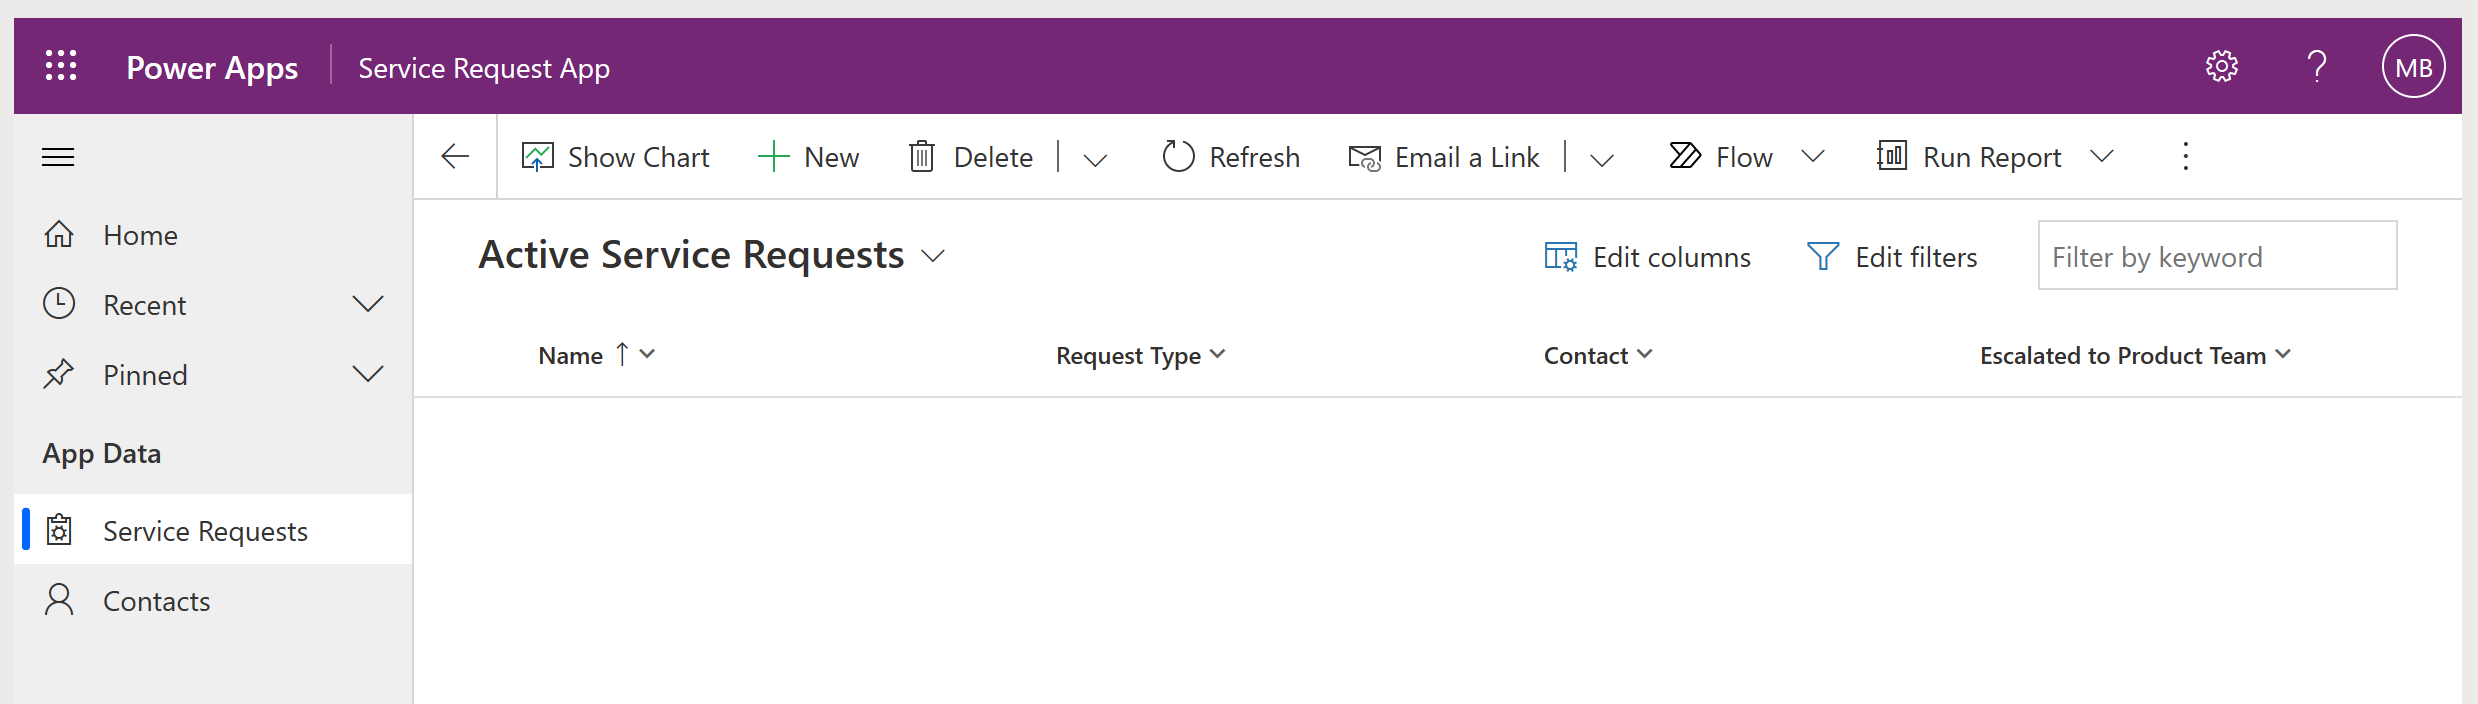
Next, in the Navigation panel, we have options for both Contacts and Service Requests. While we’re here I’m going to clean up a few things. First, rename the main navigation group (Group 1) to something meaningful like App Data. Next, remove the Subarea1 that we don’t need. And last move Service Requests to the top, because I want Service Requests to be my primary page as well as the default Home page.
The last thing to note here is on the Data panel. The entities that we added pages for, are now listed as being In your app.

Ok, now it’s time to try it out. From the Service Requests page, click the New button to create a new Service Request.
We’re automatically taken to the Main form that we configured earlier. Note the behavior of the form as you manipulate the Request Type. Select Network Issue and watch to make sure the Escalated field is displayed properly. Add some data here and click Save and Close.

Now our app has some data and you’re off to the races. Again, don’t forget to save and publish your app.
What’s next?
Indeed, there are a host of next level or advanced topics we could dive into. However, this is the point at which I’d advise you to just step back and play a little bit. Look around at what is built-in to the app. If you’re building these apps, you’re going to receive a host of questions from end users like…
- Can you import data for me?
- Can you export data to send to another system?
- I want to visualize my data.
- Can you give me a way to bulk edit rows?
- I want to share data or send a link to someone.
- How do I keep filter criteria that I use all the time?
- Can you generate a document from the data?
Before you run off on a design-build journey for any of these, know that many of them are covered in some way and directly accessible for your users through the Model Driven App user interface. For example start by looking at the ribbon menu for both views and individual records.


The key things to take away here are: Don’t reinvent the wheel. Identify and document useful features. Identify and create a strategy for built-in features that pose a risk.
.avif)