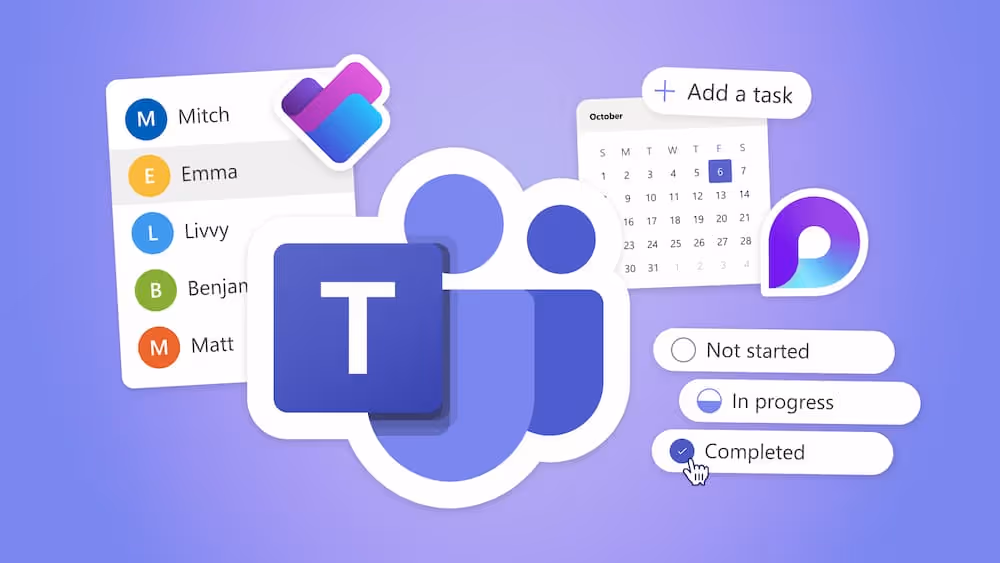


8 New Features in Microsoft Loop

Microsoft Loop has been adding some great new features over the last couple months. In today's blog, we'll be taking you through 8 new features in Loop that make it feel more like complete app 👌
Introduction
Microsoft Loop launched as a pretty barebones app with some good functionality at its core. Over the last few months, there have been quite a few features released that have made Loop feel less like a “preview/beta” app, and much more like one ready for prime time. Let’s take a look!
1. Table Detail View
This is one of the features I’ve been pushing for in Microsoft’s Loop TAP program! Gonna take a small amount of credit here 😀.
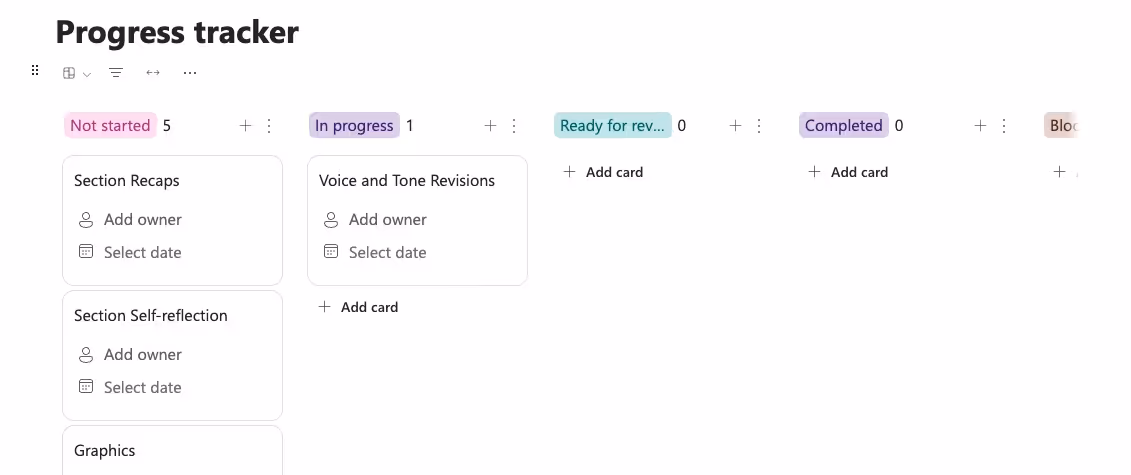
Have you ever been working in a table, and wished you could have just a little bit more info about each row? Or even an entire page for each row? That’s exactly what the Detail View gets you.
Now, instead of always needing to add another column to the table to add things like a description or other metadata, you can open a detail view where you have an entire page canvas to add content for that row of data.
Users coming from Notion will find this feature familiar (they call it “side peek”), and it’s a welcome addition to Loop.

Just hover over a row in a table, look for the “arrow button”, click it, and a modal pop-up will open.

From here you’ll see all the existing info from the table row displayed in a vertical list. You can also add new fields (which will also display out in the table). But where the real power comes from is down on the bottom you’ll see a prompt for “Add notes, comments, and related content…”. This area is effectively a page canvas where you can add any other content you want associated with that table row.

I say “effectively” a page canvas because there are a couple features that are supported on full pages that aren’t supported in this detail view, which I’ll leave you to discover on your own for the sake of brevity here. I’m sure MS will close the gap here over time, but for now I’m totally fine working without those features.
2. Table Rules (Automation)
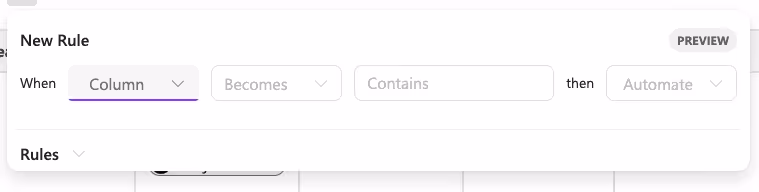
This is another one I’ve been patiently waiting for! There is now a “Rules” button that displays above tables that allows you to configure automations for when a table choice column changes.

Think “When something is marked as In Progress, send a notification to a Teams Channel”.
Very primitive example, but you can imagine the power this could unlock.
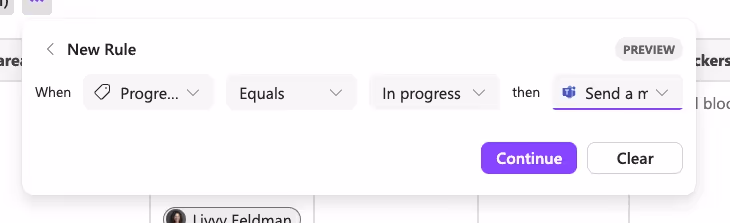
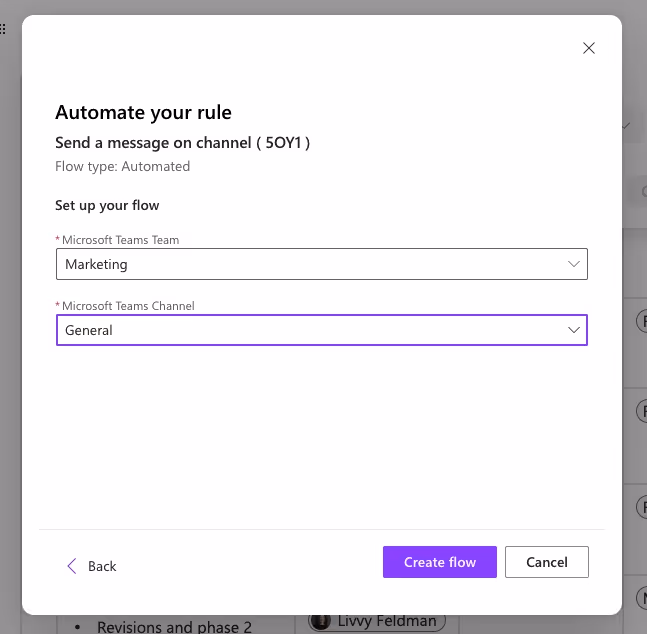
To get started, click the Rules button. This will let you configure a “New Rule”. Use the dropdowns to configure your rule. In this case, let’s say When “Status” “Equals” “In Progress”, then “Send a message in a Teams channel”.

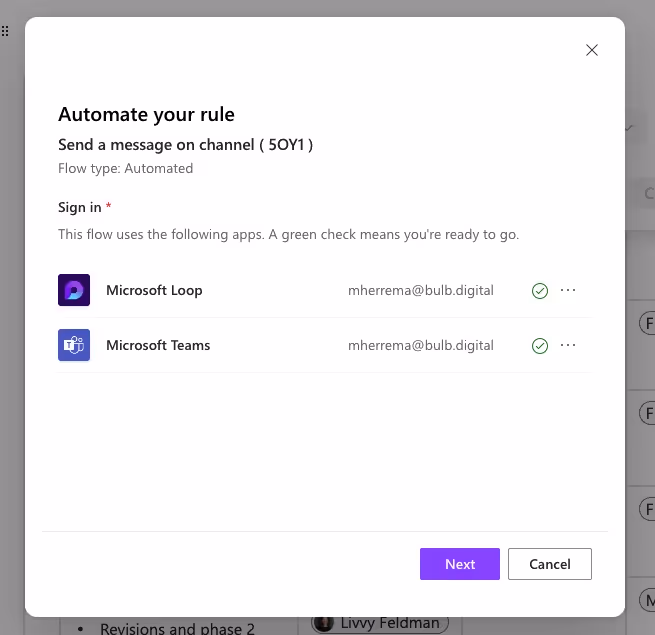
After clicking continue, it will display a new window asking you to confirm the connections you want to use, select the Team and Channel, and you’ll be off to the races.
The thing to notice here is that the language transitions to things like “Flow type: Automated” and “Create flow”. This is because behind the scenes, this is actually creating a flow in Power Automate to run when that status column changes in Loop.
The only bummer about this feature right now is it’s very distinct with what it can do, and it’s meant to serve as a “notification” method for now. If you dig into the Power Automate flow, you unfortunately can’t get access to more info from the table to use in other actions in the flow.
So it’s very basic for the moment, but the foundation for automation is there, which is really exciting to me.
3. Custom Templates
Microsoft has done a great job with giving you template options to start your pages from. It’s probably a 50/50 split for us between when we choose one of their templates versus start from a blank page.
There are just some times where we need to do our own things for our projects that the MS templates don’t support well. So, we go to an old project, copy a page, and paste it into the new page. Kind of annoying.
Fortunately, Microsoft just implemented the ability to use Custom Templates. You can now set up a page in Loop and save it as a template to be reused on other pages. This can cut down on that tedious task of copying text in pages a ton, so this feature will help us out.
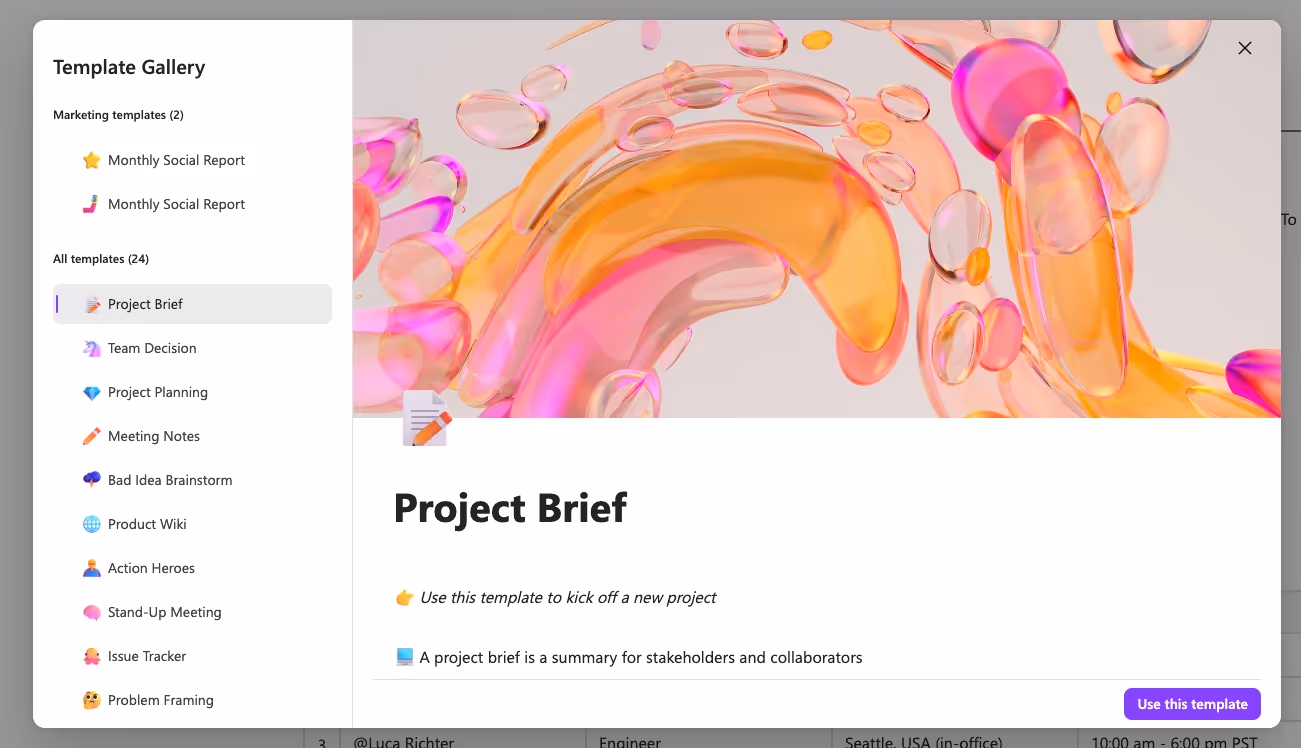
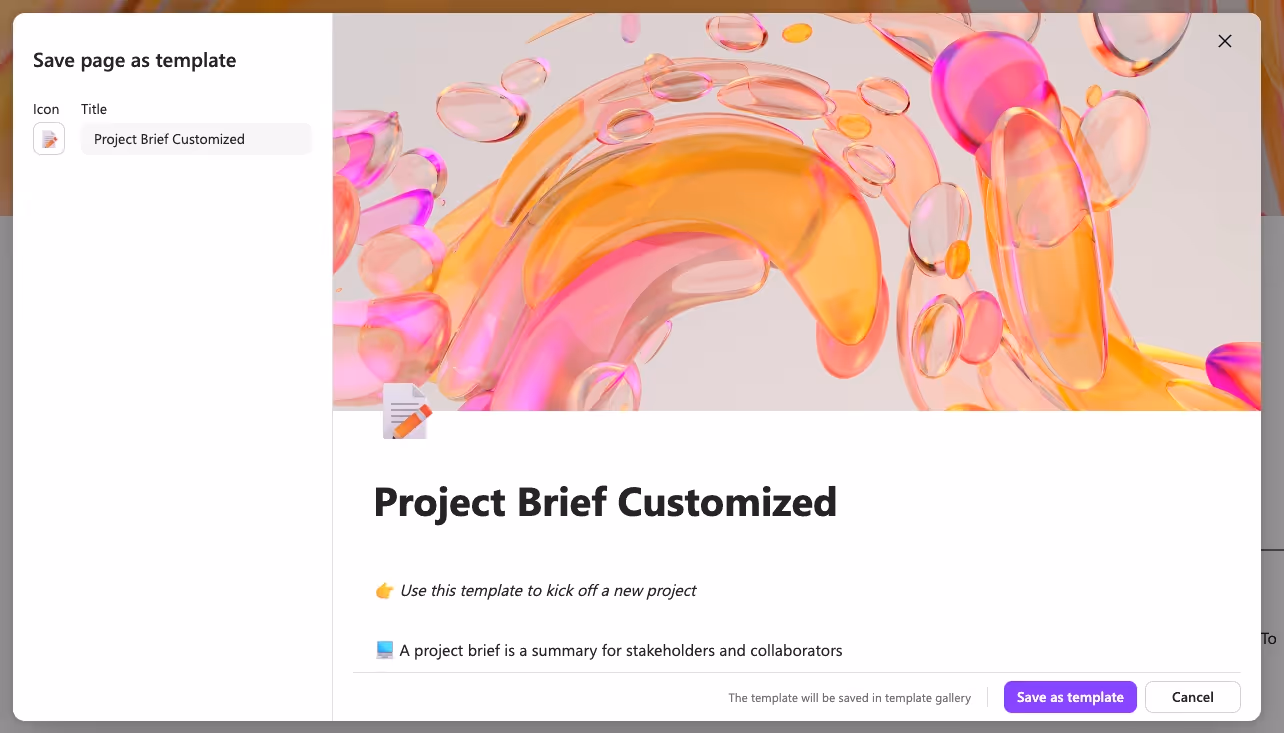
All you have to do is hover over the page you want to use as a template in the left tree view, select the ellipsis (three dots), and click “Save Page as Template”.

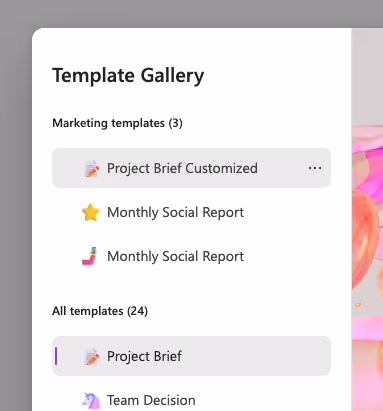
This will open up a modal window allowing you to pick an icon and title for the Template. After clicking Save as template, it will now show up in the Template Gallery any time you create a new page. Super cool.
Right now it has a bit of a limitation in that Page Templates are only in context of a single workspace. So you can create as many pages based on a template from its original workspace, but you can’t use them cross-workspace. This is definitely on my wishlist, since we spin up new workspaces all the time for different clients and projects, and I want to be able to leverage those templates to make it even easier to set up.
And while we’re on the topic of templates, what if I could create a “workspace template” that allowed me to create a hierarchy of pages (based on a template) to start from for a new project. What if I could create an awesome workspace template and share it with clients or our membership community to use (or sell them like many do with Notion)? Lots of dreaming here. Again, this feels a bit like they are just laying a foundation for this type of feature, and this is just a first step.

SELF ASSESSMENT
Is your business getting full value from your M365 subscription?
Billions of dollars are wasted each year on underused subscriptions. Take 3 minutes to find out where your tools are driving results, and where they’re holding you back.
Find Out Now
Is Team Communication Holding You Back?
Find Out in Just 2 Minutes.
Take our quick scorecard to uncover communication gaps and hidden barriers within your team.
Let’s do a couple quick-hits now:
4. Read Only Access
So much of Loop is based on this concept of casual co-editing and working together on a page. But one of the first things we heard feedback on was “can I make it so someone CAN’T edit a page?”.
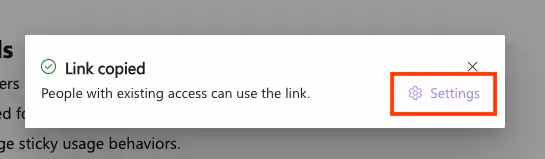
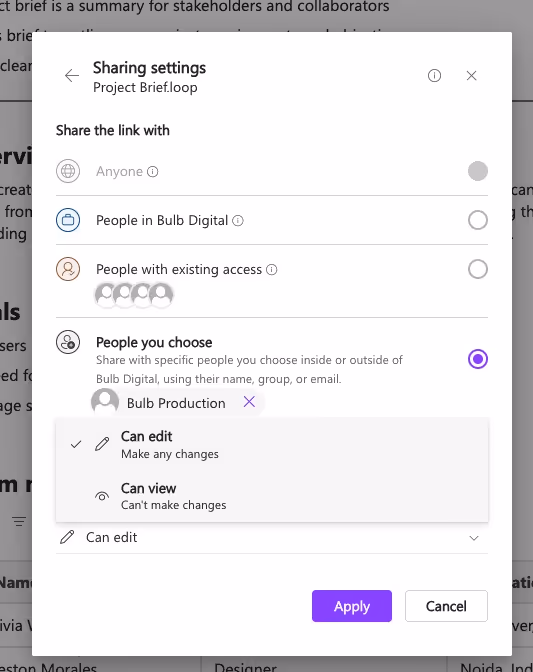
For a long time, the answer was no, but there’s now an option while sharing a page to select “Can View”, which disables all editing.
It’s easy to do – just click the share or copy button on the top right of the page, click on settings, and select “Can view” instead of “Can edit”.
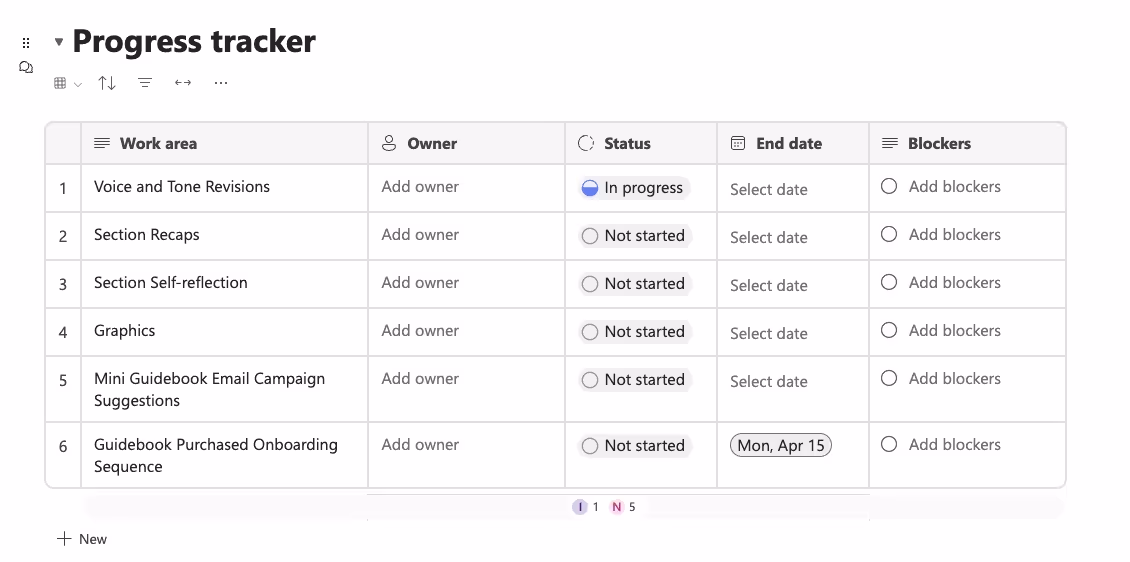
5. Switching Between Table and Board View
I talked about this a little bit previously in my Loop/Planner integration blog, but I’ll restate it here because it applies outside of just task management.
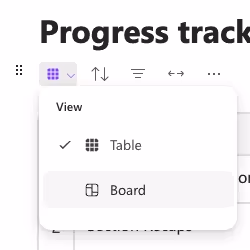
Any time you have a table of data and you want to view it as a Kanban style board, you can click the “Switch View” icon above the table on the far left and select “Board”. At the moment it appears that it just chooses the first “Label” column type as the column to group the cards with, so make sure the column you want to group by comes before other Label columns. I’d love to see this configurable in the future!
It does save the display setting with the page, so anyone who goes to look at it will see the same view as you.

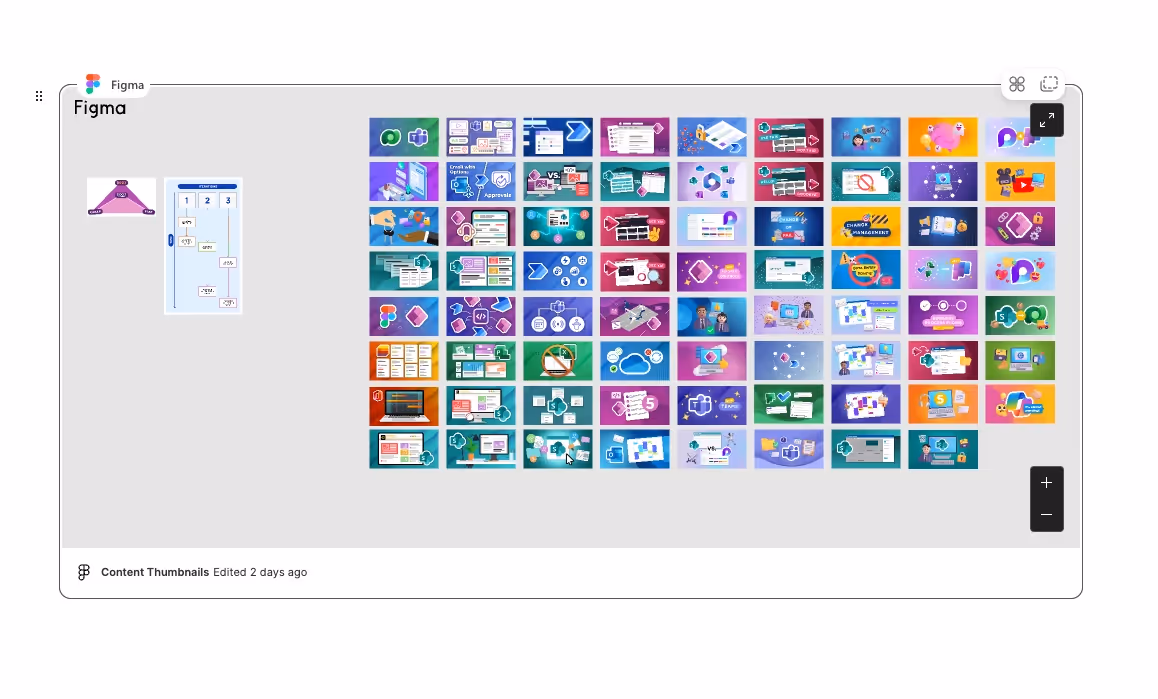
6. Figma Integration
You can now easily display Figma designs in Loop! If your team uses Figma often as a design tool and you’ve wanted to display designs on your pages, it’s as easy as pasting a link from Figma in the page.
Hey look, all our blog thumbnails 😊
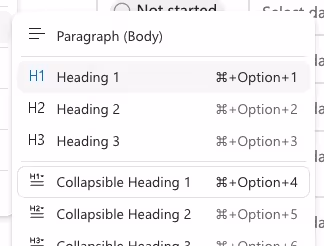
7. Collapsible Headings
Another quick but nice-to-have feature – collapsible headings (sections). Now if there’s sections you’d like to add the ability to collapse or expand when you want, you can change any heading in your page to a Collapsible Heading. Then any content that gets written below (until another heading) will show or hide based on if the section is collapsed.

Disclaimer: We have noticed on a few occasions that the heading gets “stuck” closed and can’t be opened until reloading the page later in the day. This is clearly a bug that should get fixed, but can be annoying if you are trying to access important content.
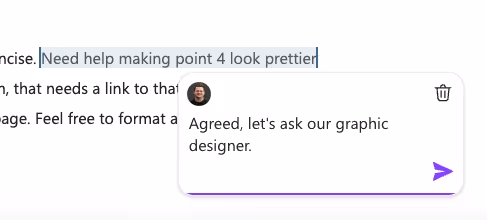
8. Better Comments
The initial implementation of comments in Loop was a little wonky. You’d have to select a block on the left by clicking the six dots, and choose the comment. What if you had a comment about a specific sentence or word within the text? You’d have to explain it in the comment, and it was quite disconnected from the actual text.
You can still comment on a block, but now you can also comment on specific text. Just highlight a piece of text, and you’ll now see a comment icon display next to the text styling options. It will show an indicator below the paragraph that there is a comment, and when you hover over it, it will highlight the relevant text that was selected for the comment. Not a novel concept, but a welcome change J.


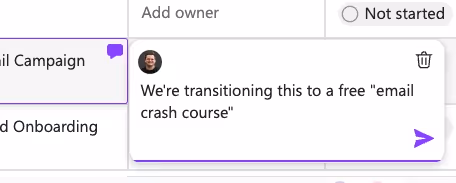
You can also comment within tables now. If you have a comment about a certain cell in the table, just right click the cell and select “New Comment” – it will add a comment right there!


Conclusion
Lot’s of new things in just a few months. I love seeing the updates come to Loop. If you haven’t integrated Loop into your daily work, I would still highly recommend it.
From the outside looking in, it can sometimes feel like Loop is still trying to play catch-up with Notion. While I totally understand that line of thinking, the development on Loop is ACTIVE. They are pushing things out what seems like every week, and it’s really encouraging to see the product mature and become ready for more common use cases.