.avif)


Create a Better User Experience With Adaptive Cards in Teams

Use Adaptive Cards in Microsoft Teams to connect your process to people.
Intro
Do you ever find yourself swimming in an ocean of modern office tools, feeling like you’re living in a wonderful new world, but things still aren’t as connected as you’d like? Maybe different departments have built automated processes that work for them, but they could connect people in a better way? Often in large organizations, systems get created that are still missing the extra glue to make them effective. In this post I’m going to show you a way to use Teams with Adaptive Cards to bring your apps, data, and people closer to make them more effective.
What is an Adaptive Card?
Think of Adaptive Cards as a common UI (User Interface) language that can be used in a wide range of platforms that do two things:
- Deliver information to users in an easy-to-consume way
- Collect information from users right in the context of the conversation
Because they can be used in a wide range of applications and platforms, Adaptive Cards are a great way to improve user engagement and effectiveness. You can use them to integrate data and actionable content within apps that your team uses every day.
There’s one place that Adaptive Cards do really well, and that is within Microsoft Teams.
Why use them in Teams?
Think of scenarios within the Office 365 platform where you have parts of a business process occurring across multiple tools. Scenarios like:
- Vacation Request
- Support Requests
- Expense Reporting
- Onboarding
- Suggestion Box
- Surveys
We often see examples like these implemented with a SharePoint List or Microsoft Form. After the data is captured, it needs to go through a process:
- It needs to go somewhere for review, approval or some next step (Typically you’d use Power Automate to notify a user that a new item has been created for their review)
- In the same flow, you would create and assign an Approval.
- Then the user clicks a link in the e-mail to view the request/access the approval and take action.
As you can see, this example requires the user to interact with multiple tools on the platform. What if we could do something to make this better?
This is where Adaptive Cards and Teams come into play.
If your team spends much of their day communicating and getting work done in Teams, it’s only natural that any processes could be made better by surfacing them within the Teams App. I'm sure Microsoft would love hearing this since they clearly want Teams to be the, “One app to rule them all”.
Since you’re already using Power Automate for part of these business processes, you can piggyback these and add a few actions to make the user experience around your process better.
So let's walk through an example to see what this new process would look like.
In our example, we’ll use an Issue Tracking process where we shift from a multi-tool review, communication, and action process to a more cohesive user experience within Teams.
A Peek At Adaptive Cards In Action
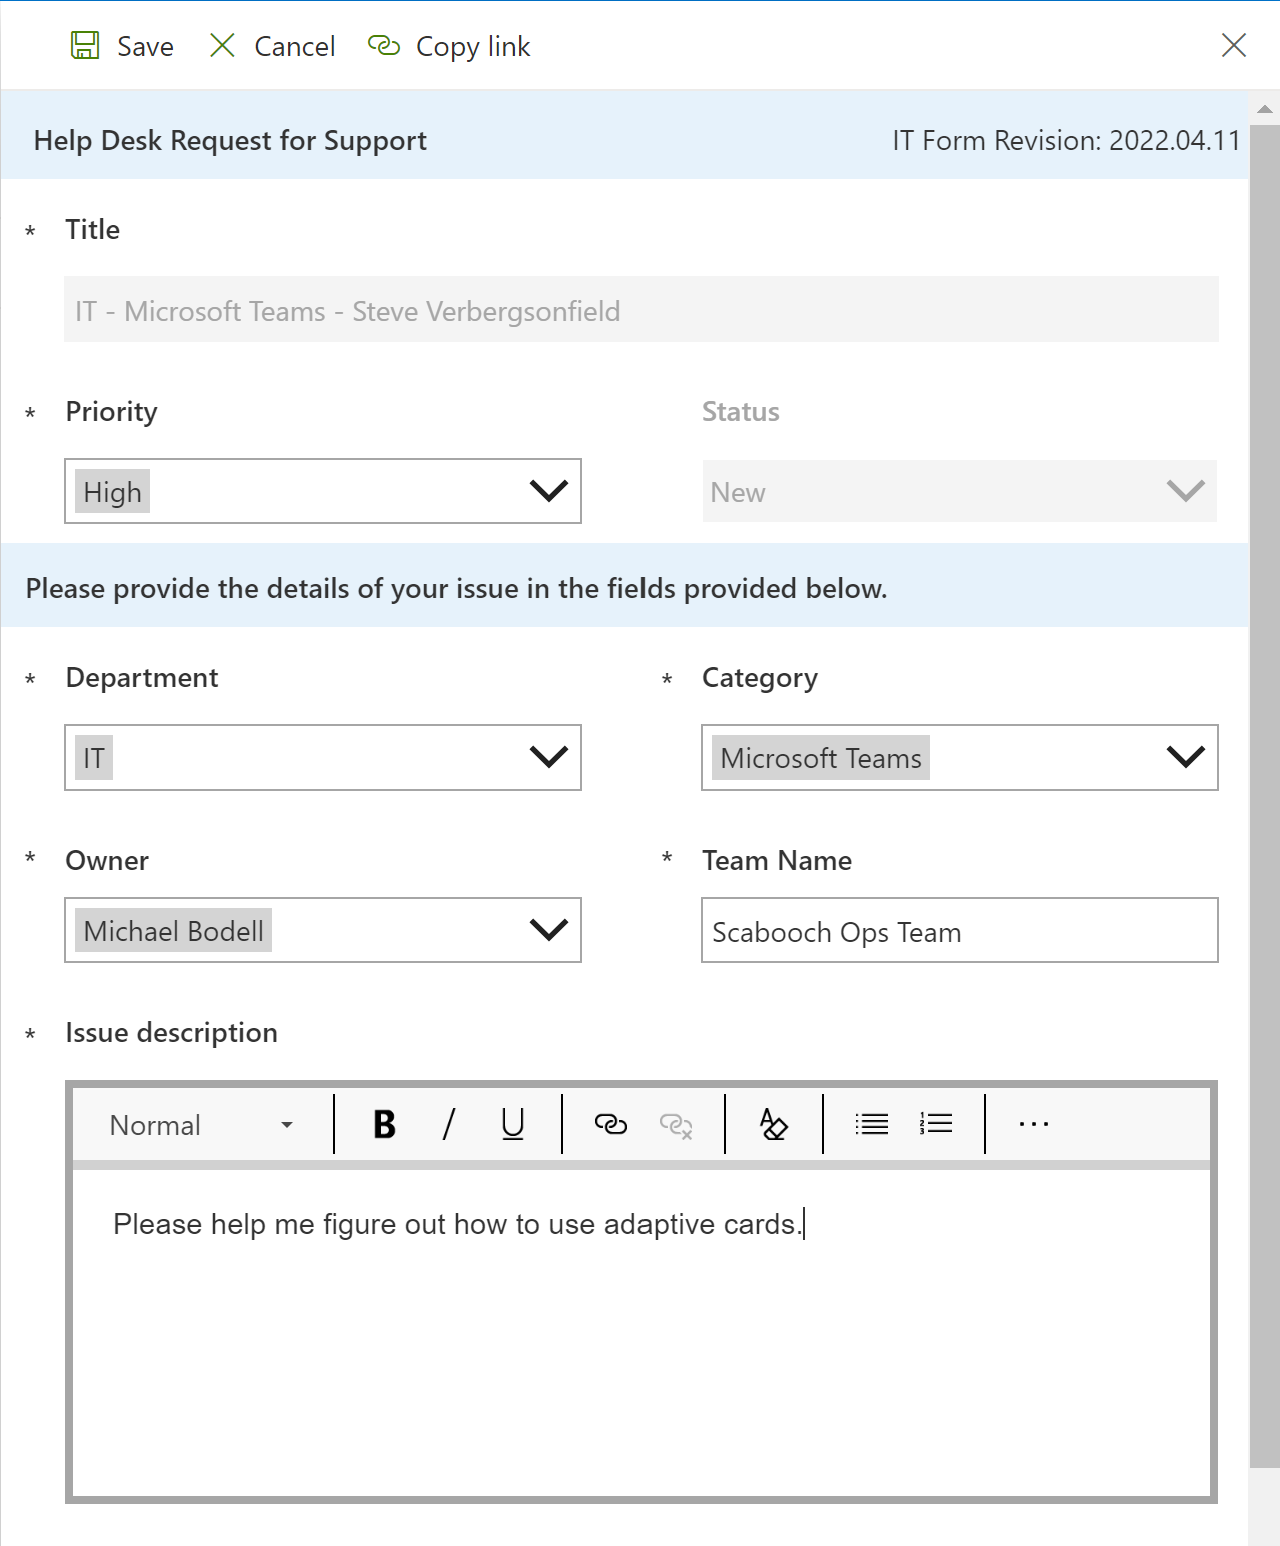
In this scenario, our user – let's call him Steve – is going to submit a new issue using our Issue Tracker List in SharePoint.
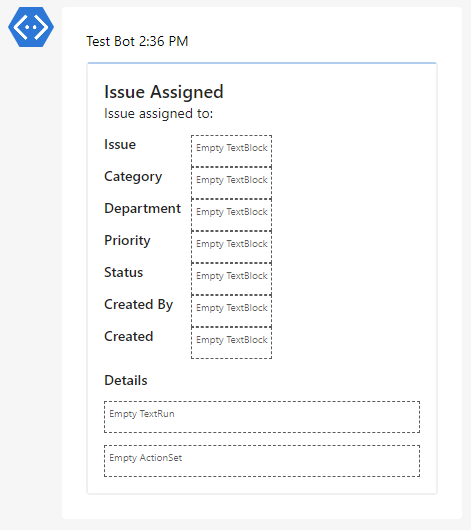
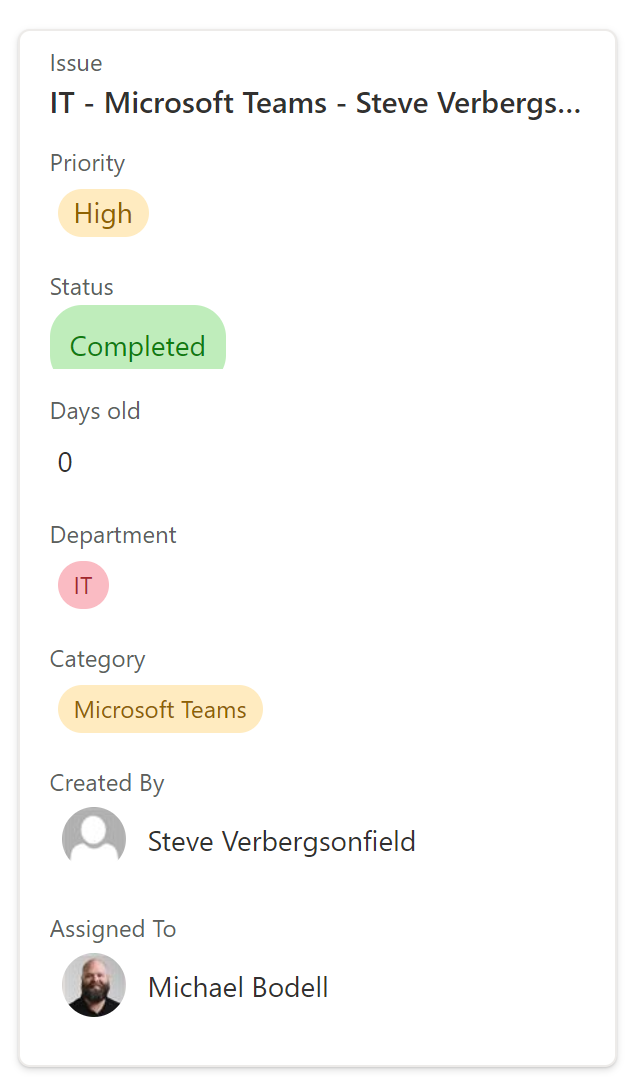
Next, we have a flow that is monitoring the Issue Tracker list for new items being added to the list. It’s going to pick up Steve’s issue and post an adaptive card in Teams to the team leader responsible, which in this case is me!
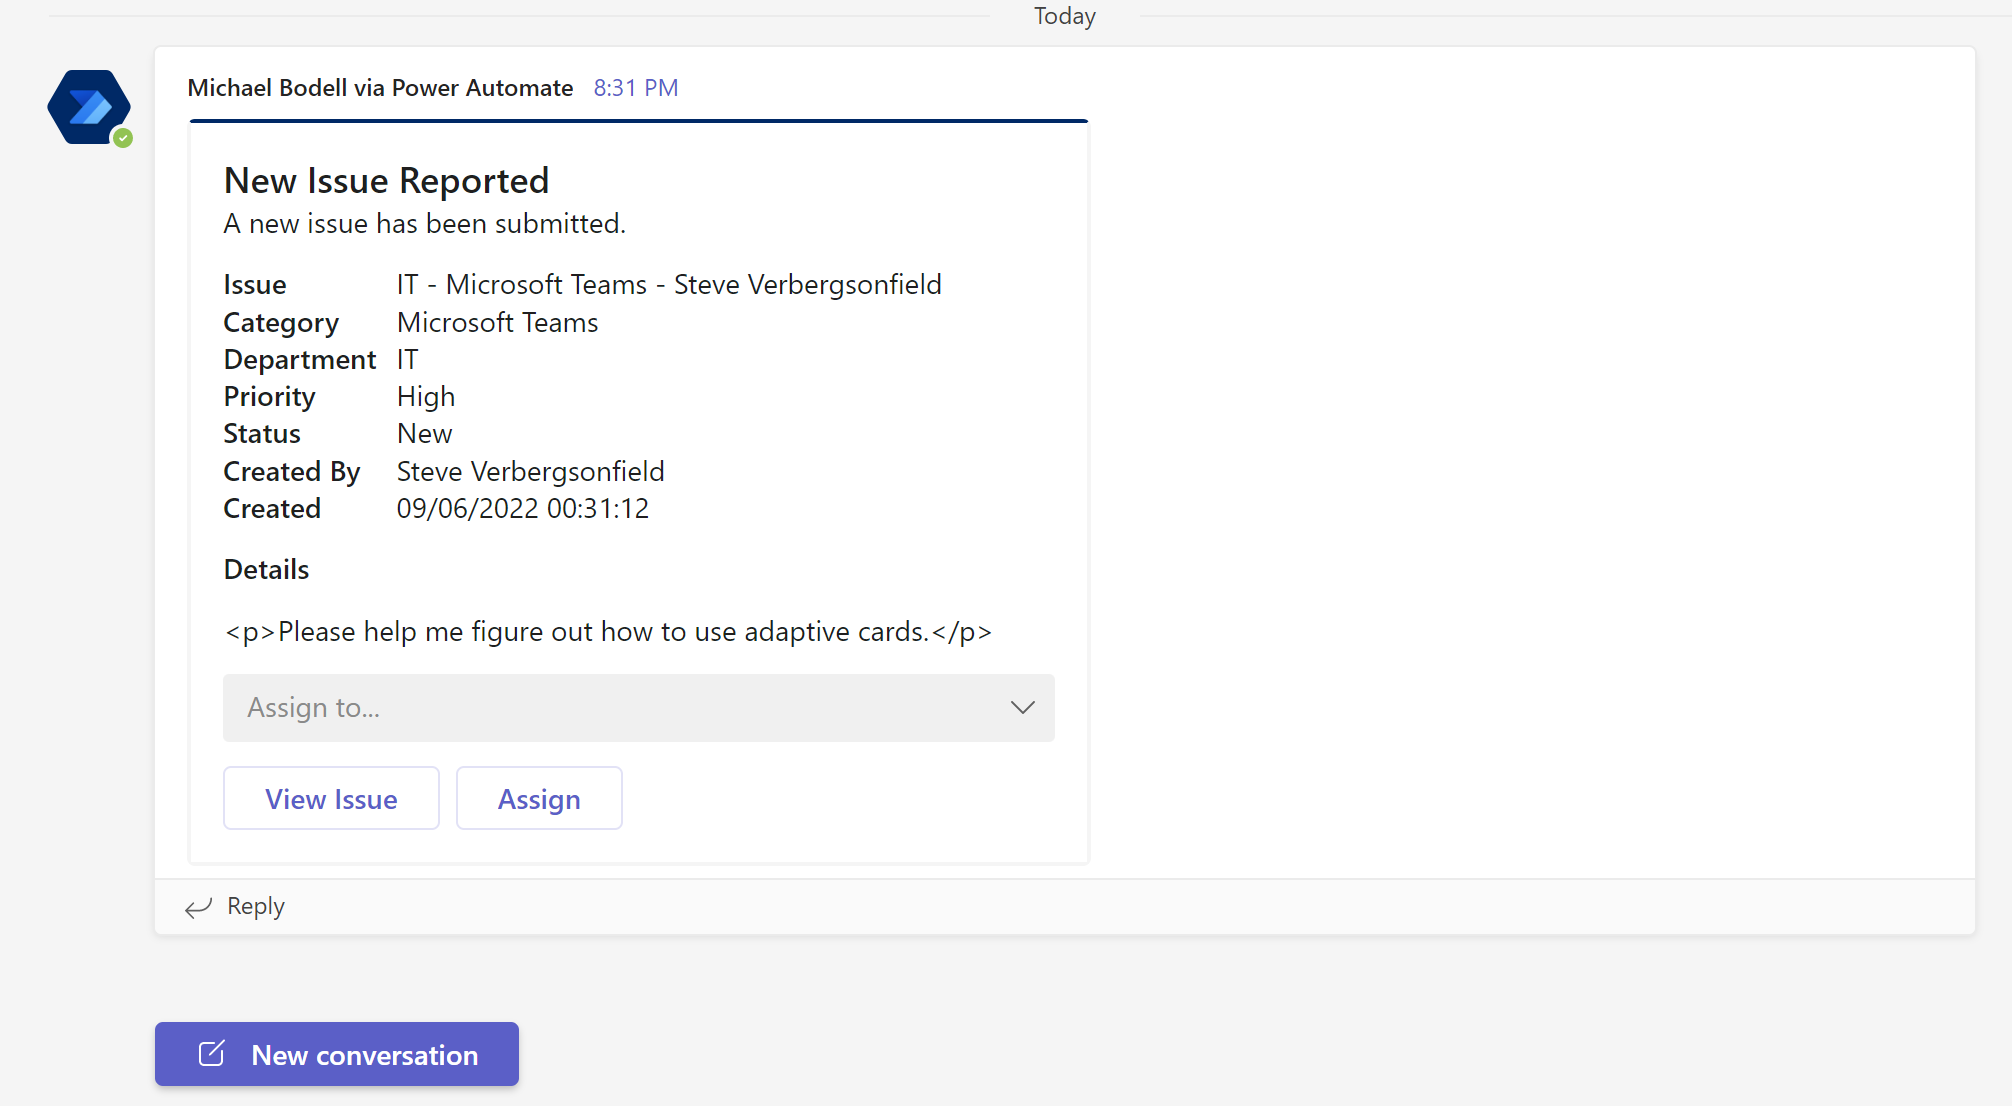
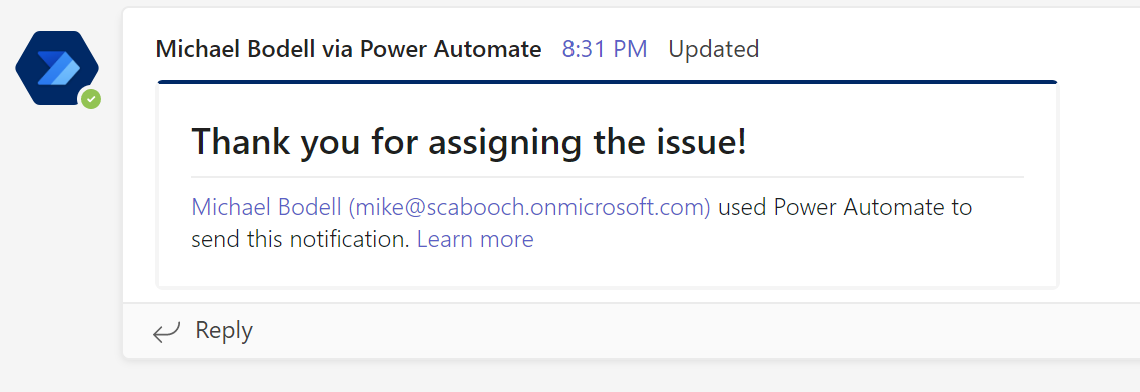
This first adaptive card lets me quickly review and assign the issue to a team member. I’m going to assign this one to myself.
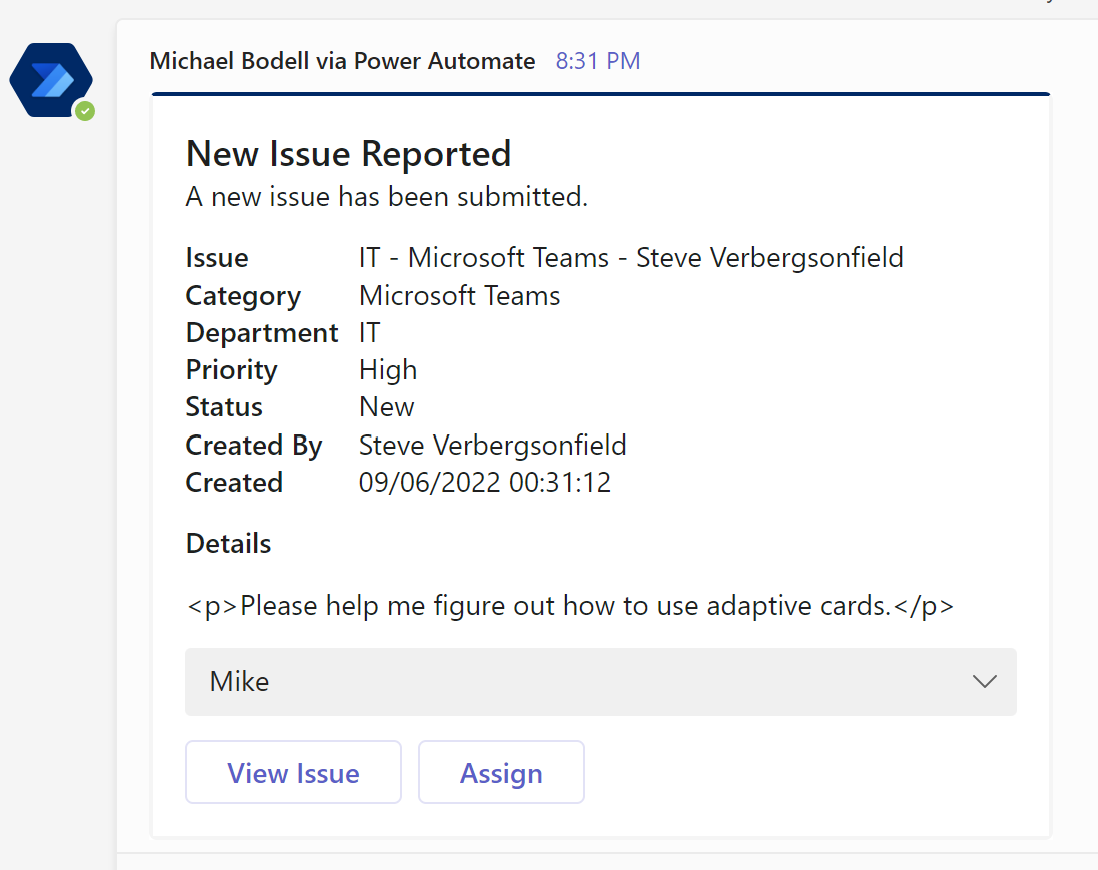
Once assigned, I get a simple message confirming my action and thanking me. How nice is that! 😎
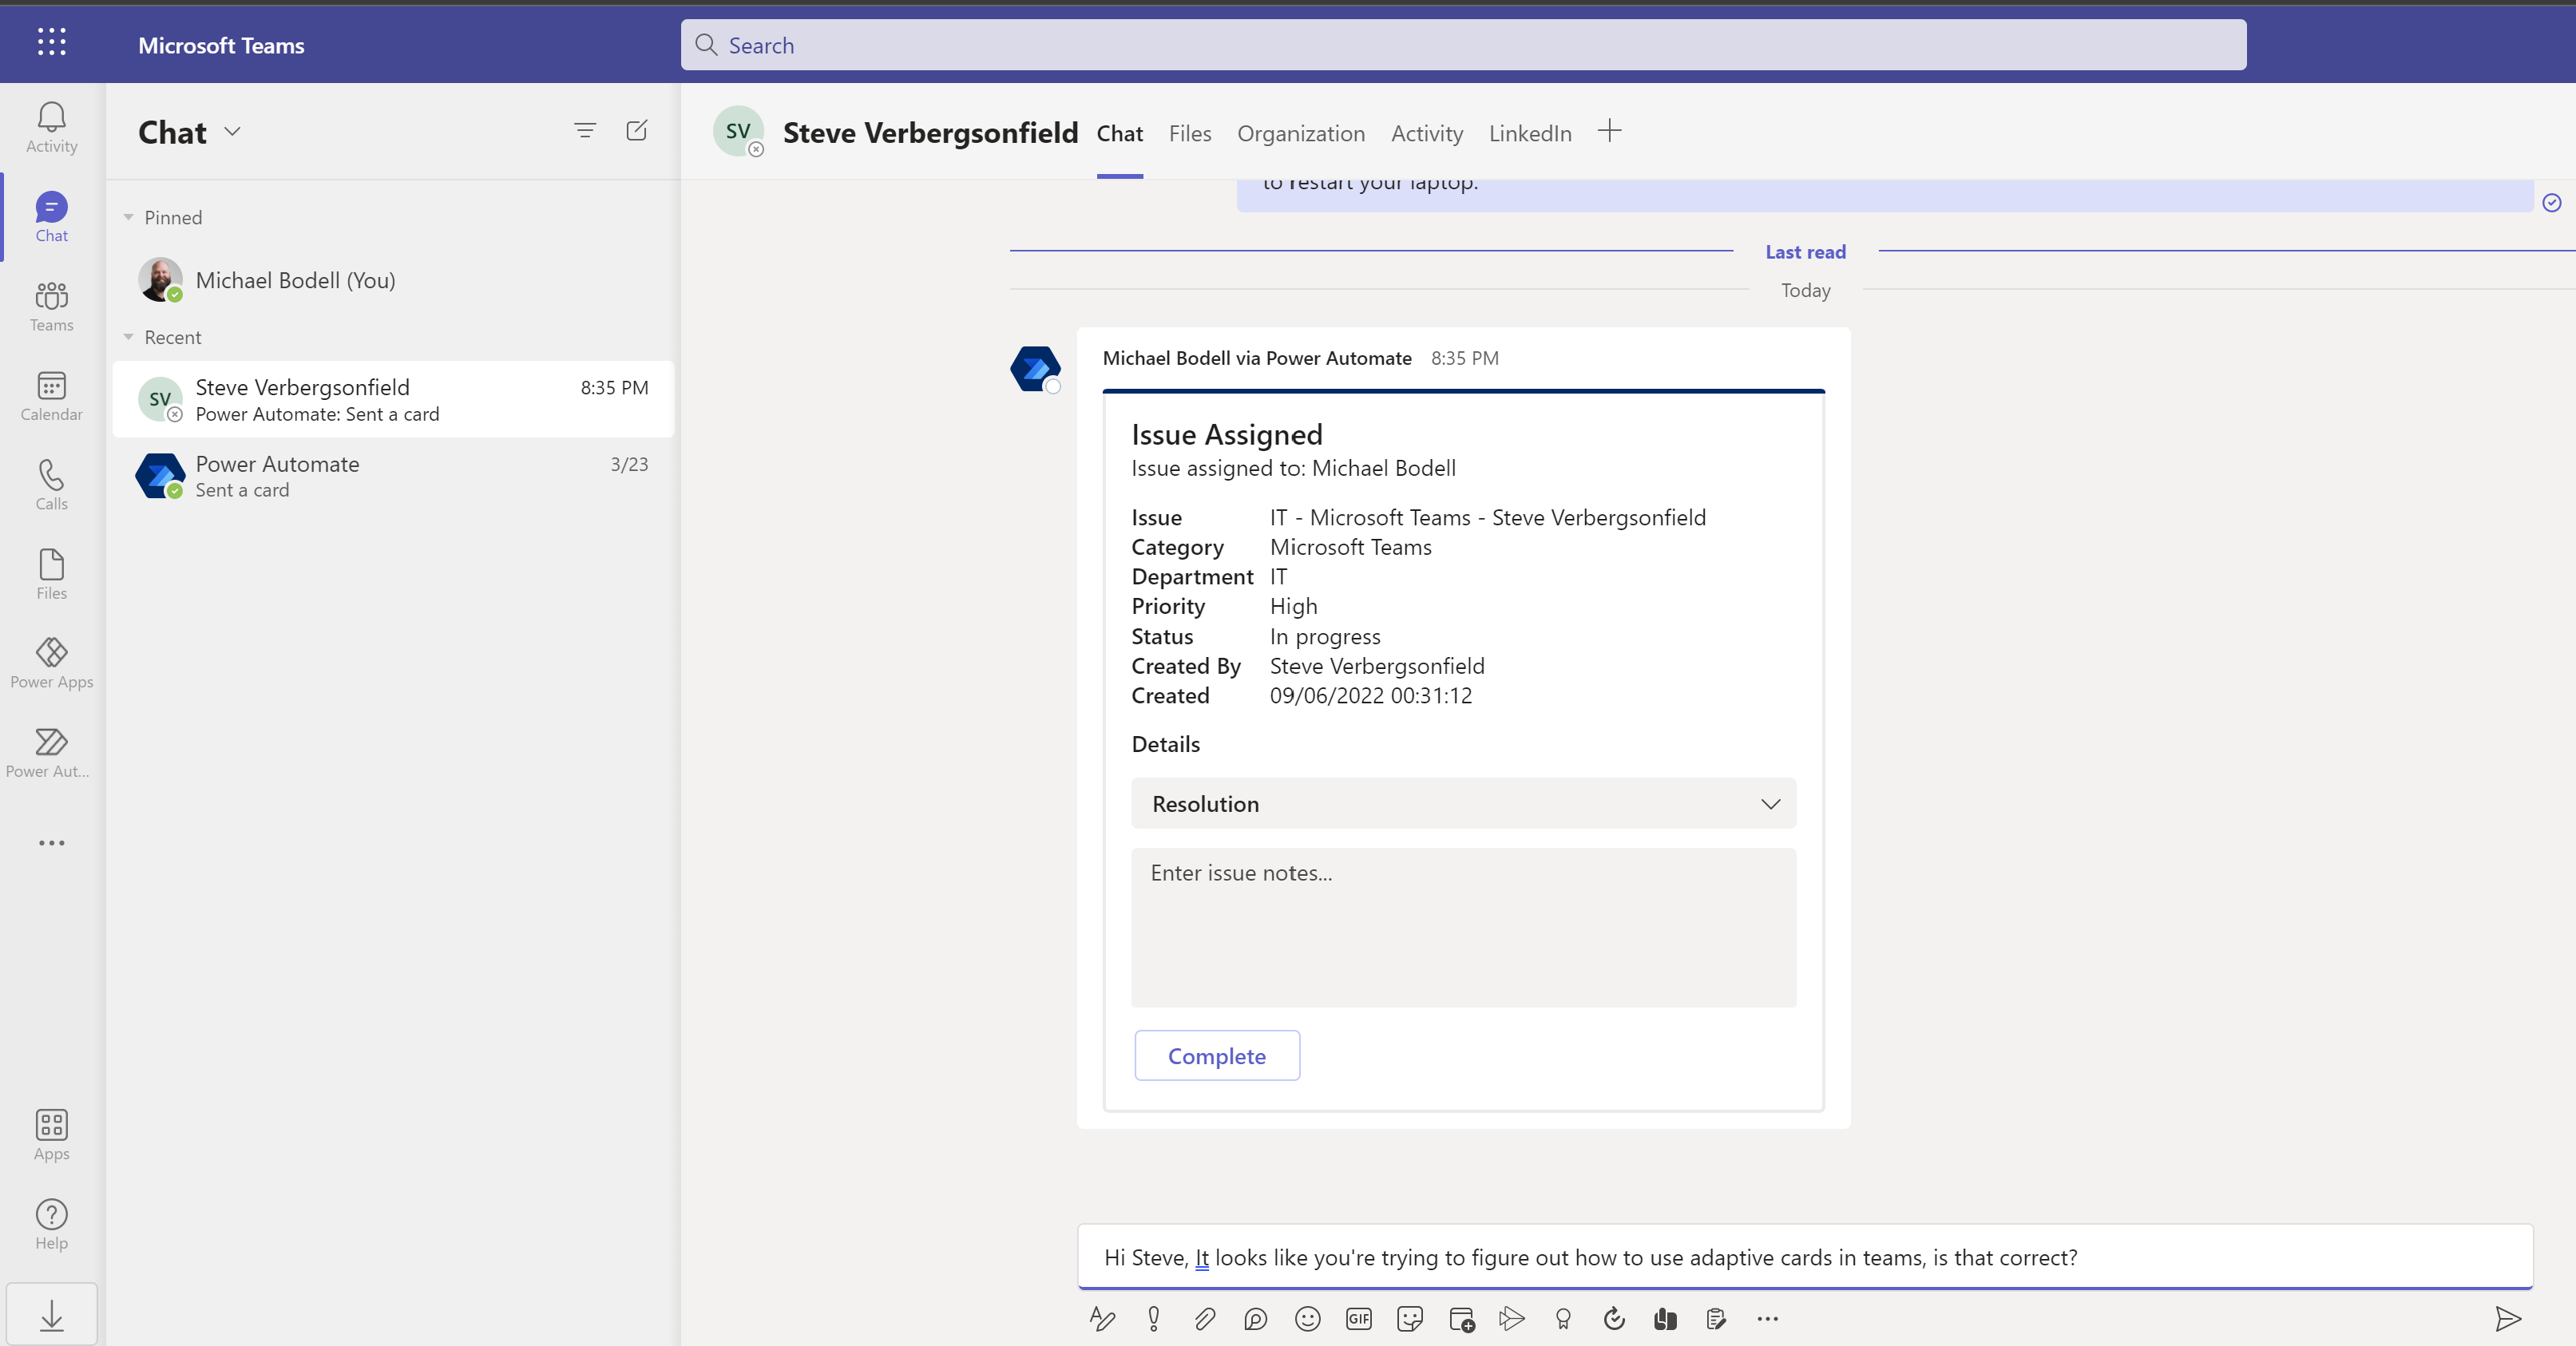
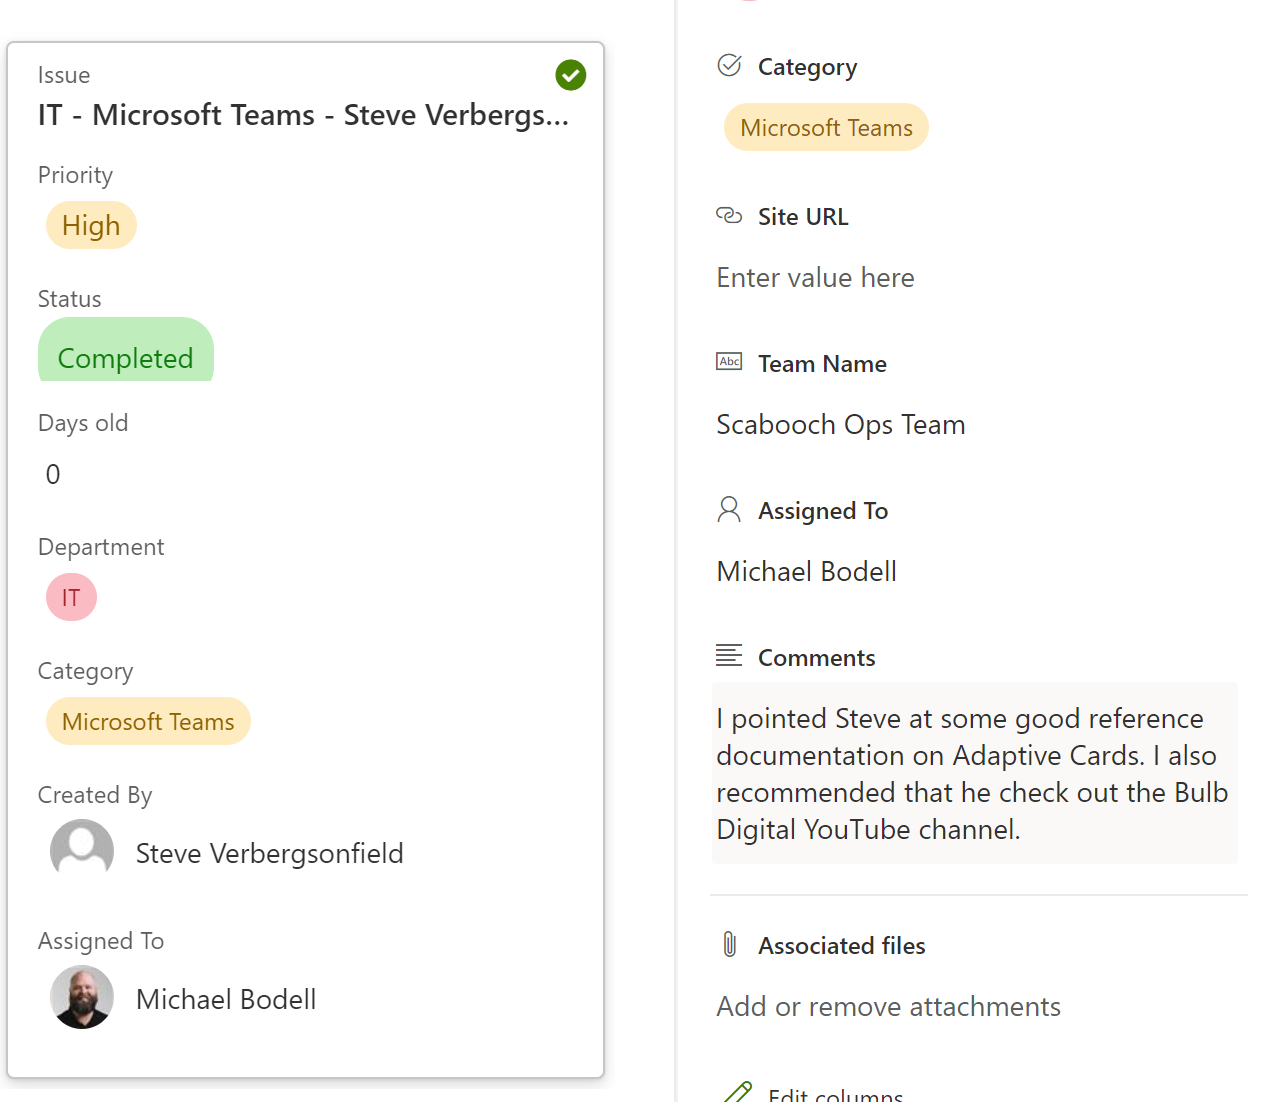
After assignment, the flow automatically starts a chat in Teams for myself and Steve to discuss the issue. The first thing you’ll notice here is we’re again using an adaptive card to initiate the chat. It includes details about the issue submitted and gives a place to capture notes and ultimately the resolution for the issue.
Now Steve and I have a quick little conversation and sort out the details of the issue.
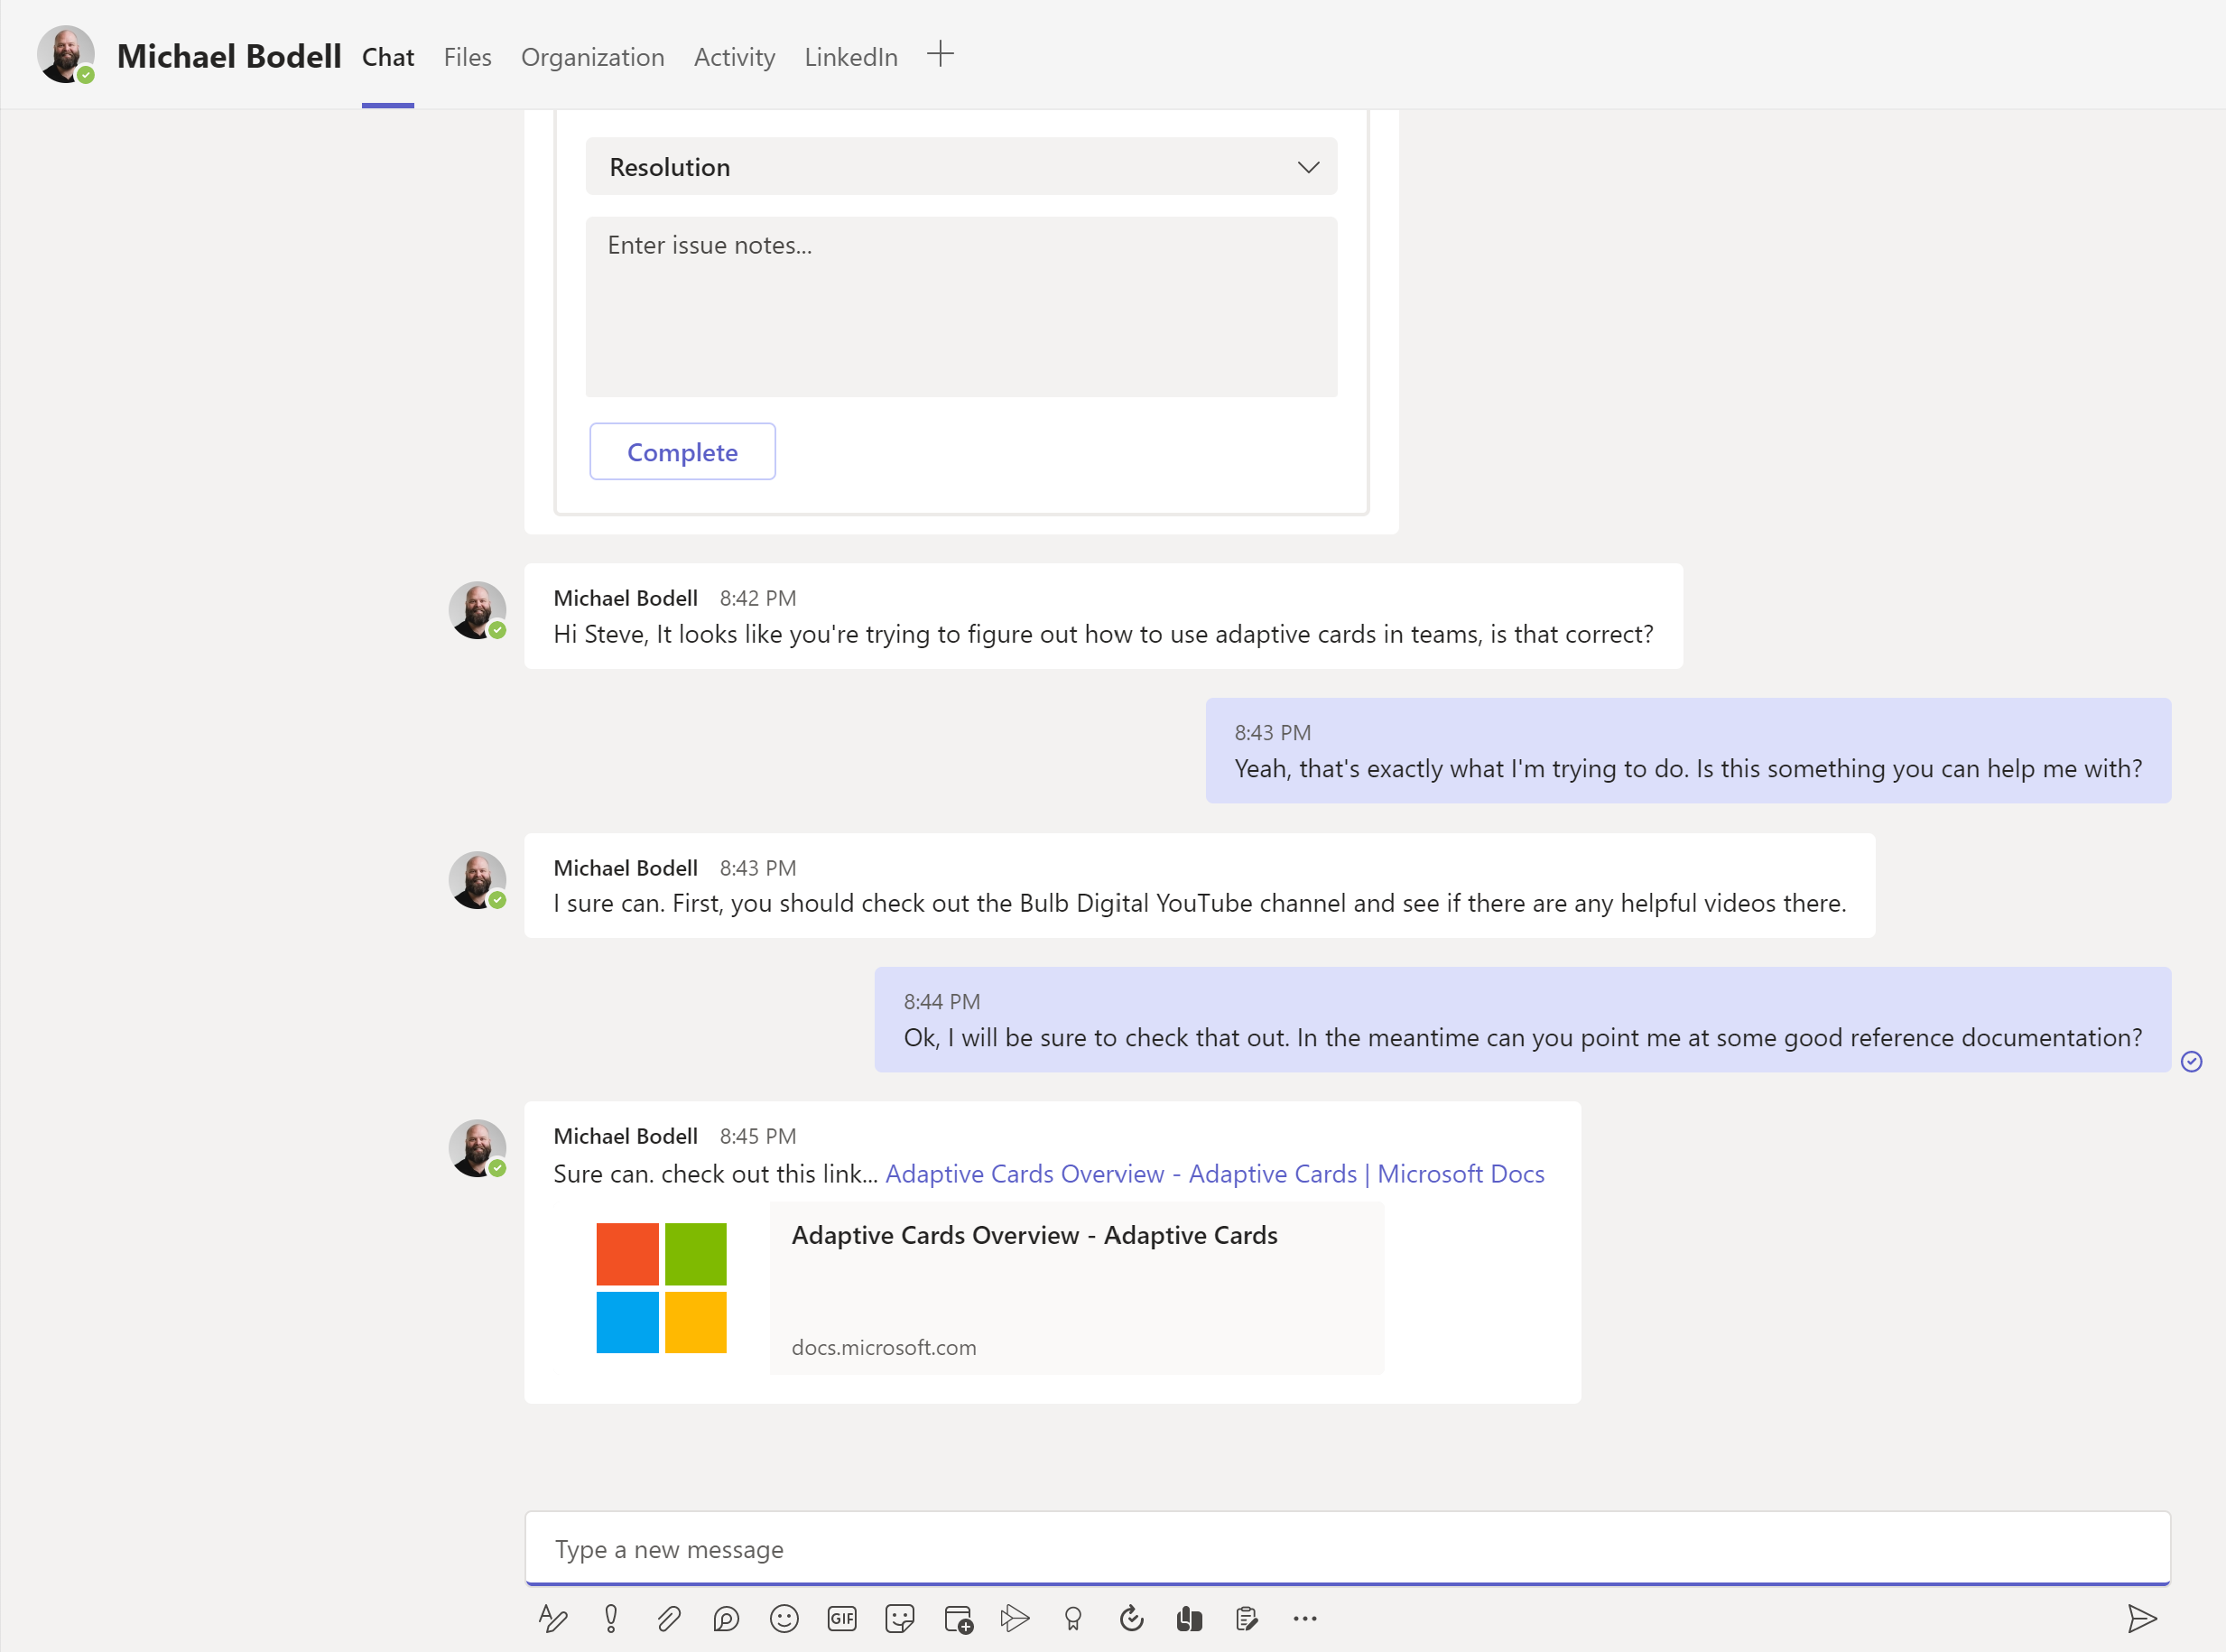
Once satisfied, I’ll add some notes in the adaptive card, specify a resolution, and complete the task.

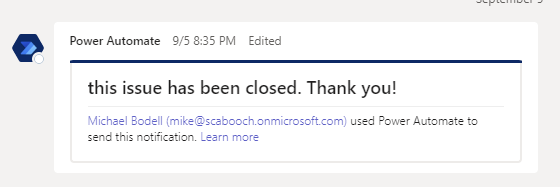
The card registers the submission and provides confirmation that the issue has been resolved.
Lastly, let’s go back and look at the issue in the Issue Tracker list. The last step in our flow is to update the issue and mark it with the resolution from the adaptive card.
If we open the info panel for the issue, we’ll see it even updated the comments with the notes I entered in the adaptive card.
Pretty cool, right?
Want to learn about what’s happening under the hood?
Ok, keep reading.

SELF ASSESSMENT
Is your business getting full value from your M365 subscription?
Billions of dollars are wasted each year on underused subscriptions. Take 3 minutes to find out where your tools are driving results, and where they’re holding you back.
Find Out Now
Is Team Communication Holding You Back?
Find Out in Just 2 Minutes.
Take our quick scorecard to uncover communication gaps and hidden barriers within your team.
Building From a Template
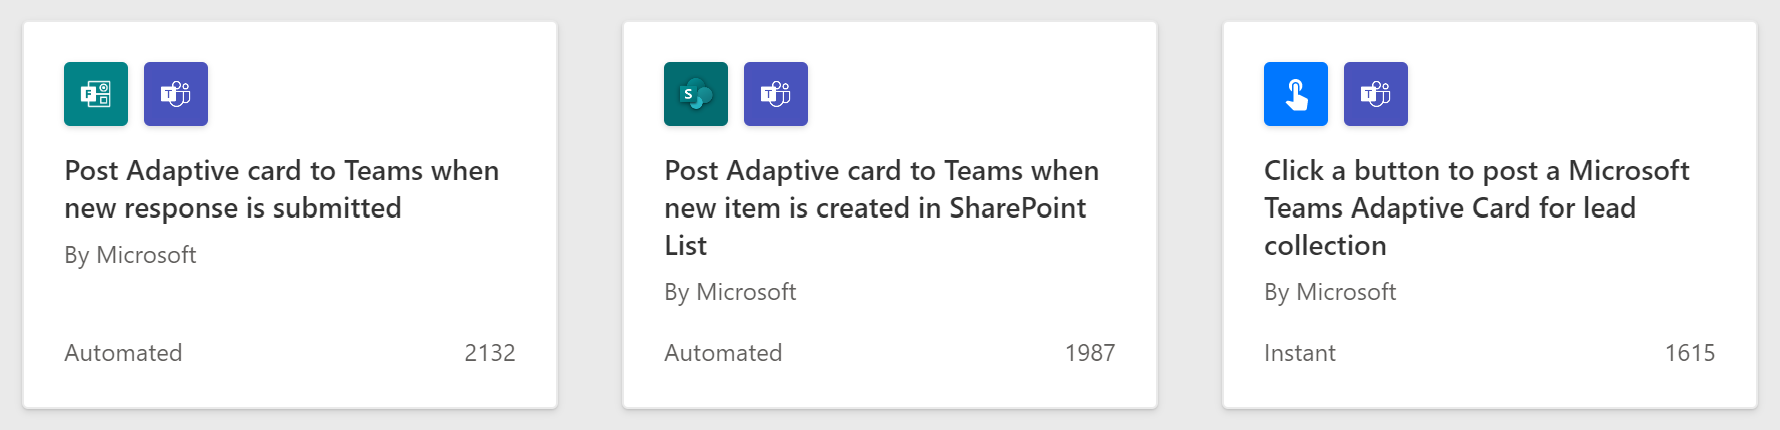
The easiest way to start is to use some of the built-in flow templates that Microsoft provides. Do a search for “post adaptive card” when creating a new flow from a Template, and you’ll find a few examples to work from.
We suggest starting with one of these and changing the trigger action if needed to fit your scenario and then try it out.
Building Your Own Adaptive Card
Once you’re comfortable with that, it will be time to dig a little deeper and build Adaptive Cards to fit your scenario. One of the best resources out there for building these is AdaptiveCards.io. It’s a great reference for all the things you can do with Adaptive Cards, but most importantly, it provides a design tool we can use to build cards for our needs quickly.
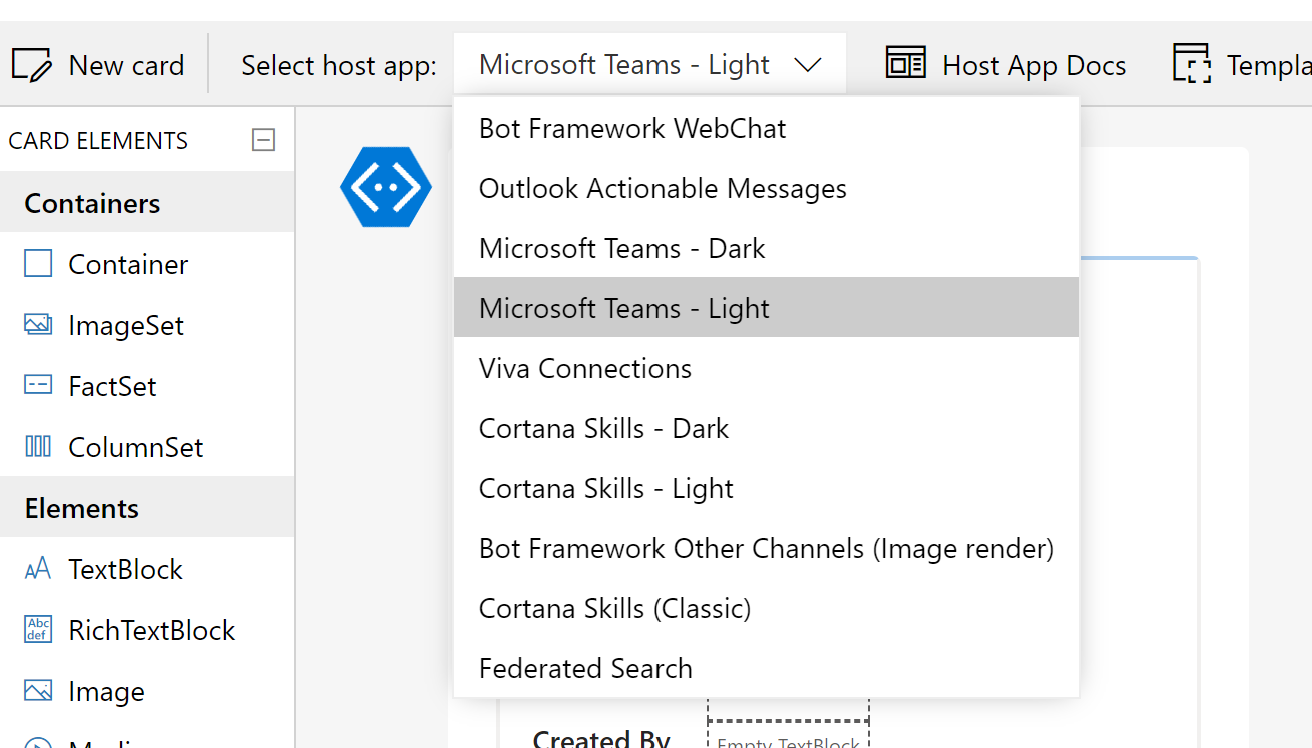
Now let's use the designer to build a card. The designer tool has several panels all important and useful. We’ll start with the top menu.
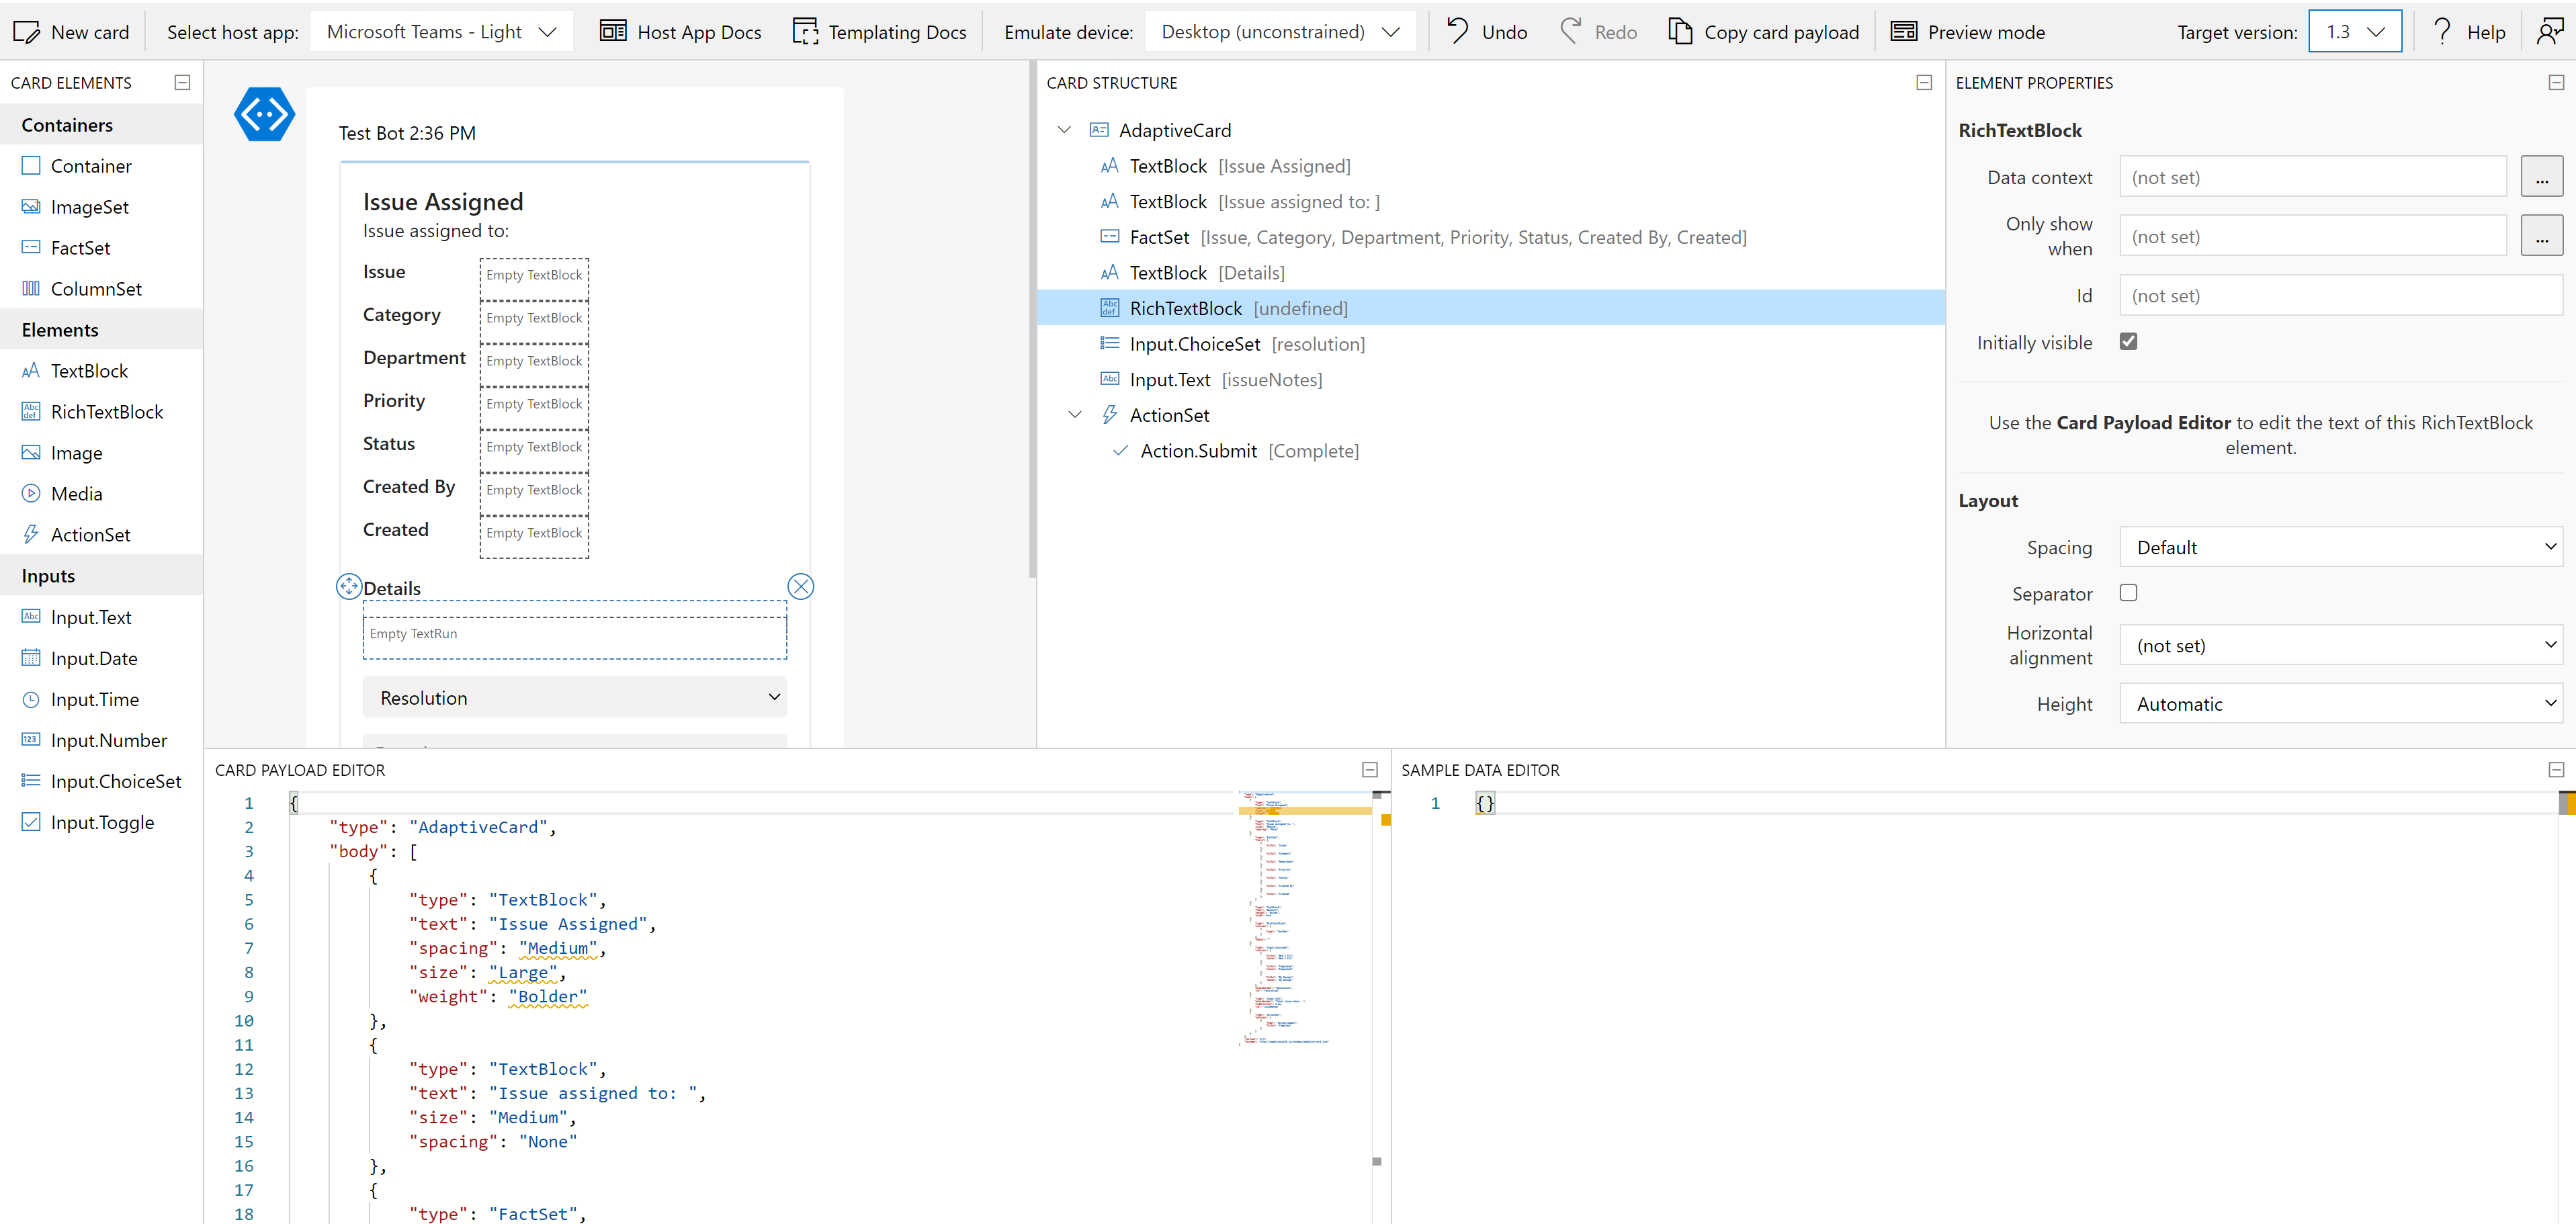
Probably one of the key things here to note is the option to choose the target platform for your adaptive card. In our case let’s choose `Microsoft Teams (Light)`.
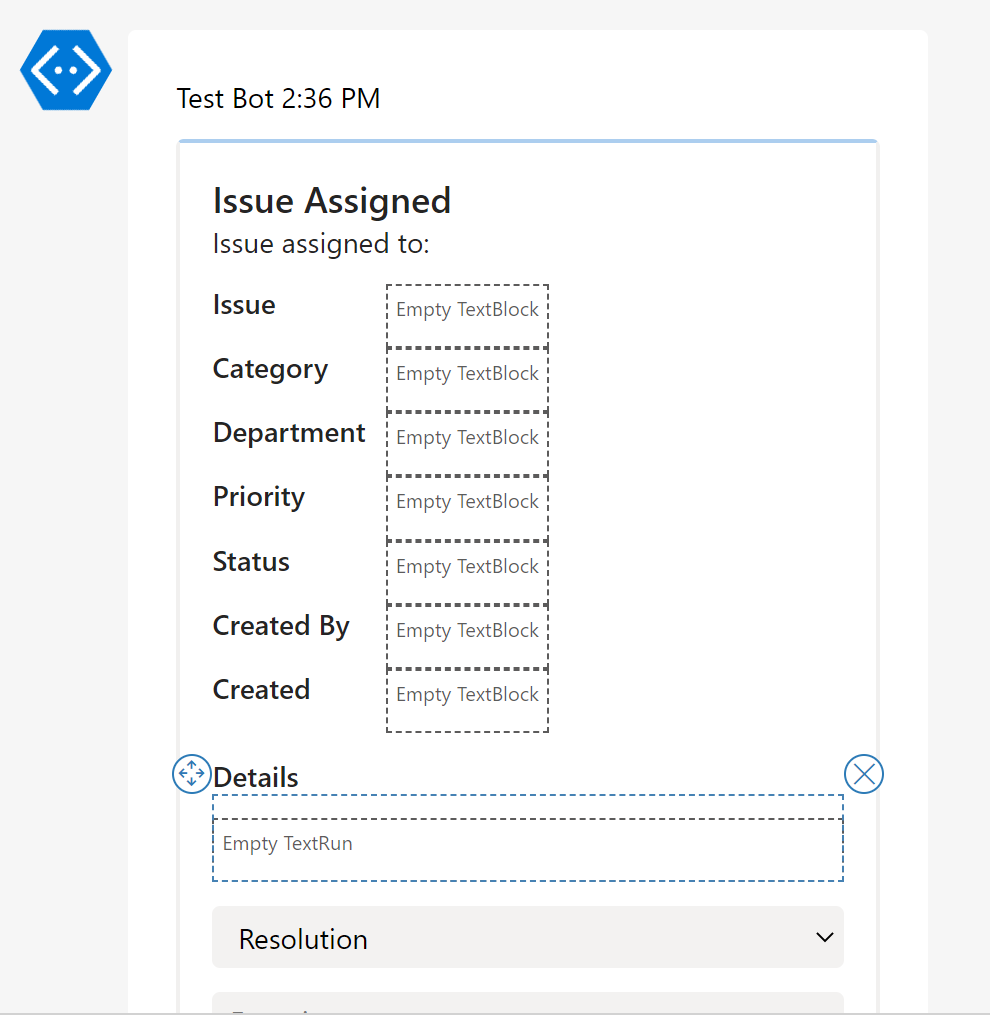
The Card
The next section to draw your attention to is the card itself. Here, you’ll see a preview of how all the fields will display on the card.
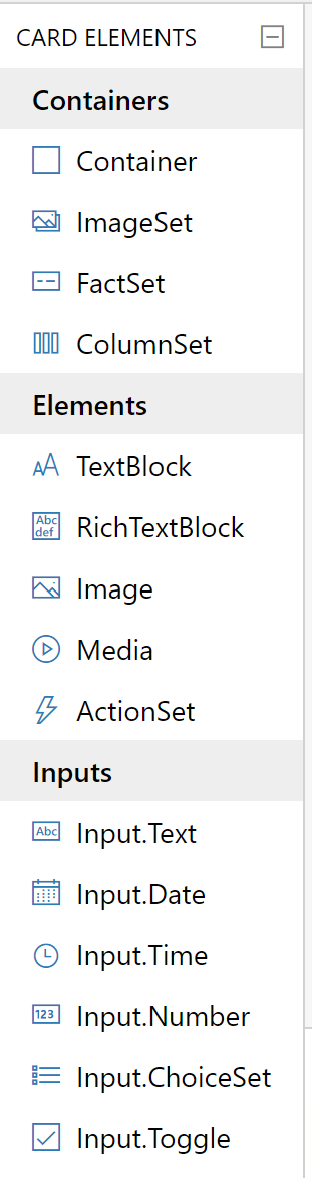
Card Elements
On the far left we have a list of all of the types of elements we can drop into our card.
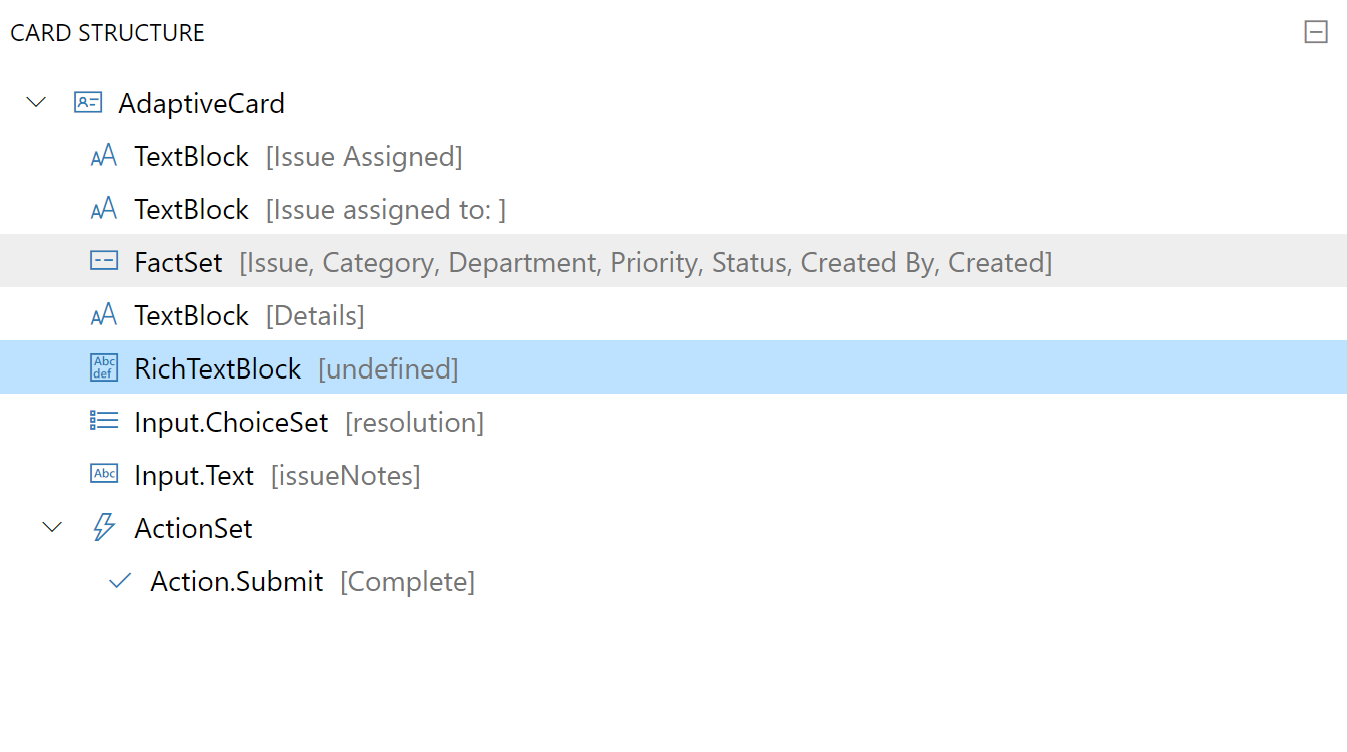
Card Structure
In the top middle, we have a kind of tree view of the card structure. This can be useful when your card gets fairly complicated. It provides an easy way to find and select the control you want to manage.
Element Properties
On the far right we have the properties panel. This will allow you to modify a selected control, what it looks like, what data is present, etc.

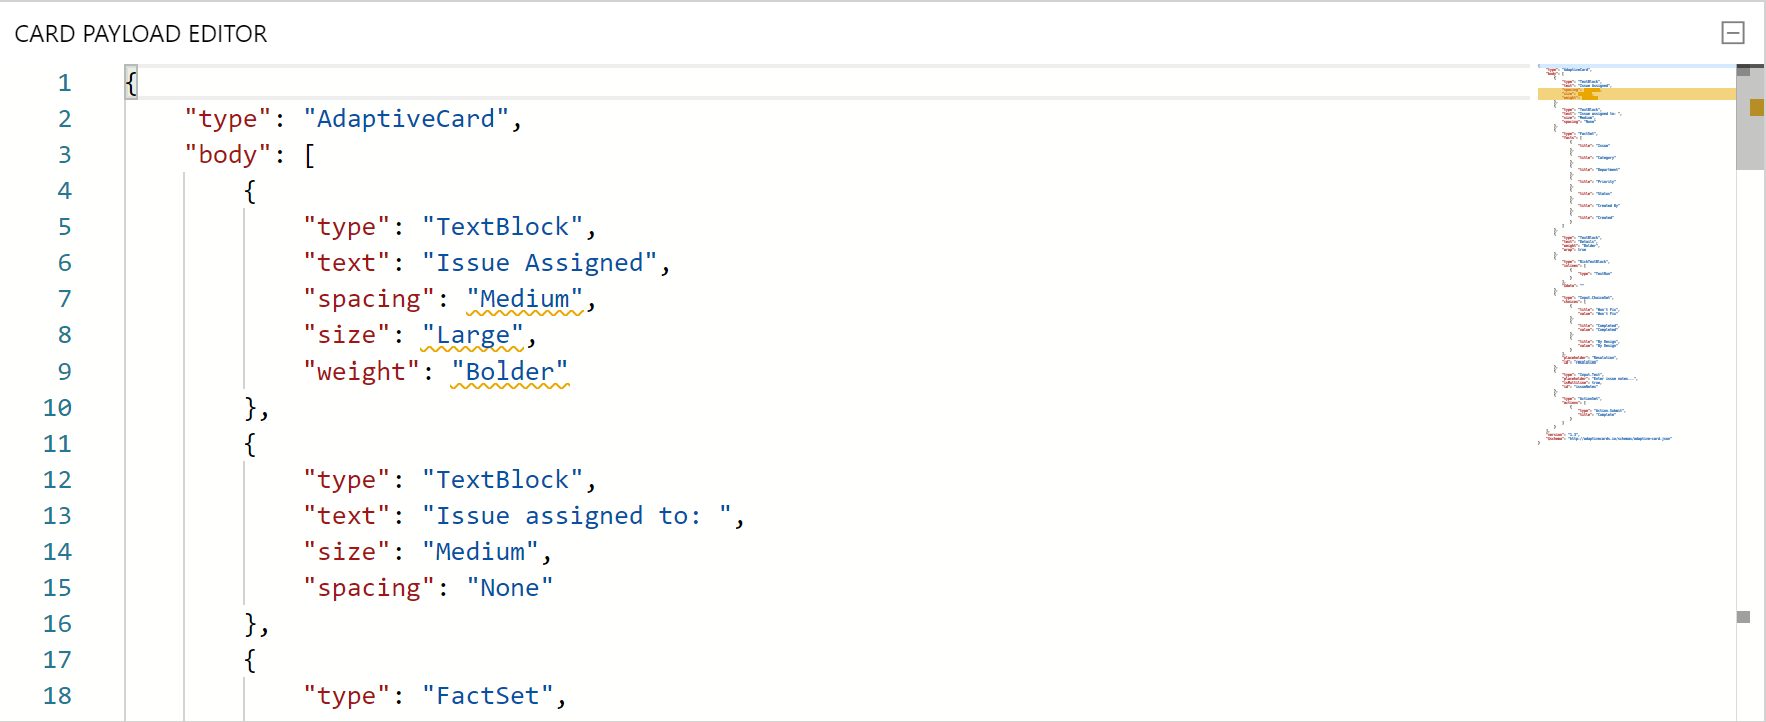
JSON Editor
At the bottom left you’ll see the JSON editor. If you’re like me, sometimes you like to feel like you’re writing code. This is also a place where you can paste the JSON from an existing adaptive card if you don’t want to start from scratch.
On the bottom right `Sample Data Editor` we have a place where we can define data that can then dynamically be pulled into the card.

The Fields
Let's take a quick look at my GitHub example here.
We have a title along with the following fields correlating to those on our Issue Tracker:
- A fact set to list the issue fields
- Text blocks for longer form content
- A Choice Set to allow the user to select resolution
- Input Text for the comments
- An Action Set with a Submit button to allow the user to complete their response.
Adding it to the Flow
Now it’s time to plug this into our flow. You can simply copy the text from the Card Payload and paste this into your Post Adaptive Card action’s Message property in your flow. Then all you need to do is add the dynamic content from your process into the message of the action.

Using the inputs from the adaptive card is also fairly easy. You can take these values and use them in another action in your flow as shown below.

Dynamic Field Picker Work-Around
There is a bit of a miss, at least in my tenant, in that the input fields from the post adaptive card action are not readily available in the Dynamic field picker in flow. To get this to work, you may have to simply paste something like this... `@{outputs('Post_adaptive_card_and_wait_for_a_response_2')?['body/data/FIELD_NAME]}` into your actions. Don’t forget to replace the first part with the name of your Post Adaptive Card action and also replace `[FIELD_NAME]` with the name of your card input.
Conclusion
Long story short, Adaptive Cards is a great way to use common and popular channels for communication to facilitate processes and apps that need user input. You can connect all the components of a system to each other and with the right people. And, you can solicit input from someone when it’s needed, instead of waiting for the user to log in to the app or check their e-mail, ultimately making your people more effective and your process more efficient.
Helpful links
Microsoft: Adaptive Cards Overview
Microsoft: Format Cards in Microsoft Teams
.jpg)