How to Set Up a Help Desk App With Power Apps

Microsoft has changed its documentation for how to set up the Help Desk App and doesn't provide full instructions anymore. Luckily, we've created this guide to help you through the process from start to finish.
Help Desk Template Setup
Back in 2020 we launched a blog/video called Creating a Help Desk App with PowerApps. It gave an overview of the Help Desk App Template that Microsoft provides in Power Apps, but it didn’t show the set up, because Microsoft had it all documented already in documentation and a video.
Well, that documentation has changed, and Microsoft no longer provides the full instructions anywhere other than an outdated YouTube video. The template found in the Power Apps template gallery also doesn’t provide any connections to datasources out-of-the-box either.
So we thought we’d create an updated version just for you. Here’s your guide to setting up the Help Desk App from start to finish.
There’s a few steps to this process. It includes setting up a SharePoint list, creating the app from the template, and connecting it all together with Power Automate.
Let’s go step by step.
SharePoint List Setup
The first step is to set up a SharePoint list to store the help desk tickets. This list should exist in a place where all of your users have access to, as it's a list they'll be "contributing" to.
Create a list called `HelpDesk`.
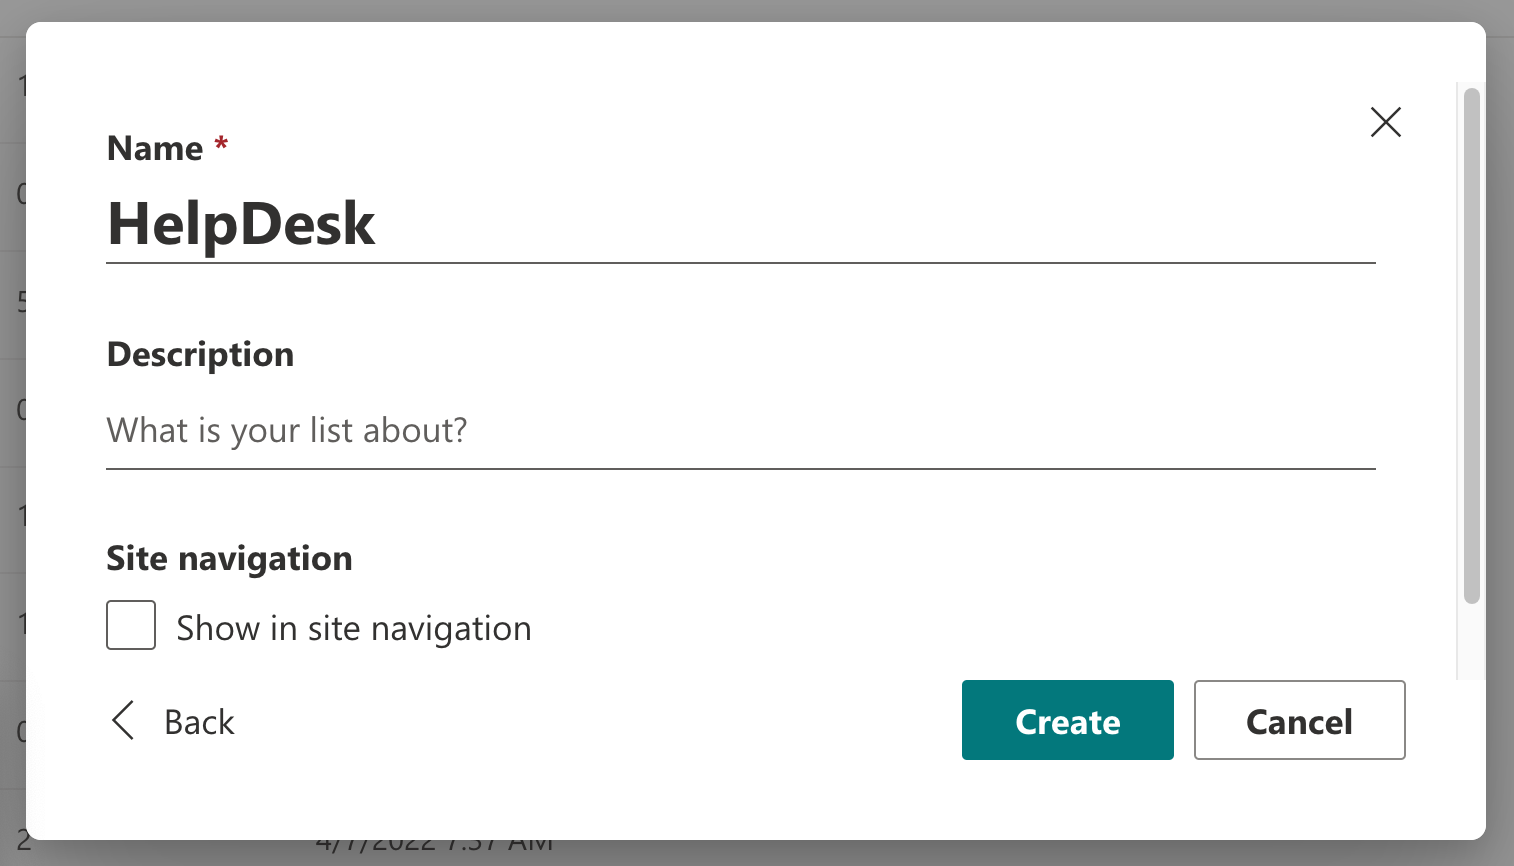
Now, add the following columns to the list:
Description
- Column Name: `Description`
- Type: `Multiple lines of text`
- Required: `Yes`
- Type of text to allow: `Plain Text`
Category
- Column Name: `Category`
- Type: `Choice`
- Choices
- ~`Laptop / PC Equipment Issue`
- ~`Laptop / PC Software Issue`
- Enforce Unique Values: `No`
- Display: `Drop-Down Menu`
- Default Value: `Laptop / PC Equipment Issue`
Percent Complete
- Column Name: `PercentComplete`
- Type: `Number (1, 10, 100)`
- Required: `No`
Priority
- Column Name: `Priority`
- Type: `Choice`
- Choices
- ~`HIGH`
- ~`MEDIUM`
- ~`LOW`
- Enforce Unique Values: `No`
- Display: `Drop-Down Menu`
- Default Value: `LOW`
Task Status
- Column Name: `TaskStatus`
- Type: `Choice`
- Choices
- ~`NOT STARTED`
- ~`IN PROGRESS`
- ~`COMPLETED`
- ~`DEFERRED`
- ~`WAITING ON CSR`
- Enforce Unique Values: `No`
- Display: `Drop-Down Menu`
- Default Value: `NOT STARTED`
Assigned To
- Column Name: `AssignedTo`
- Type: `Person or Group`
- Required: `No`
- Allow multiple selections: `No`
Lastly, adjust the `Title` field’s require that this column contains information to `No`.
SharePoint List - Check.
Now it’s time to setup the app.
App Setup
Since the template provided by Microsoft in the template gallery doesn’t save data, we’ll show you how to import an updated version of the template get it saving data to the SharePoint list.
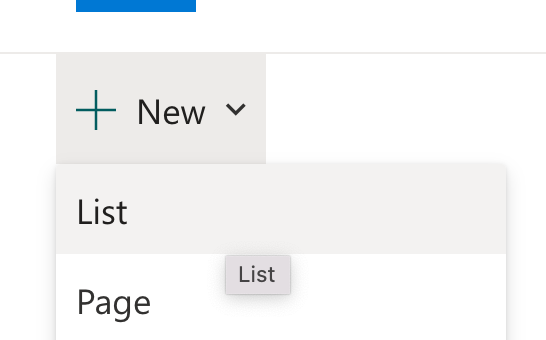
To import the app, open the Power Apps page at make.powerapps.com
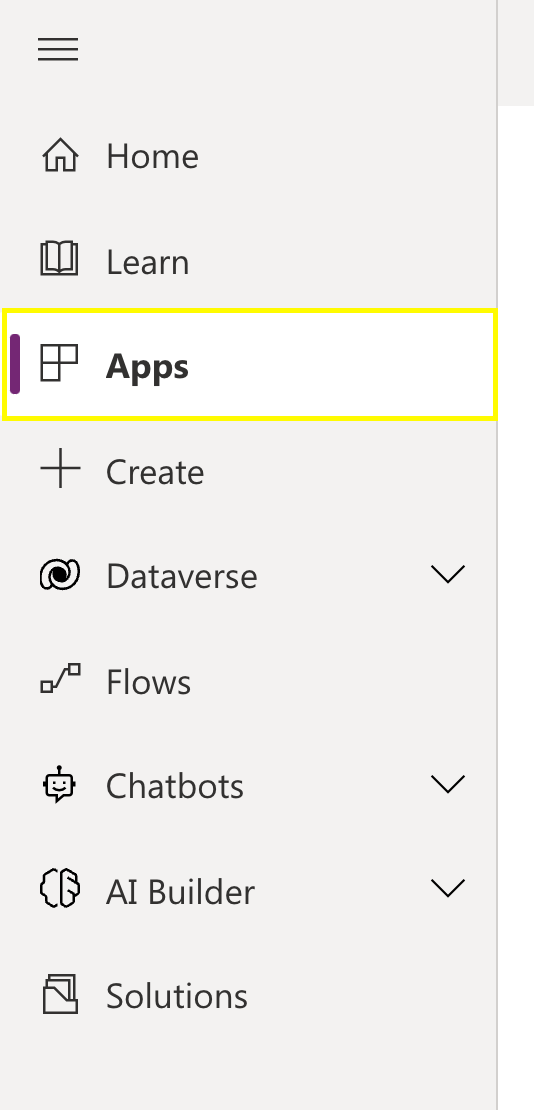
Click `Apps`
Next, select `Import canvas app`

Click `Upload`, and select the zip file you downloaded above.
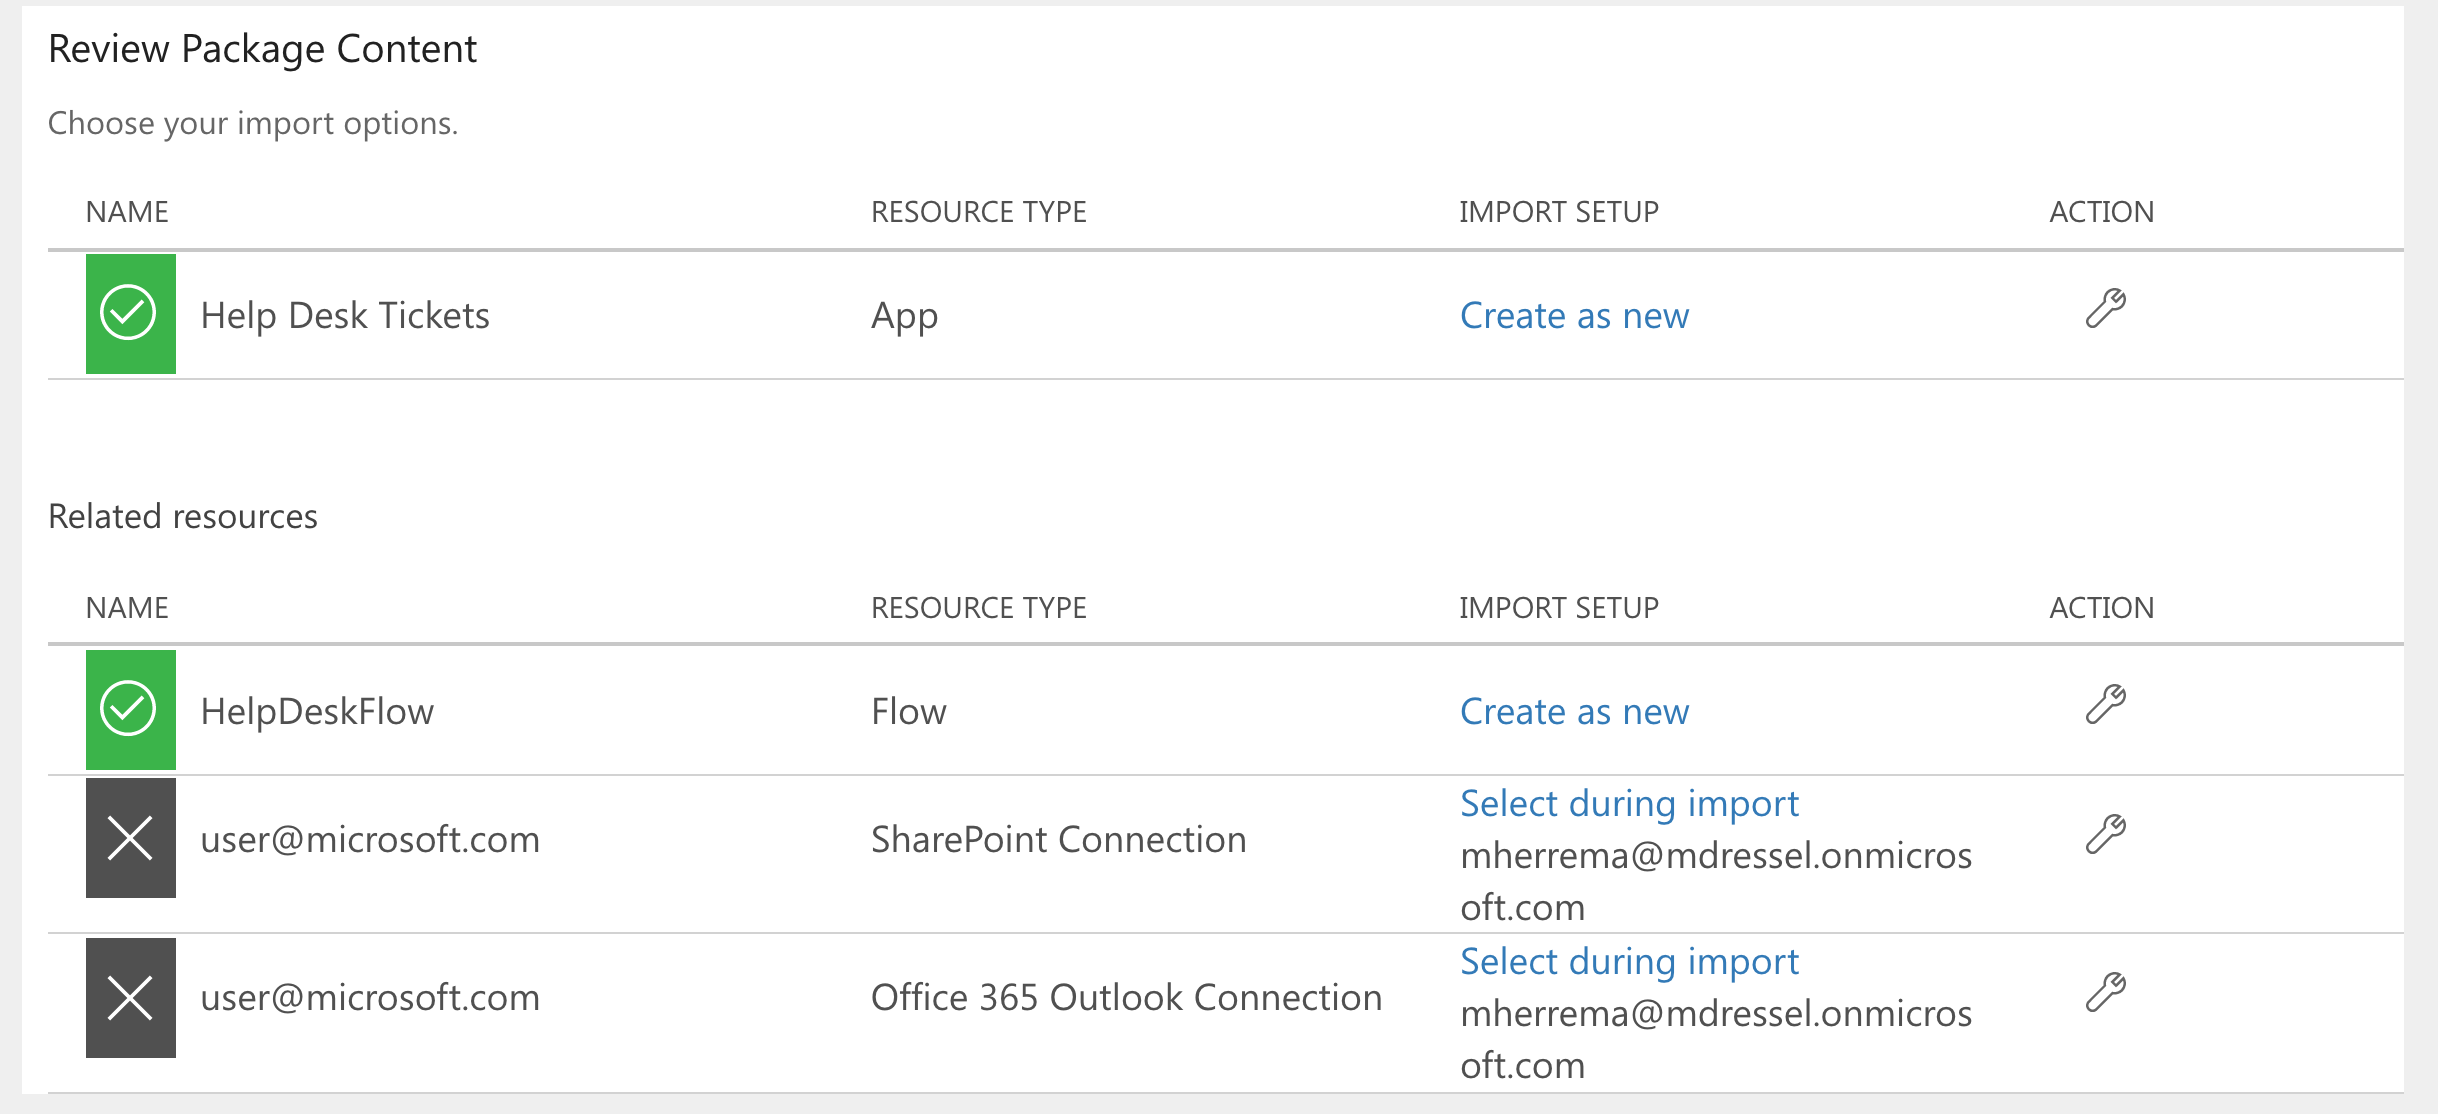
It will display a screen that lists all the contents of the package. Let’s make note of what’s here:
- Help Desk Tickets - this is the app itself that will get created during import
- HelpDeskFlow - This is a Power Automate flow that gets created which will connect everything together
- SharePoint Connection - This is the connection that will authenticate to the SharePoint list where tickets are stored
- Office 365 Outlook Connection - This is used by admins to look up users to assign tickets to

Note that there are two red alerts on the page that we need to resolve.
Click the “Select during import” link next to each of them to configure the connection.
Either select an existing connection that displays in the Import setup panel, or click `Create new`.

Hopefully yours ends up looking like this!
Then you can click `Import`.
It will take a little while to import, but sit tight.
Looks like things were successful!

Click the `Open app` link and we’ll get to wiring up the app!
Wiring Up the App
The first thing that will display when you open the app is a modal where you need to allow the connections. Click `Allow`, and it will open up the Power Apps Studio.

You’ll be greeted with the home screen of the app. There’s a few updates we need to make here to get it all to work.
Set the Admin Email
The way that the app knows about who should have Admin privileges is configured in the app’s OnStart property. Note that this property is being phased out by Microsoft, and we’ve written up on how to migrate away from OnStart in a separate blog.
Because of this, we’re going to move some code from the app’s OnStart to the Login Screen’s OnVisible property.
To clear out the old code, click the App in the left tree view.
Click on the drop down in the top left and select `OnStart`.
Expand the Formula Bar so you can see all the code being run.

Delete all of the code here.
Next select the `LoginScreen` on the left, select `OnVisible` in the dropdown, and paste in the following code:
The line we want to adjust is regarding the AdminList. Replace “user@microsoft.com” with your email, or whoever you’d like to be the admin. If you'd like to have multiple admins, enter the emails separated by a comma like `"email1@domain.com", "email2@domain.com"`.

SELF ASSESSMENT
Is your business getting full value from your M365 subscription?
Billions of dollars are wasted each year on underused subscriptions. Take 3 minutes to find out where your tools are driving results, and where they’re holding you back.
Find Out Now
Is Team Communication Holding You Back?
Find Out in Just 2 Minutes.
Take our quick scorecard to uncover communication gaps and hidden barriers within your team.
Connect to the HelpDesk List
Next click the `View` tab, then `Data sources`. Then skip down to the "Removing the Data Source" section.
If you don't see the `View` option, Microsoft has lovingly updated the menus. There are a few steps to getting this panel back. Follow along below. This may change over time. If you discover these steps don't work, please comment and let me know.
Select the `Settings` cog in the bottom left of the screen.
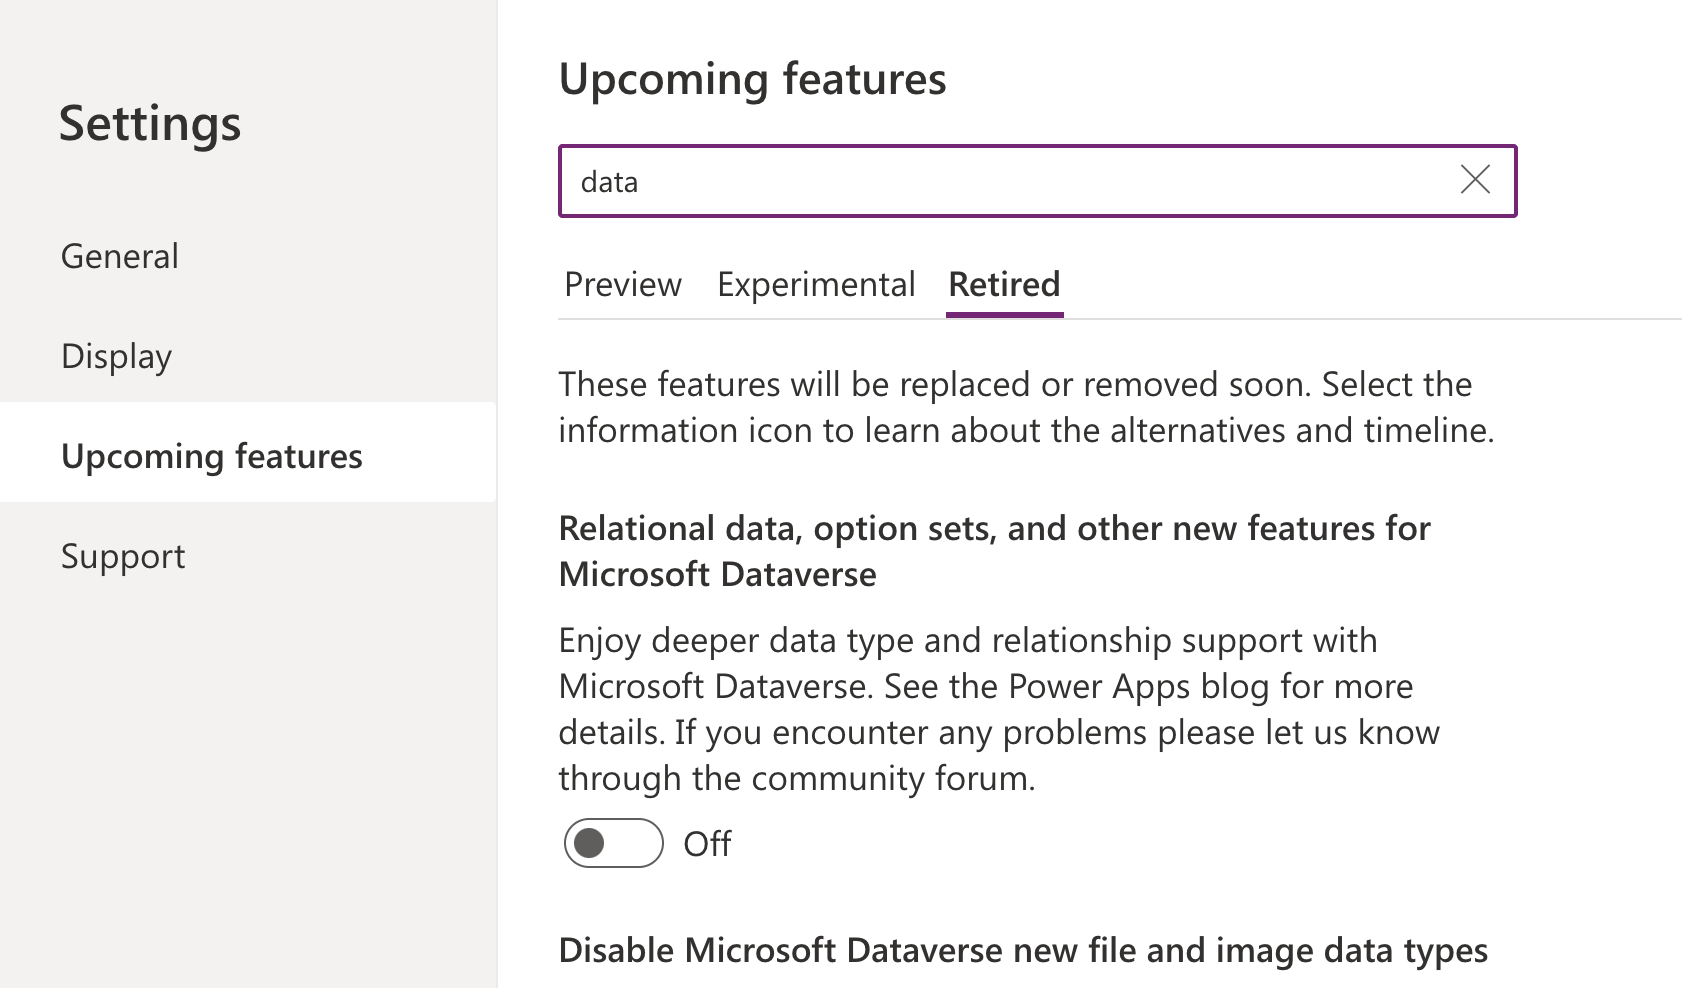
Then select `Upcoming Features`.
Search for `data`, select the `Retired` tab, and toggle on `Relational data, option sets, and other new features for Microsoft Dataverse`
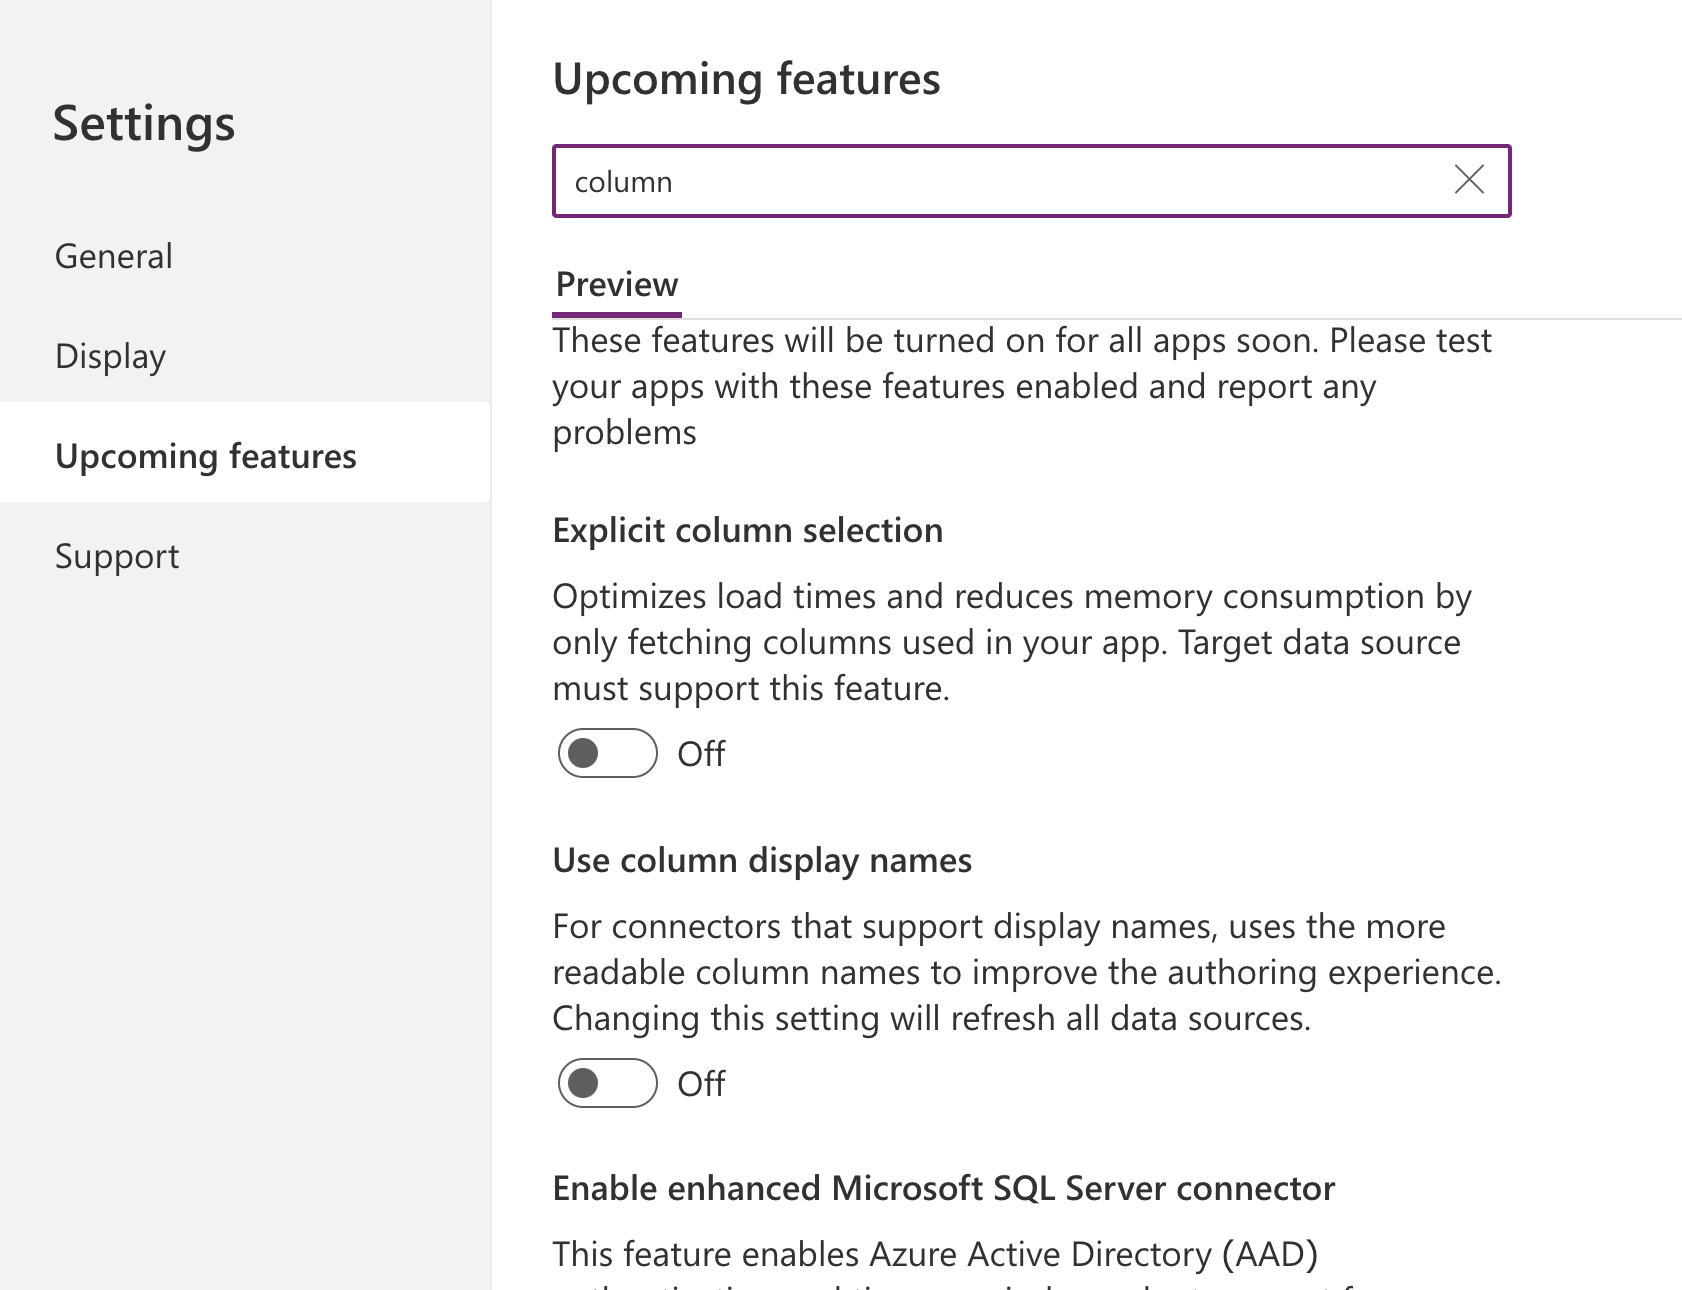
Next search for `column`, and turn on `Use column display names`
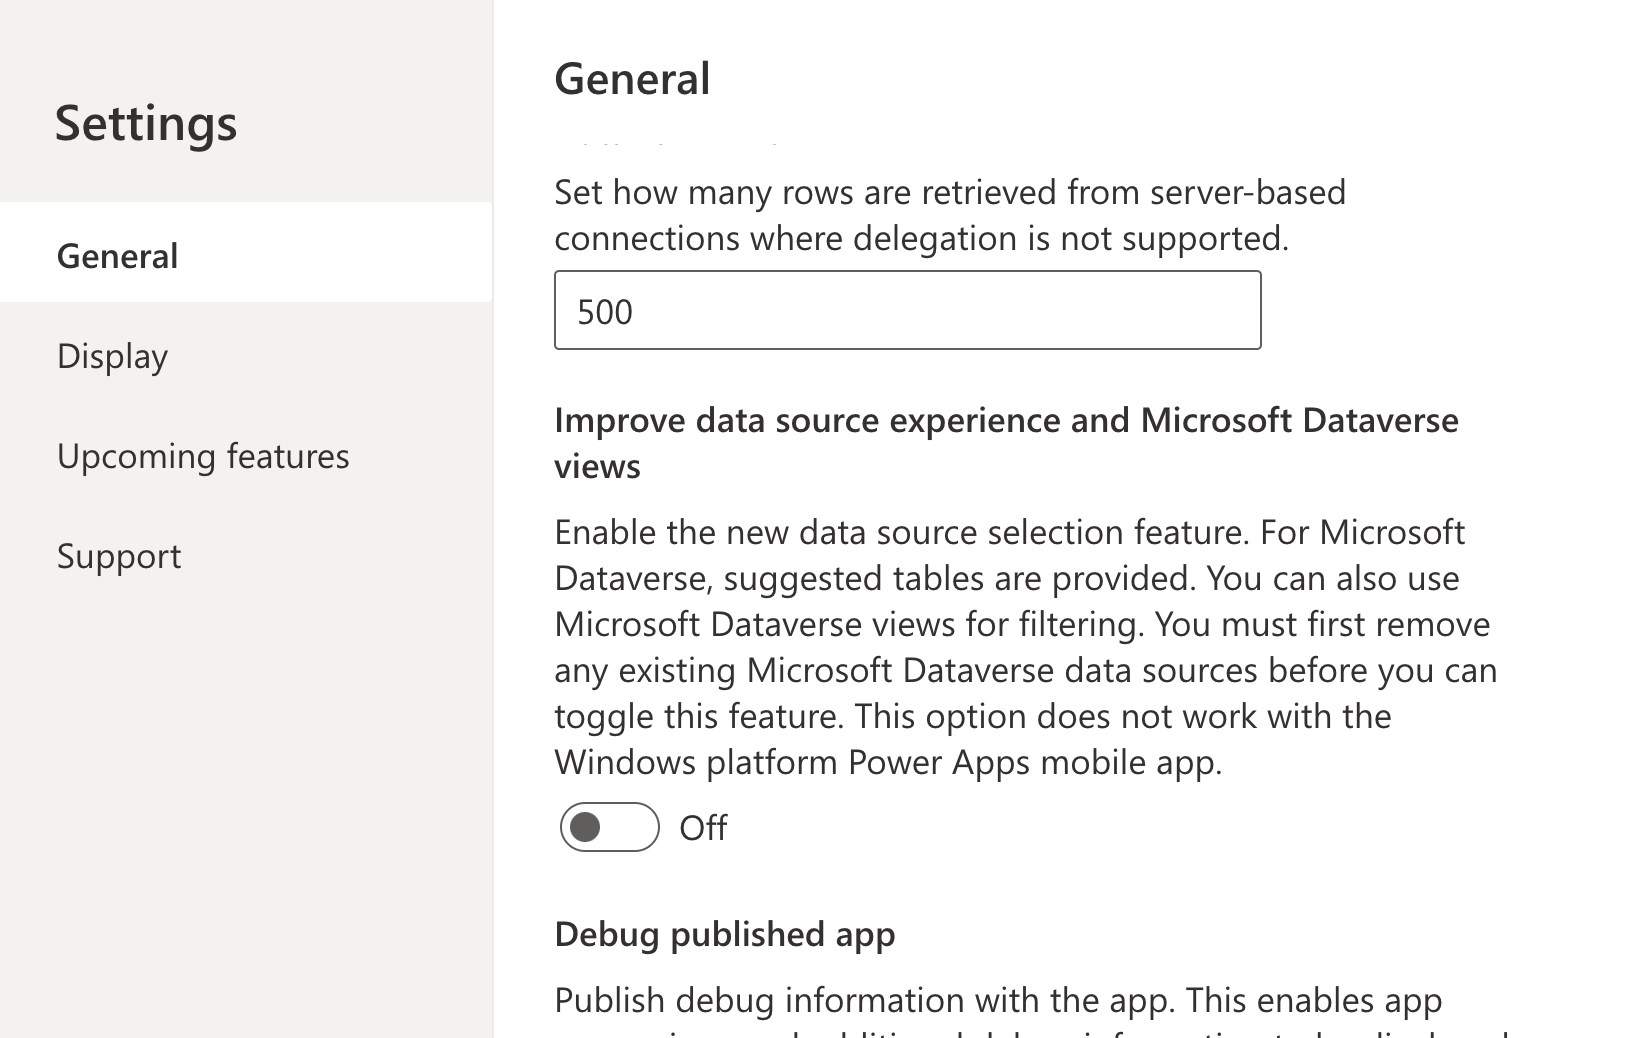
Finally, go to `General` within the settings panel, and toggle on `Improve data source experience and Microsoft Dataverse views`
This will add a `Data` menu on the left side of your Power Apps window which you can open and continue with the instructions.
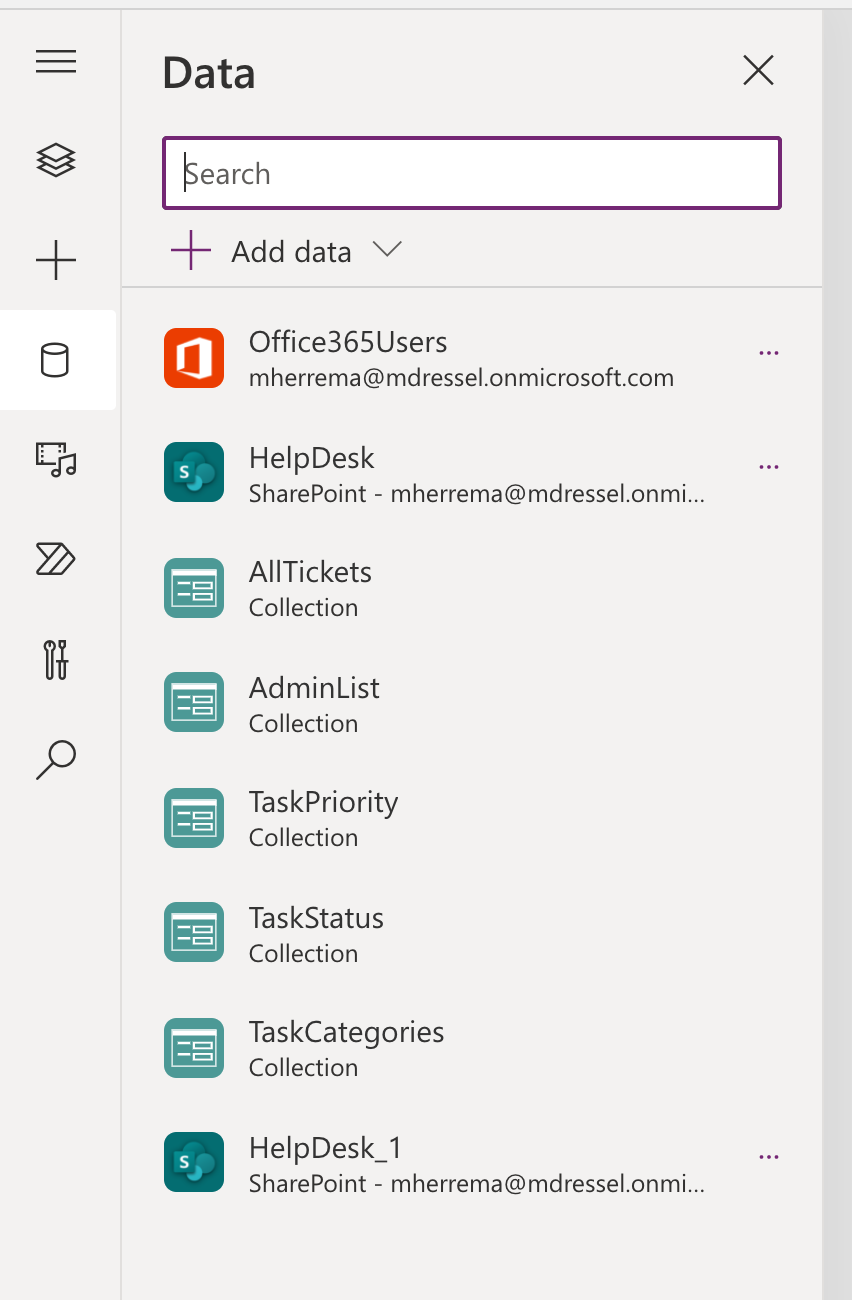
Removing the Data Source
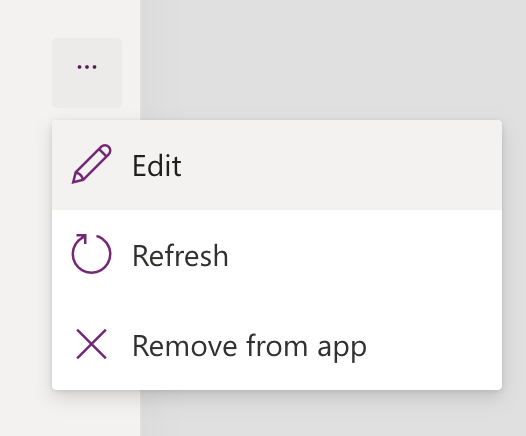
Find the HelpDesk connection to SharePoint, hover over it, and select ellipsis next to it. Click `Remove` to remove the connection, as we’ll want to connect it to our new list.
Now click `Add data source` and search for SharePoint

Select the Sharepoint result displayed.
In the next panel, find the site where you created the HelpDesk list and select it.
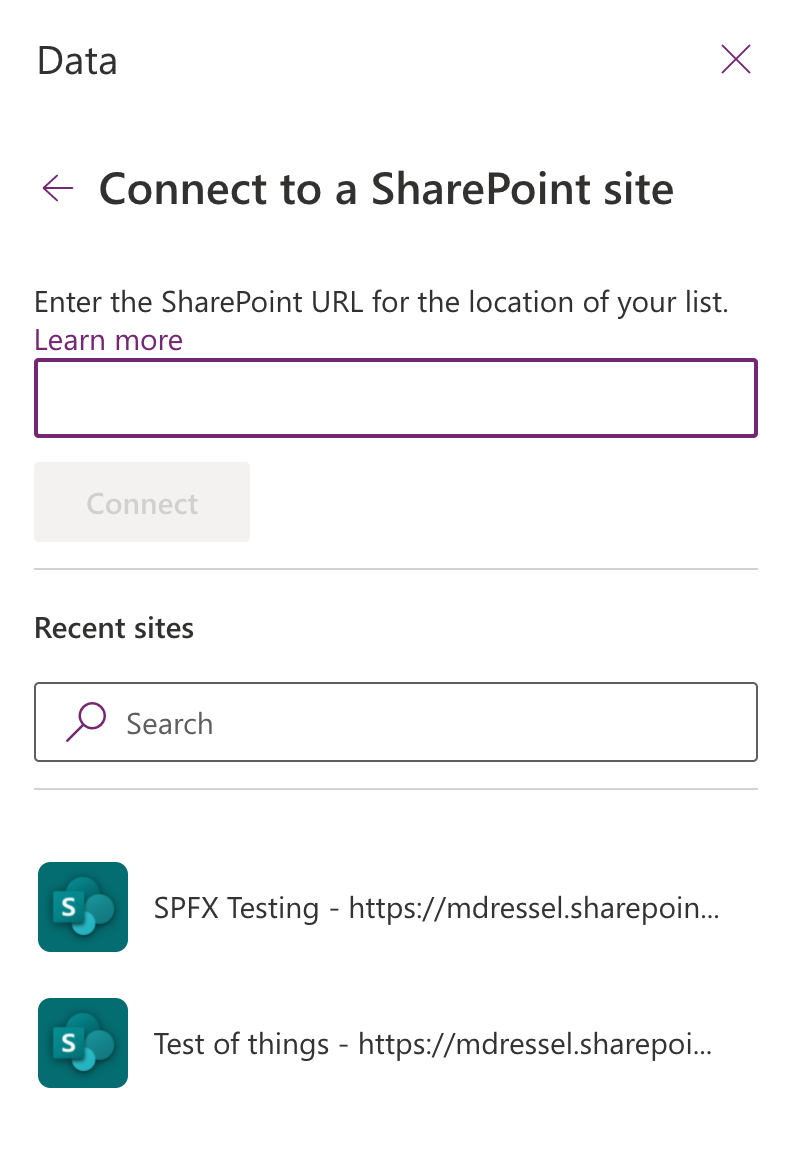
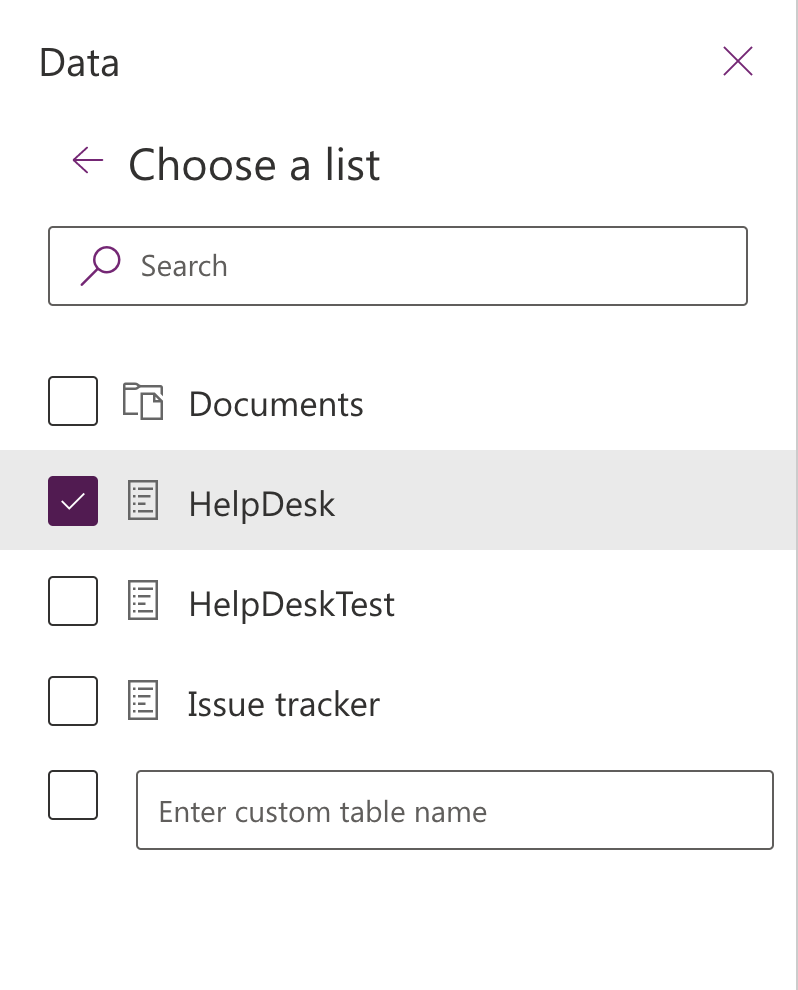
Check the box next to your list, and click `Connect`.
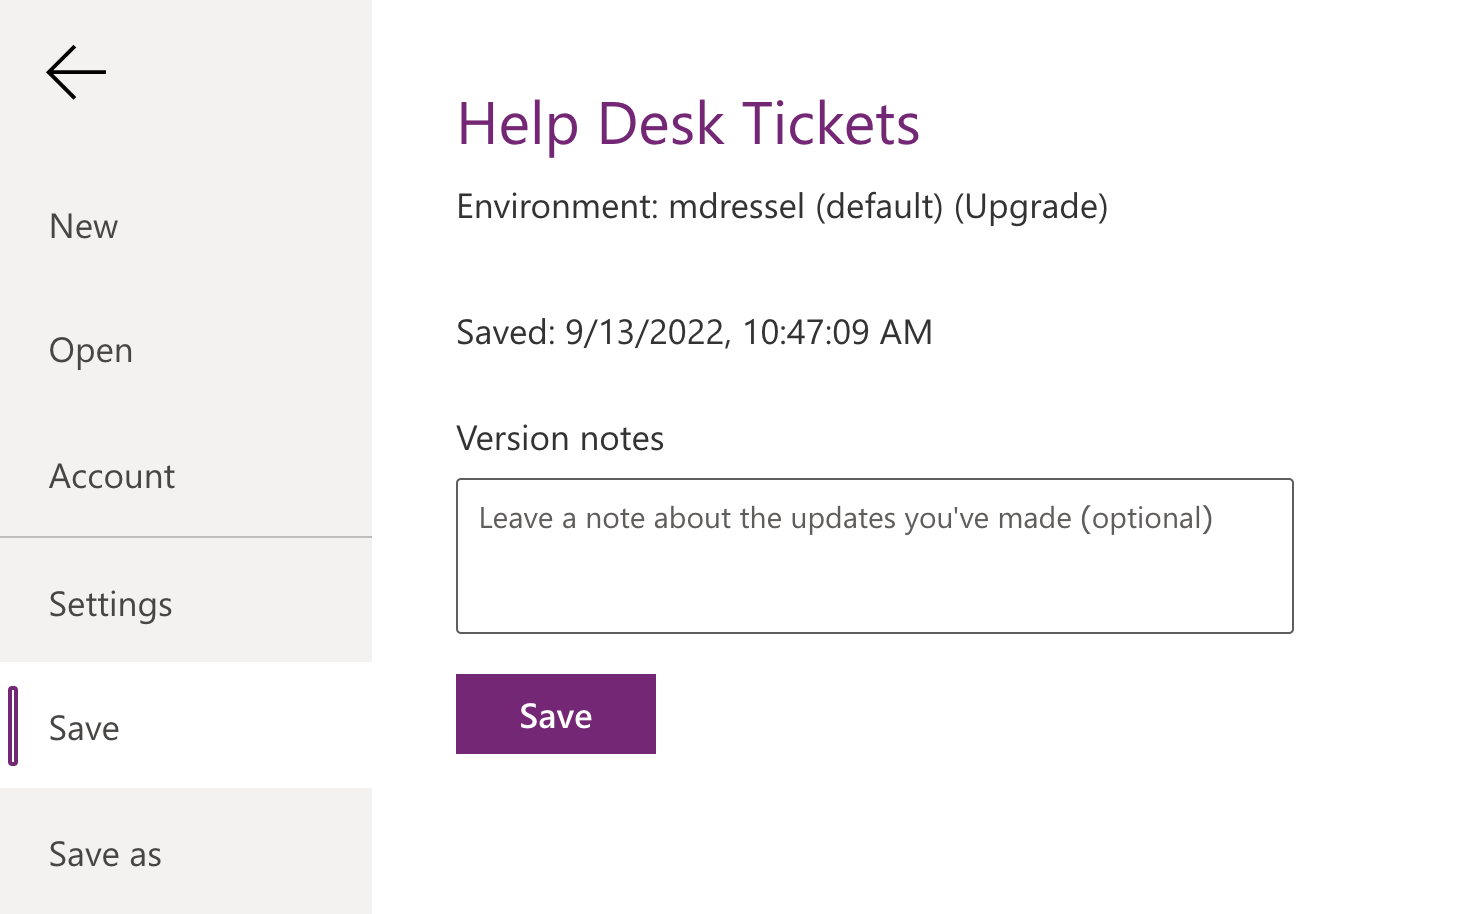
Now save your app, then publish it.

Next up, we have to configure the flows used by the App.
Modifying the Flow
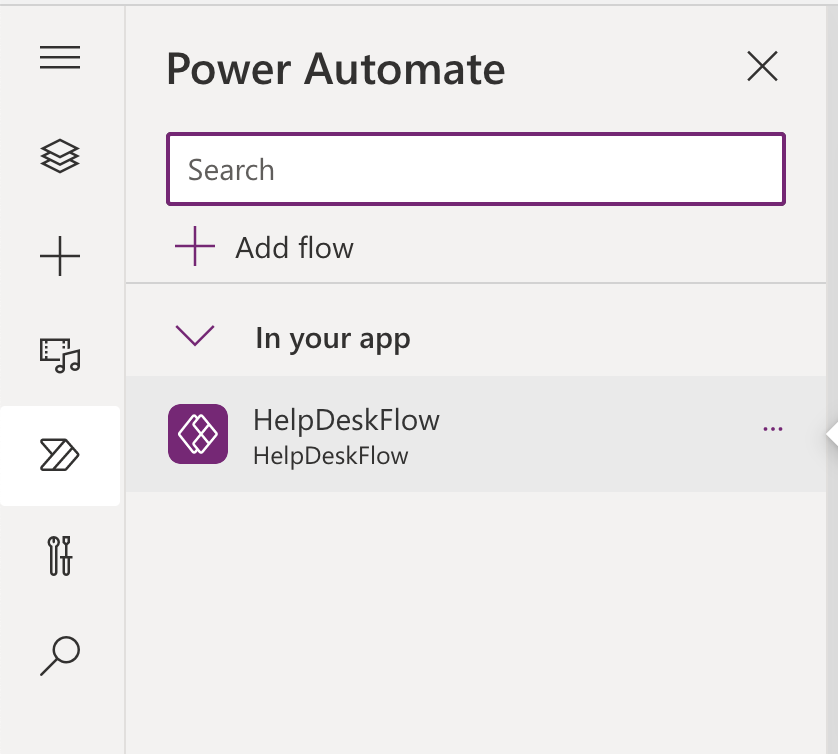
Select the Power Automate tab on the left, and you’ll see the flow that got created. Click the ellipsis next to it and select `Edit`.
If this brings you to an error page, navigate back to make.powerapps.com
Select Flows in the left panel.
Find HelpDeskFlow, and select the Edit pencil next to it.

Welcome to Power Automate!
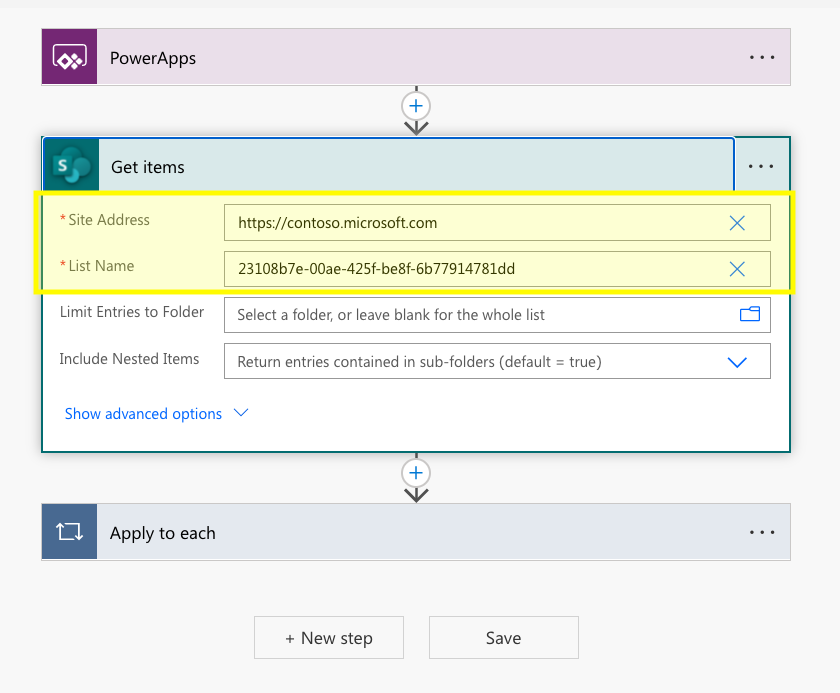
Expand the Get items action, and adjust the Site Address and List Name to the site and name of the list you created earlier. If you clear out what is currently entered into those boxes, some suggestions will display that will make finding your list easier.
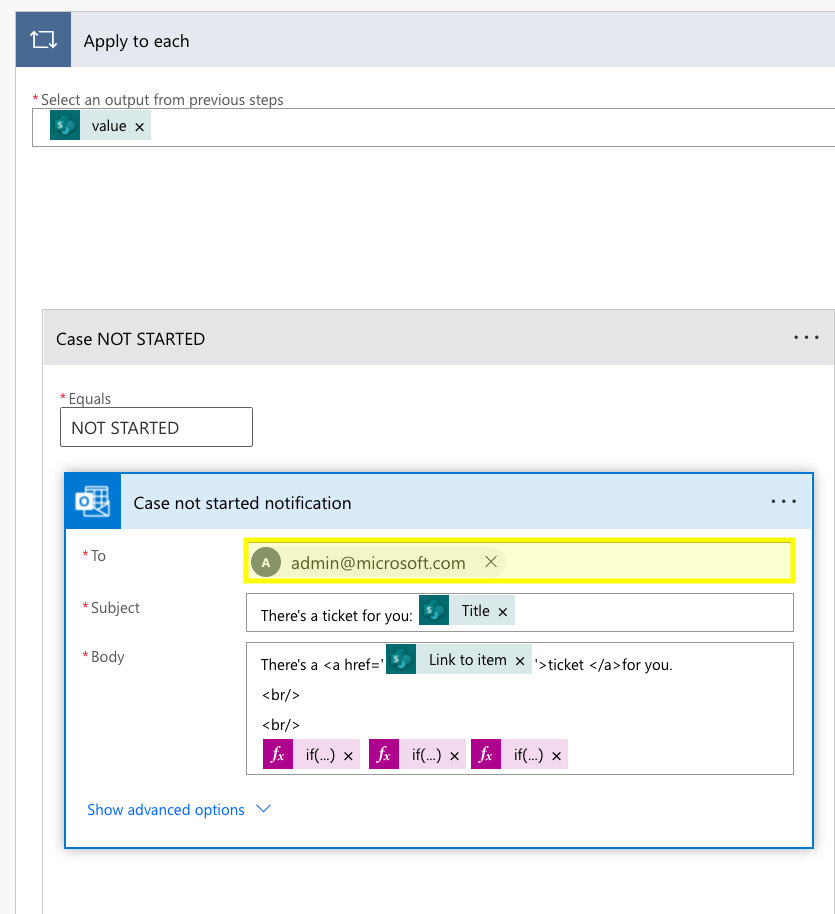
Now expand the Apply to each, then the Switch, then Case NOT STARTED, and lastly Case not started notification. Adjust the To field with the email of the admin who you would like to receive an email when a new request gets submitted.
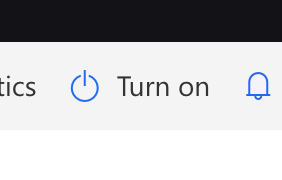
The last step is to turn the flow on.
When you are viewing your flow, in the top bar there is an action to `Turn on`.
That’s all there is to it! You now have a Help Desk App that can be used by your team to submit tickets and manage their lifecycle.
Want to Adjust the Dropdown Options?
We've seen comments about wanting to add additional choices to the dropdowns. Right now, the options pull from a manually created collection, not from the SharePoint list.
If you'd like to add options to the SharePoint list and have them selectable, you can change the dropdown's `Items` to pull from `Choices([@SharePointList].ChoiceColumn)`, and it will display the choices available in the choice column, so adding one in the SP column will add it to your dropdown.
.jpg)