Trigger Flows from any Message in Microsoft Teams

If you've ever wanted to take action on a message in Microsoft Teams, we'll show you how!
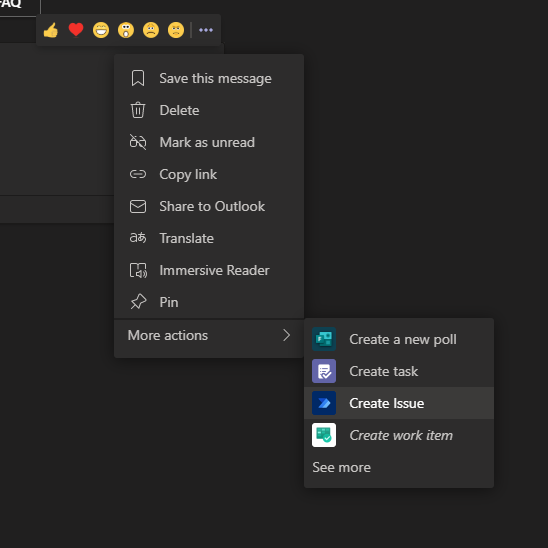
The More Actions Mystery
If you have ever poked around the option available to you for a message in Microsoft teams you might have noticed a menu called `More actions`. This menu has some interesting integrations that allow you to take action on a message and you can add new actions by activating Teams apps and features.

What if you want to do something completely specific to your needs? You can use Power Automate!
Creating your flow
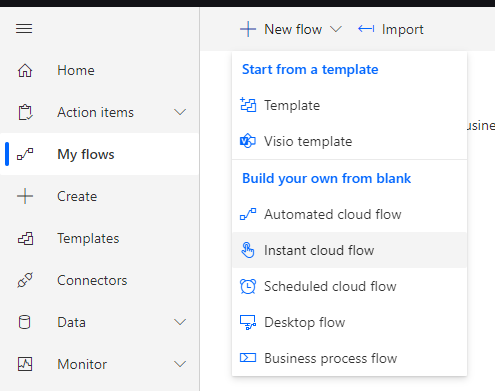
Sign in to Power Automate and then select `My Flows` > `New flow` > `Build your own from blank` > `Instant cloud flow`.
Now you just need to fill in a name, select `For a selected message`, and click `Create`.
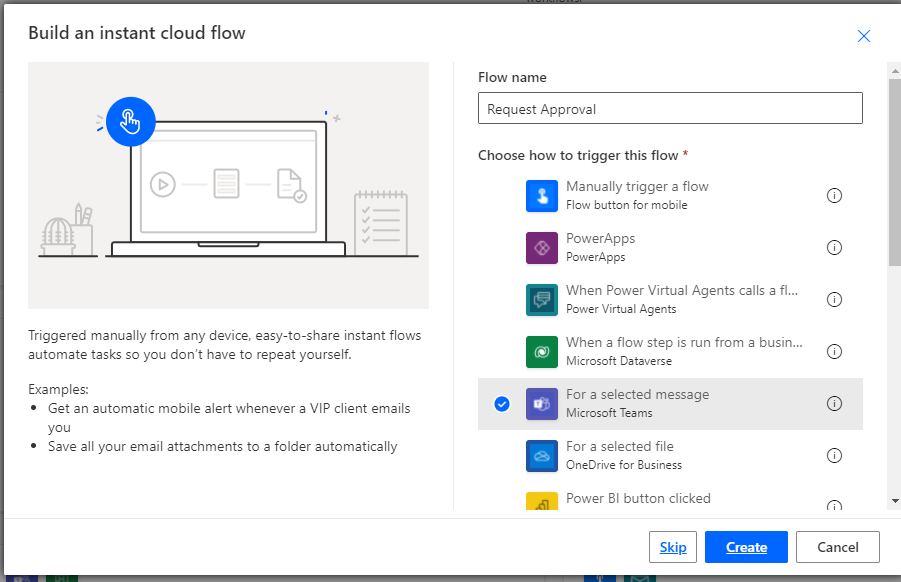
This created a new flow that will be triggered when a user selects your flow from the `More actions` menu.

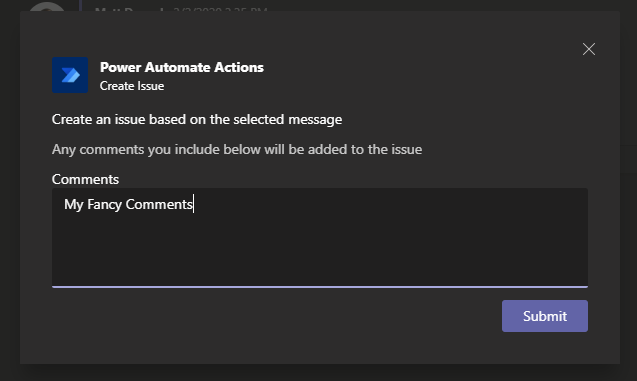
If your flow doesn’t need any more information from the end-user you could just add steps right below this, but the chances are that you want to interact with the user to gather or confirm information. You can do that by clicking `Create Adaptive Card`. This will open the adaptive card and you can customize what the user will be shown to include collecting some additional information from the user that you can use later in the flow.

In my case, I have modified the adaptive card to ask the user to enter additional comments before I create additional work.
Note that you can not use dynamic content if you utilize the adaptive card in the trigger. This is because the flow hasn’t been started at the time the adaptive card is opened. If you want to use dynamic data in your adaptive card you would leave the adaptive card on the trigger empty and then send an adaptive card to the user using the `Post an Adaptive Card to Teams channel and wait for a response` or `Post an Adaptive Card to a Teams user and wait for a response`.
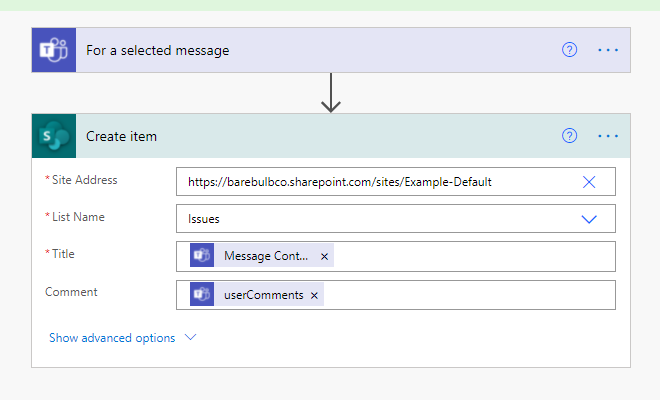
At this point, you can add any actions you want to do the work you need to do. In my case, I am simply creating a list item with the text of the message and the comments.
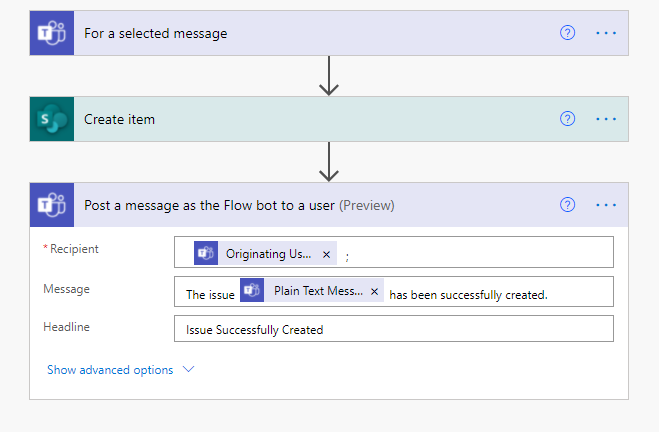
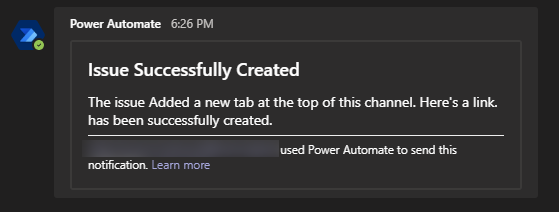
Now the only other thing I would recommend is for you to send a message back to the user to let them know that the flow succeeded. You can do this with a simple `Post a message as the Flow bot to a user` action.
Note that the following are also required for your Flow to show up in the `More actions` menu.
- Your flow must be created in your default environment. If you aren’t sure what the default environment is check out this blog for some details.
- Your tenant must have the Power Automate Actions app enabled in the Teams admin center. This is enabled by default.
Test It Out
Assuming you have everything set up correctly, you should now see the following in Teams. Note: the name of the option in the “More actions” menu will be the name of your flow.
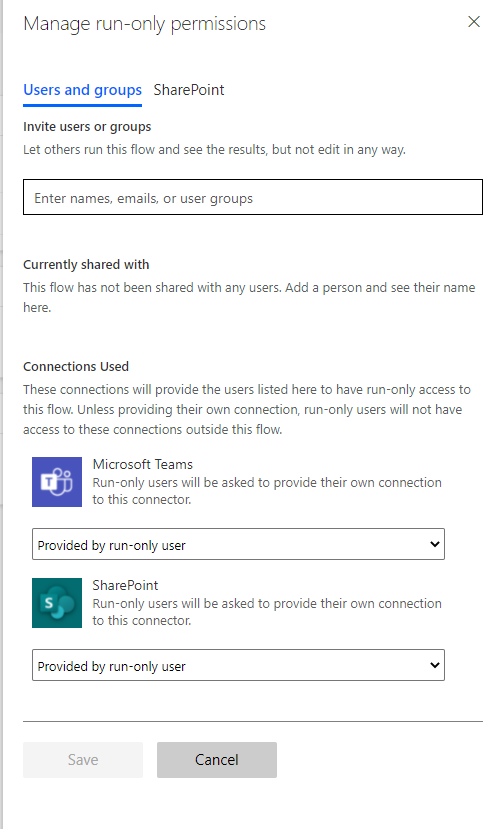
How do I give access to others?
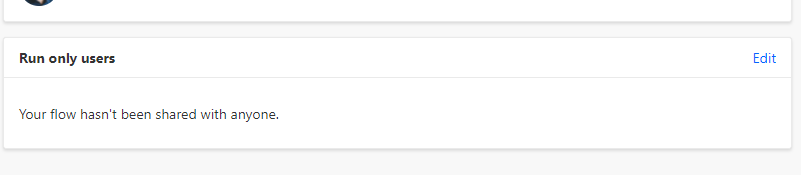
Now that you have tested that this works for you, how do you give others access to this? To allow other users to take advantage of this new action you just need to add them as `Run-only users` and make sure they have access to all the resources the flow uses.

SELF ASSESSMENT
Is your business getting full value from your M365 subscription?
Billions of dollars are wasted each year on underused subscriptions. Take 3 minutes to find out where your tools are driving results, and where they’re holding you back.
Find Out Now
Is Team Communication Holding You Back?
Find Out in Just 2 Minutes.
Take our quick scorecard to uncover communication gaps and hidden barriers within your team.
.jpg)