Meeting Capture App Overview

Having a productivity app can help streamline your process for meeting with people. It allows you to see a list of your daily meetings (as scheduled in Outlook), and for each meeting, you can view attendees and email them directly, see meeting details, take notes, and more.
What Kind of Meetings Benefit From This App?
Meetings That Happen Face to Face
This app helps digitize information you need at the beginning of the meeting (like attendees & meeting details) and information you produce during the meeting (like notes, assigning tasks, capturing sketches/pictures). With easy exporting afterward, it can save you from having to produce & share this content later.
Virtual Meetings on Platforms like Zoom
The strength of this app lies in connecting to data in the Microsoft ecosystem and putting it all in one place. This keeps you from doing a lot of window-switching during meetings and helps focus more on the meeting itself.
Virtual Meetings on Microsoft Teams
This app may not be very useful for Teams meetings, as much of this functionality is duplicated in the Teams experience. However, if you want to customize or add new features on top of what is available in Teams, modifying this tool with the Power Platform is a good way to go.
Requirements
This solution uses four different Office 365 apps: Power Apps, Outlook, OneNote, and Planner. Most Office/Microsoft 365 subscriptions come with these apps, but to double-check you can go to www.office.com, click on “All Apps” in the lower-left corner, and make sure you can see each app in your list.

If you don’t see Power Apps, it could be that it doesn’t come with your subscription, but it could also just be that your IT admins have it disabled for your profile, so it might be worth reaching out to them to check.
Walkthrough
When you open the app in Power Apps, the first screen you see is a list of your Outlook meetings for the day. If one of those meetings is currently happening, the app will automatically select it for you.
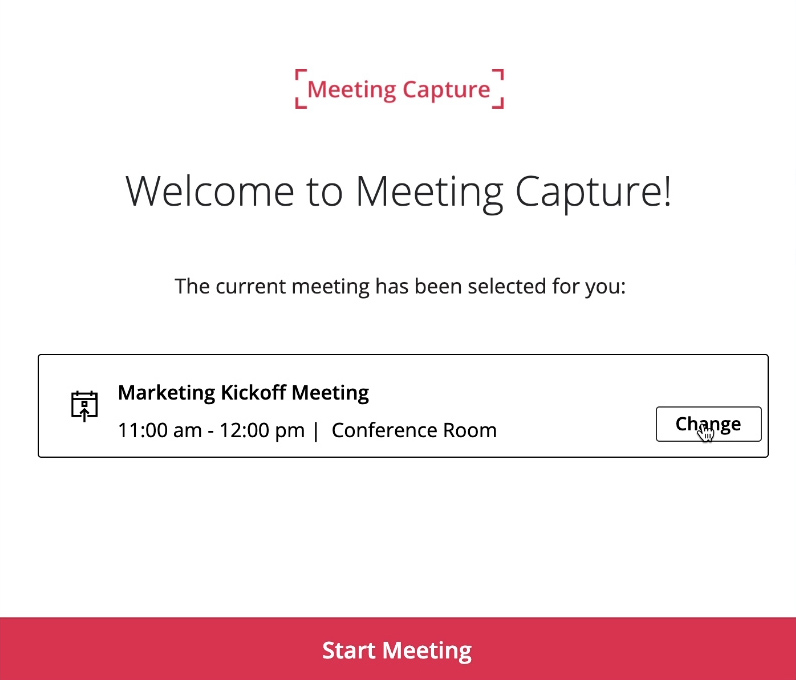
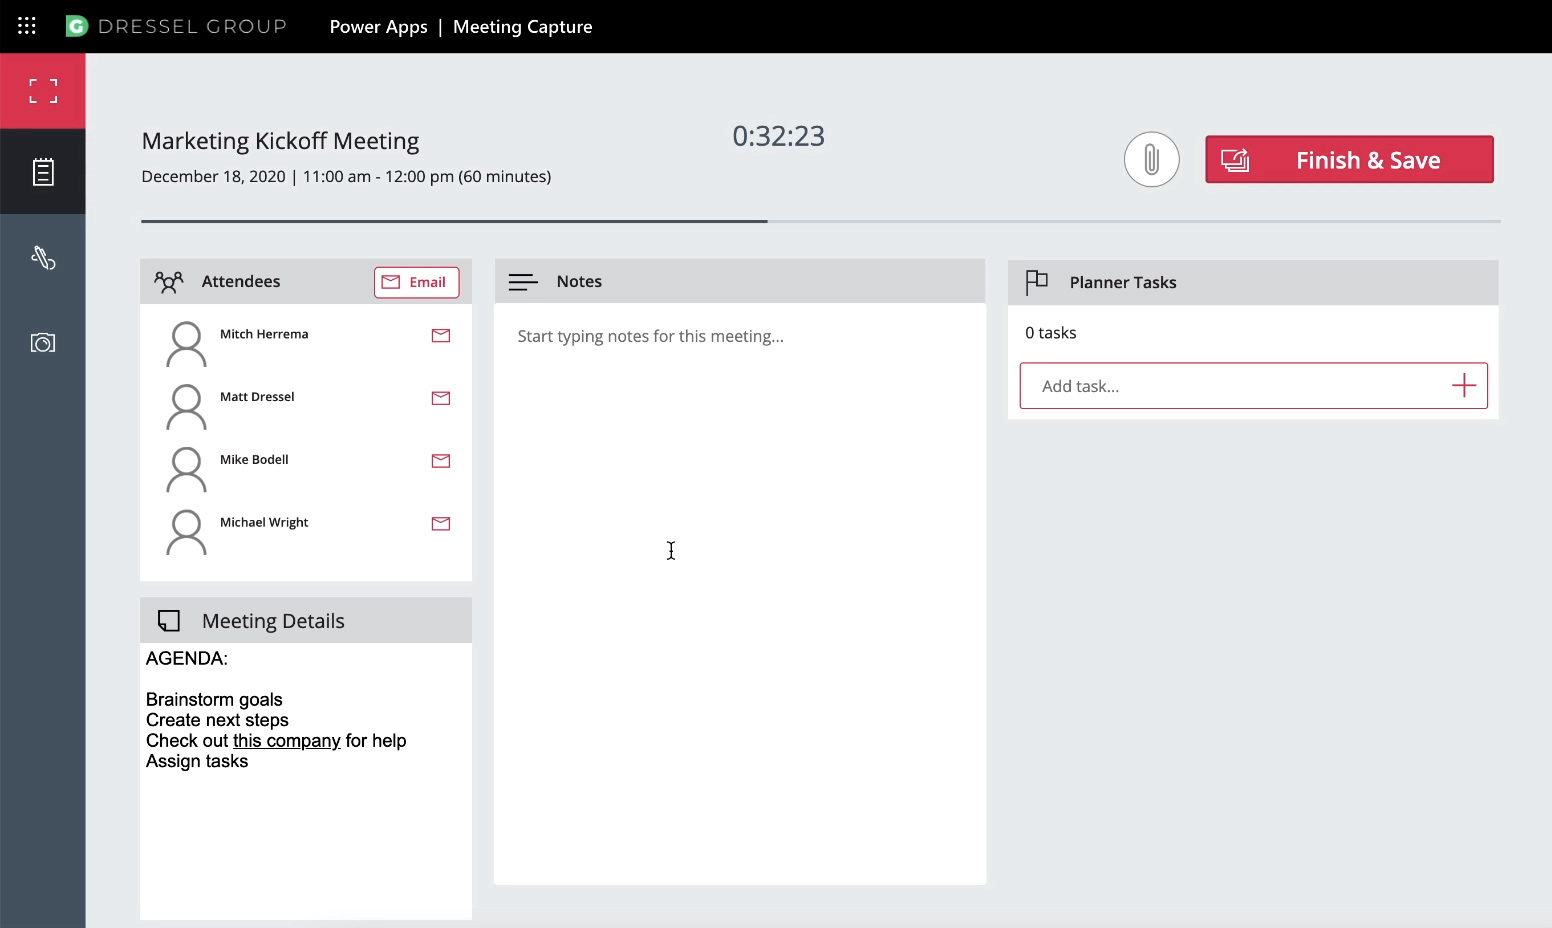
Once you select the meeting, you’ll enter the main screen of the app where you can:
- See meeting title, date & time at the top
- See remaining meeting time at the top with a sliding progress bar underneath
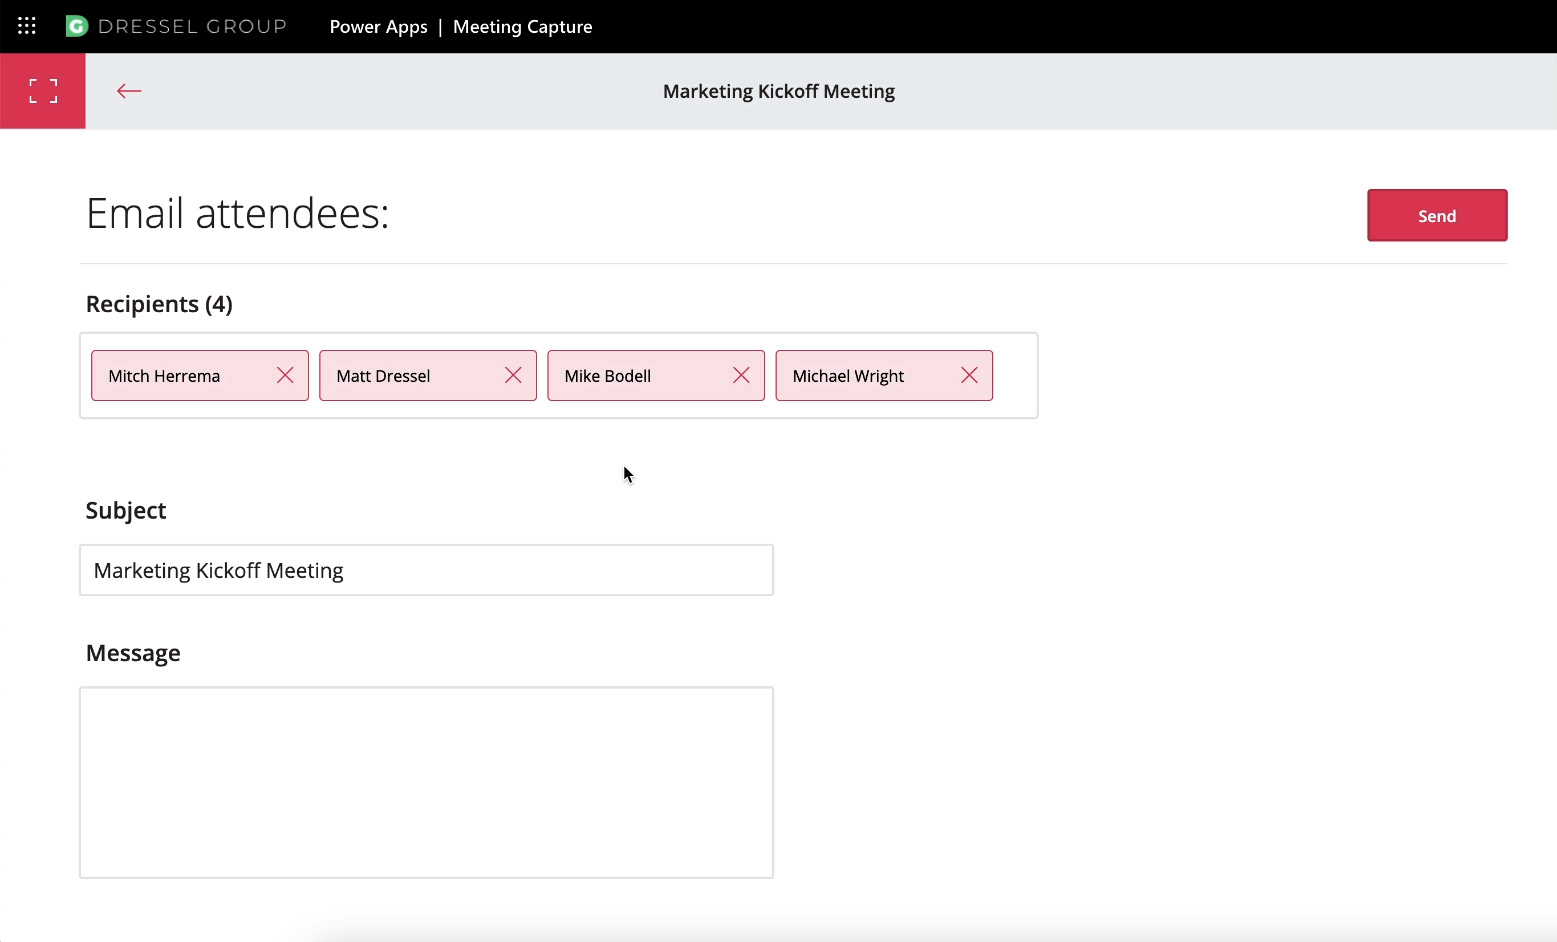
- See and email attendees individually or as a group in the upper left corner
- See meeting details in the lower-left corner
- Type notes in the middle
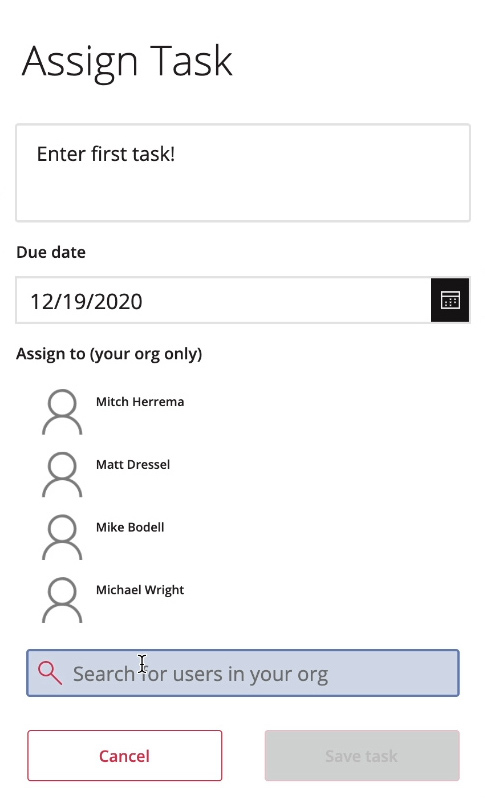
- Assign tasks on the right
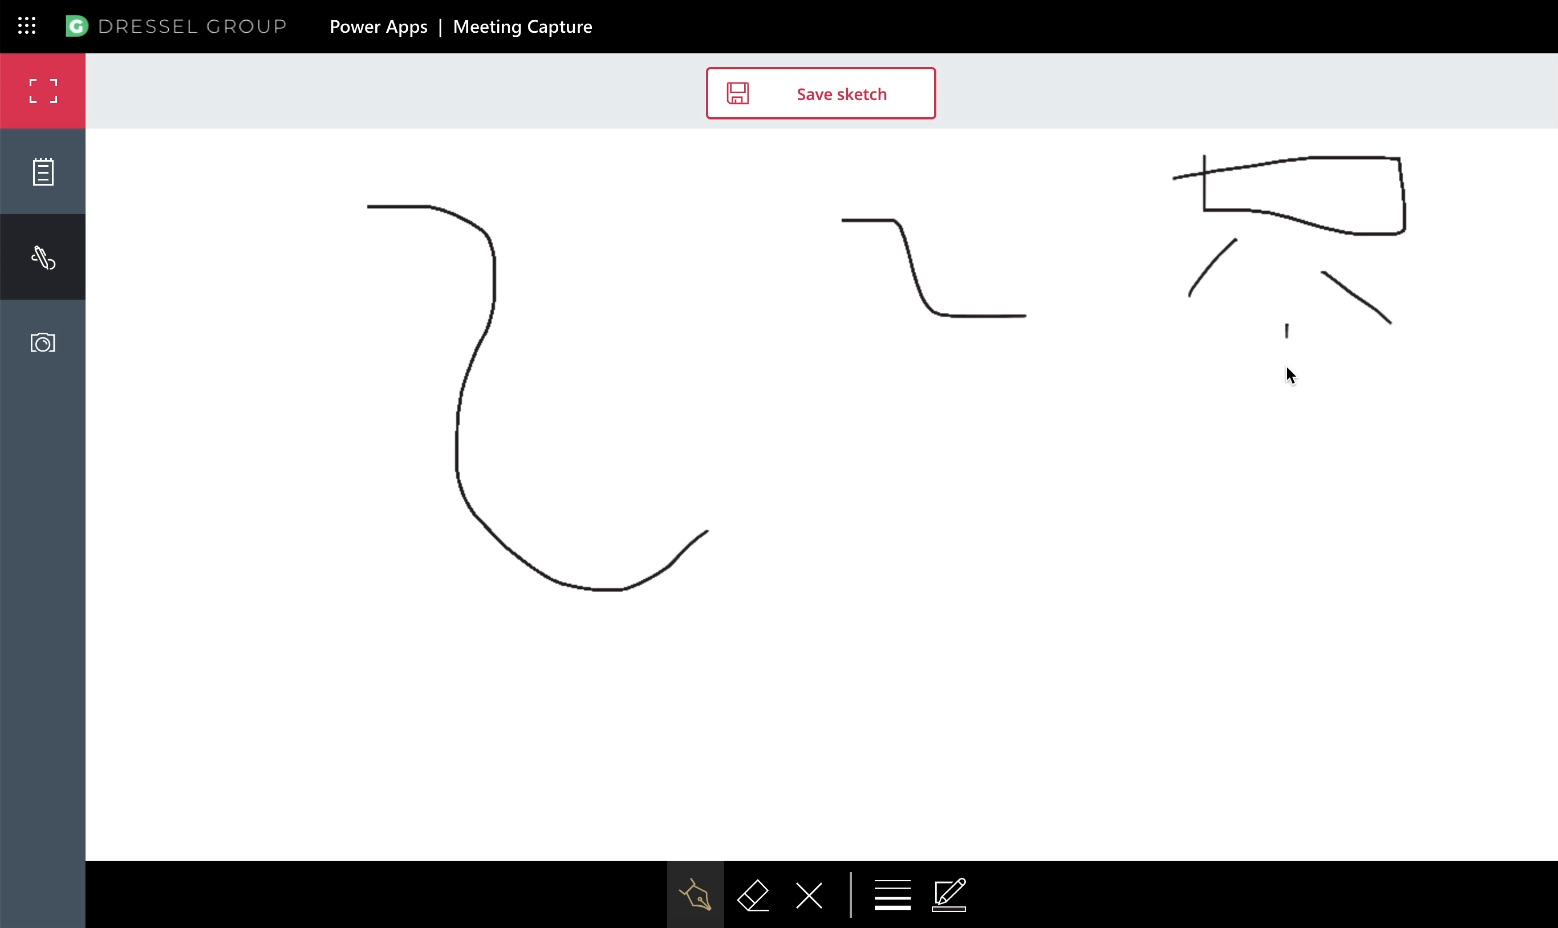
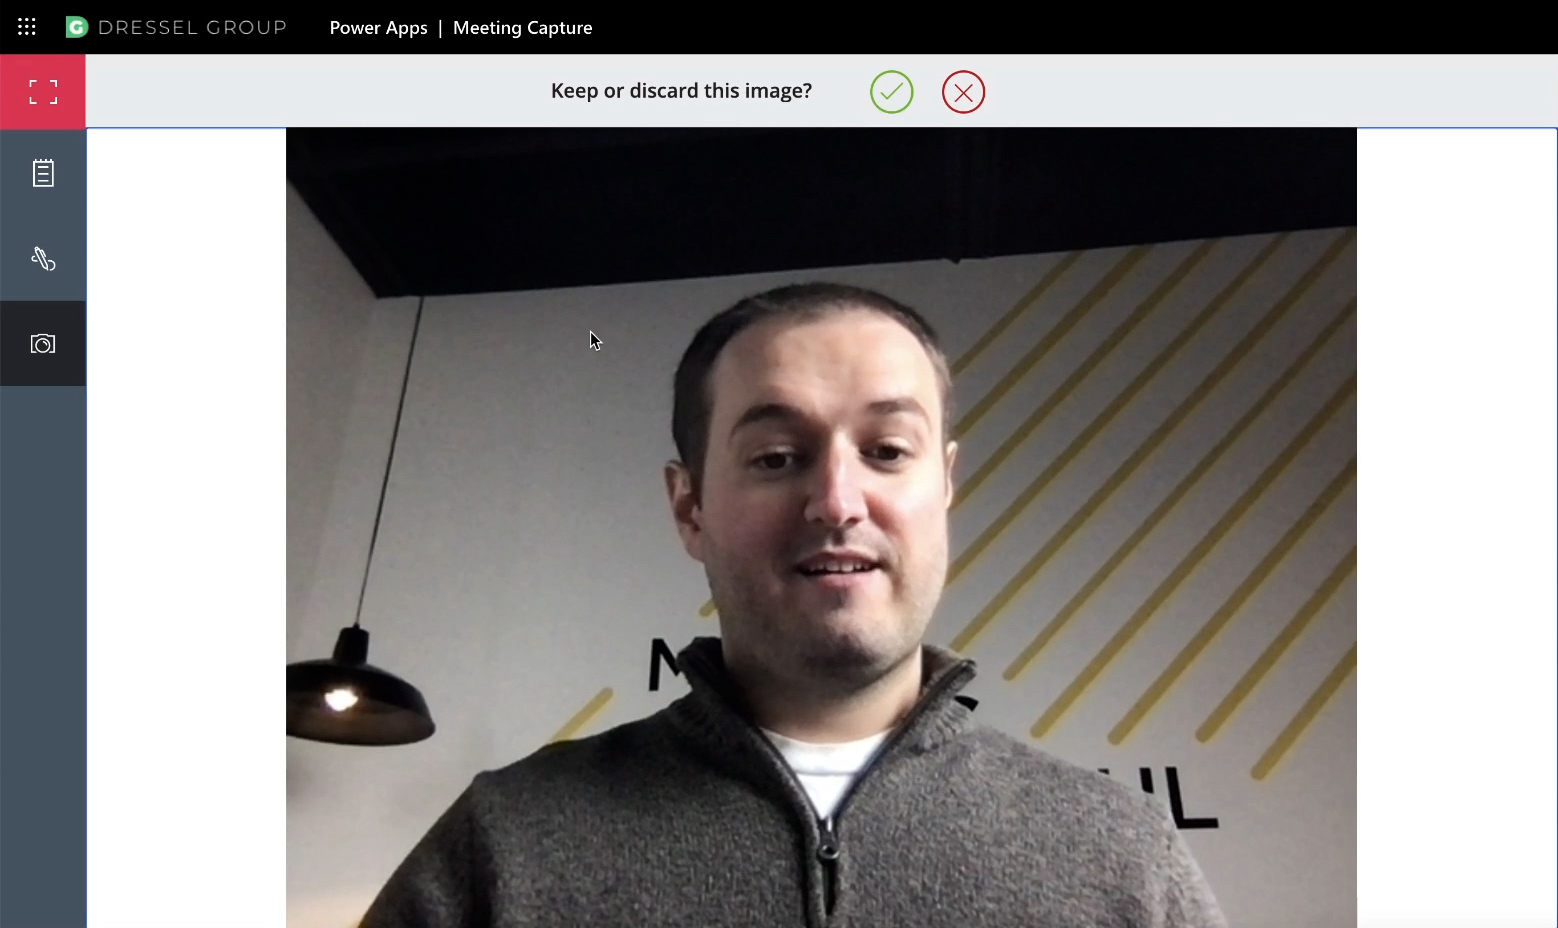
- On the far left menu, select the pen icon to sketch or the camera icon to take a picture
- Click the paper clip icon in the upper right corner to see sketches/pictures you’ve saved in this meeting
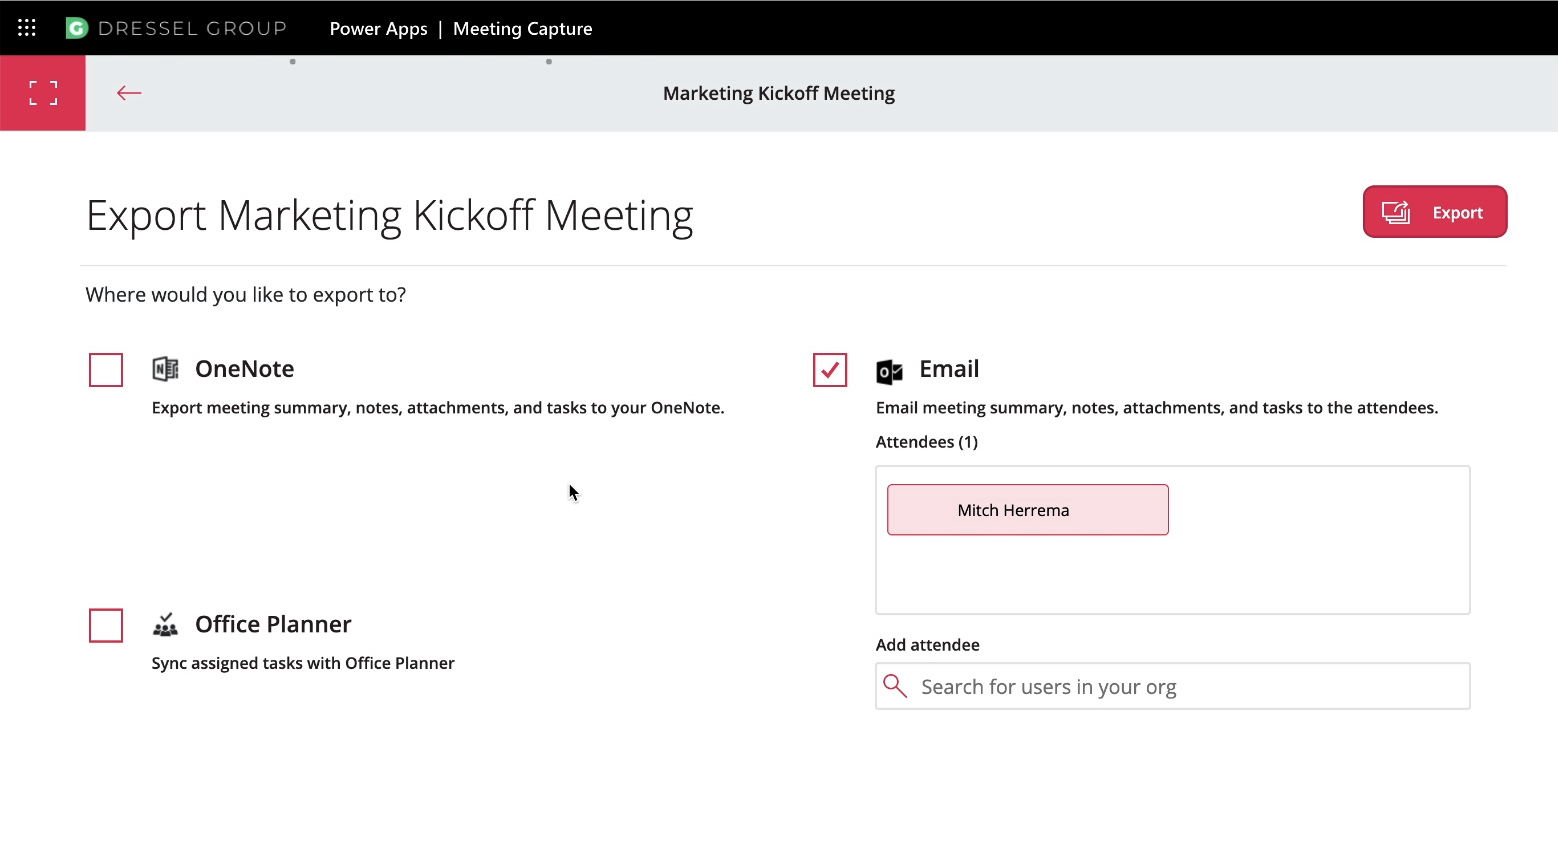
- Click “finish & save” when the meeting is over and you want to export everything
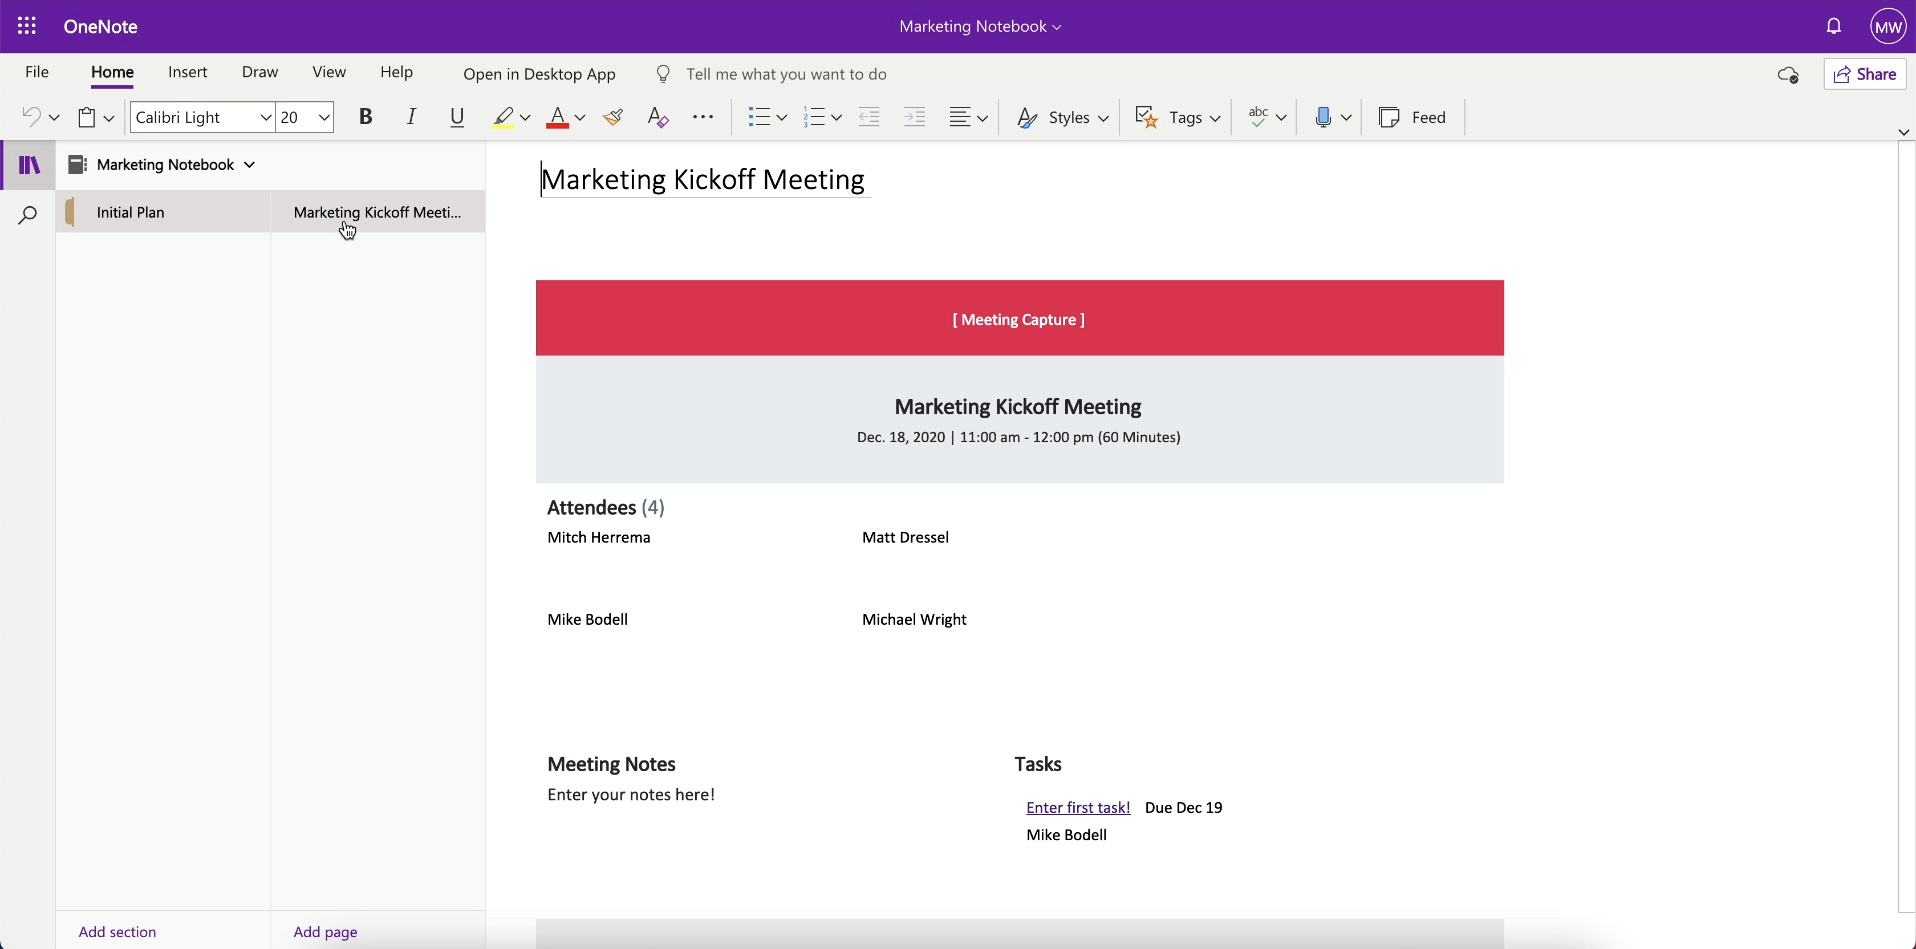
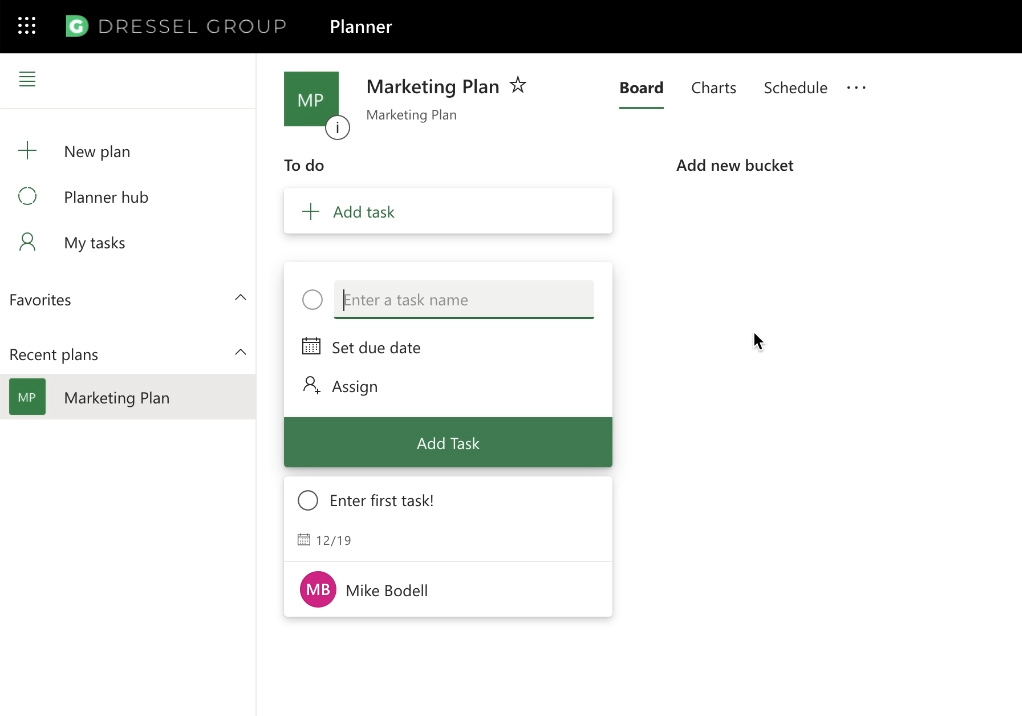
Once the meeting is done and you’ve clicked “finish & save”, you’ll come to the export screen where you have the option to send everything captured in the meeting to email or OneNote, as well as syncing the tasks you created to Planner.
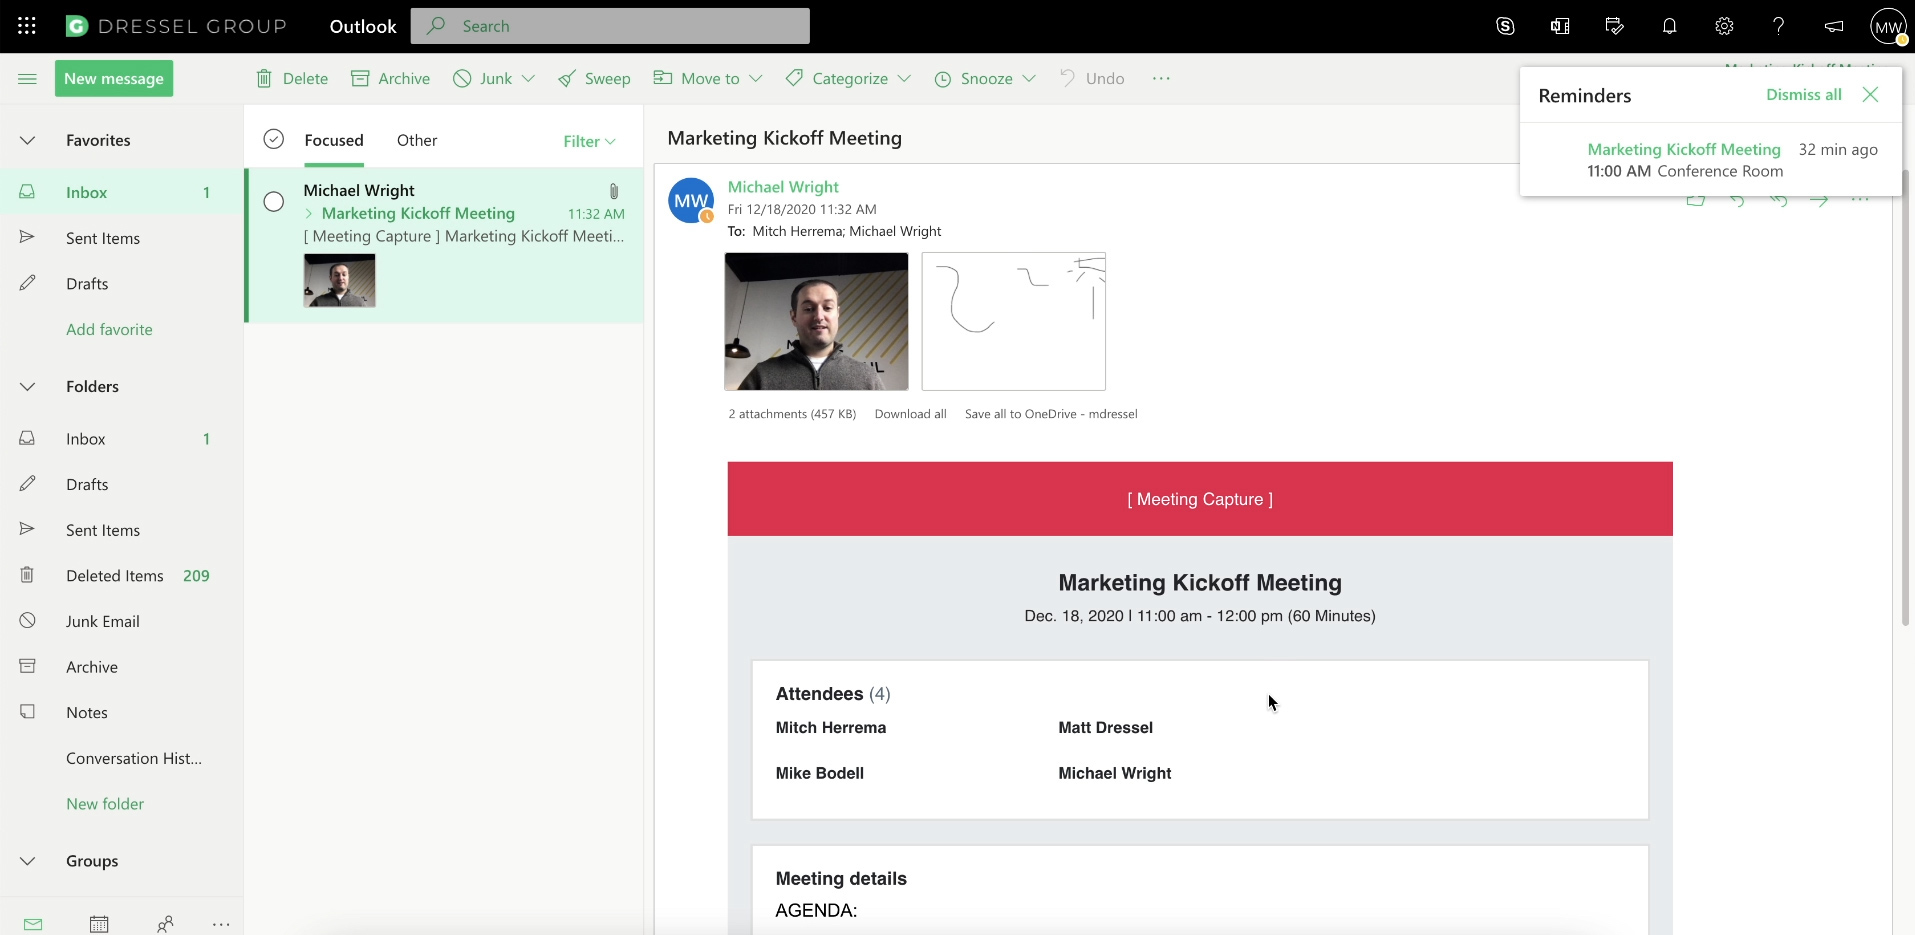
Once you’ve made your choices and selected “export”, the app will send everything to Outlook/OneNote/Planner and will look like this:
When you go back to the app, there’s one final thing you can do before existing that meeting – schedule a follow-up meeting. First, you select who should be in the follow-up meeting along with a subject and message.
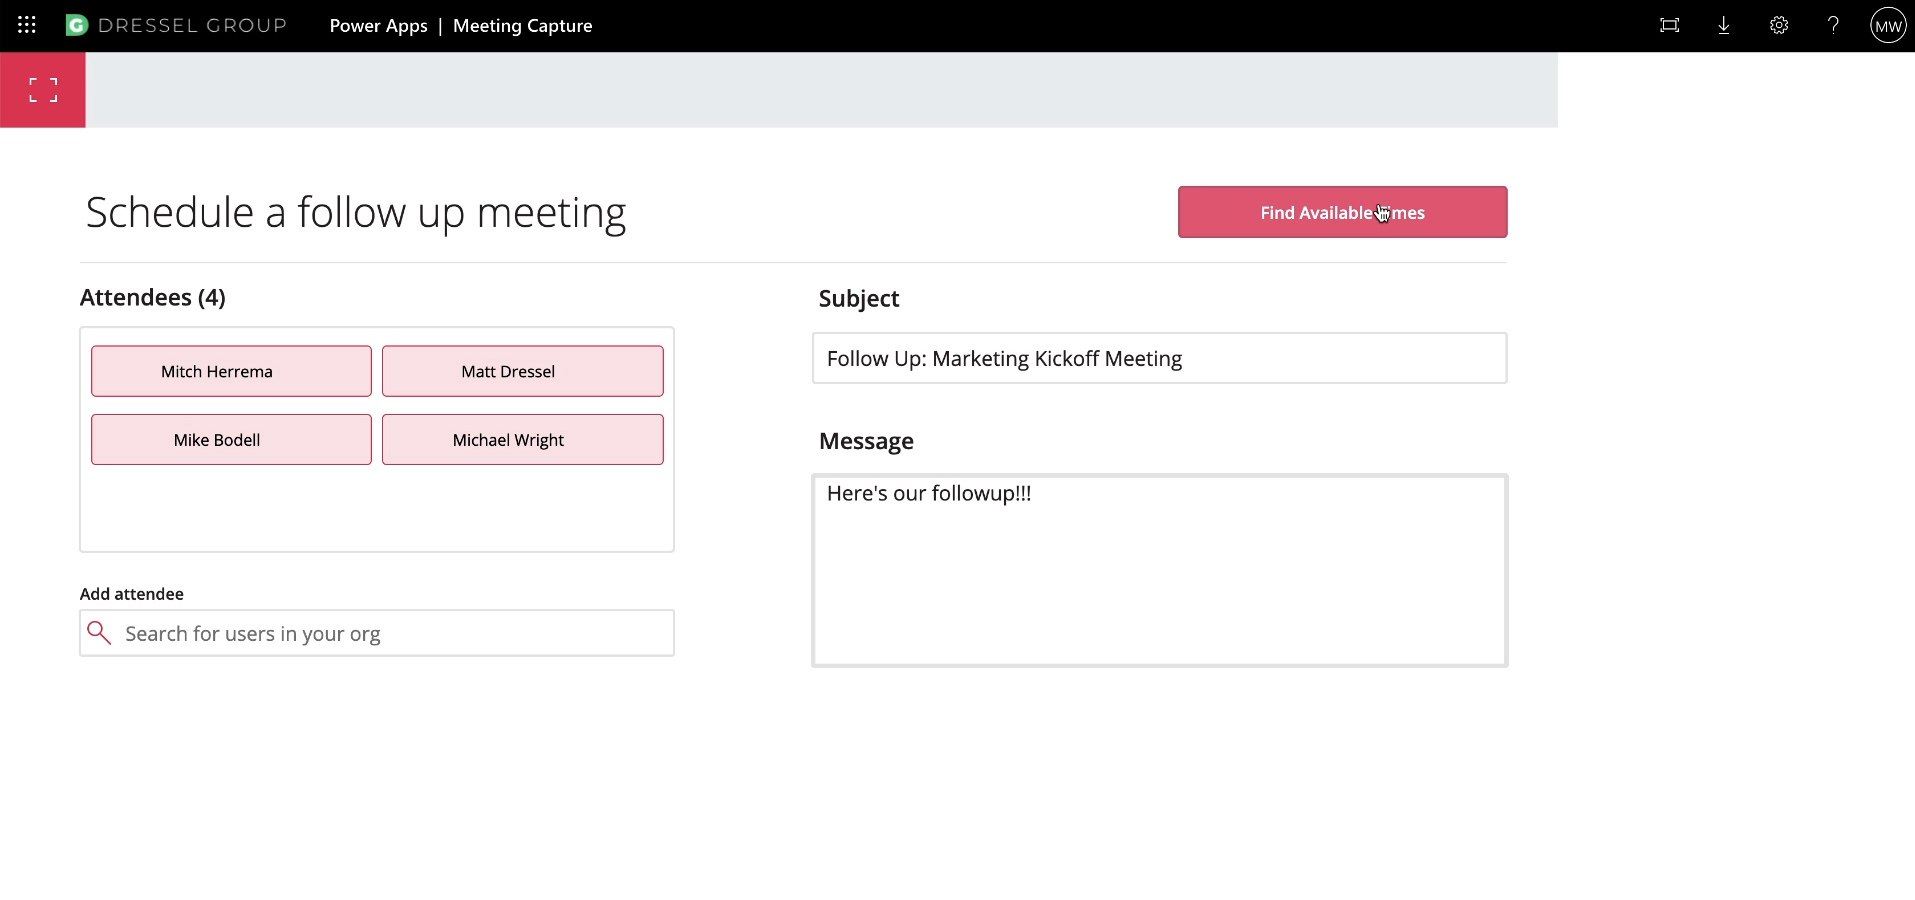
Then you select a date and time range to meet and it will recommend time slots based on the participant’s availability.
.jpeg)
Customizations
One of the great things about Power Apps is you can quickly make feature changes so the app better fits your workflow. Here are some ideas to get you thinking:
- Visual features – you can adjust any colors, fonts, sizes, layout, borders, etc.
- Email substitutes – if your org communicates with messaging apps more than email you can have it send messages/summaries to platforms like Slack or Teams rather than email
- Attendance marking – you can add the ability to mark who’s present, and even add the ability to manually or automatically ping participants who are late
- Other media – you could capture & save audio or video during the meeting
- Tasks to multiple people – assign tasks to multiple people instead of just individuals
- Change navigation – the app currently doesn’t allow you to schedule a follow-up meeting unless you export something to email/OneNote/Planner; if you want the ability to schedule follow-ups without exporting something you can easily change the navigation structure
Setup & Help
This app is very easy and quick to set up (maybe takes 2 minutes). Just go to the Power Apps home page, find the Meeting Capture template, give it a name and select “Create”, save the app, and then share it with whoever will be using it. No data sources to create or hook up so it’s literally that easy! Here are some resources to help with setup.
https://docs.microsoft.com/en-us/powerapps/maker/canvas-apps/sample-meeting-capture
https://www.youtube.com/watch?v=MTsbjln1AcA&list=PL8IYfXypsj2B5FizD0ZVVuzf49vr8yXFU&t=0s

SELF ASSESSMENT
Is your business getting full value from your M365 subscription?
Billions of dollars are wasted each year on underused subscriptions. Take 3 minutes to find out where your tools are driving results, and where they’re holding you back.
Find Out Now
Is Team Communication Holding You Back?
Find Out in Just 2 Minutes.
Take our quick scorecard to uncover communication gaps and hidden barriers within your team.


.jpg)