Outgrowing Planner and Lists? Check Out Project for the Web

If you have been using Planner, Lists, or other basic Office 365 tools and need something more for your organization, we'll help you learn how Project for the web can step up your project management game.
Intro
Have you been using Planner or Lists to manage your projects, but need a more robust solution? You might want to consider adding a Project for the web subscription to elevate your project management game. While Project for the web is a separate subscription, it is heavily integrated into Office 365 and there are special read-only licenses built into many Office 365 subscriptions. This means you can bring a more advanced project management experience to your users while still having a similar feel to other Office 365 applications.
Project for the Web Overview
Project for the web is a cloud project management tool and is part of the larger Microsoft Project product suite. If you were to look at Microsoft’s project management tools on a spectrum from simple to complex or fewer features to more features, it would look like this:
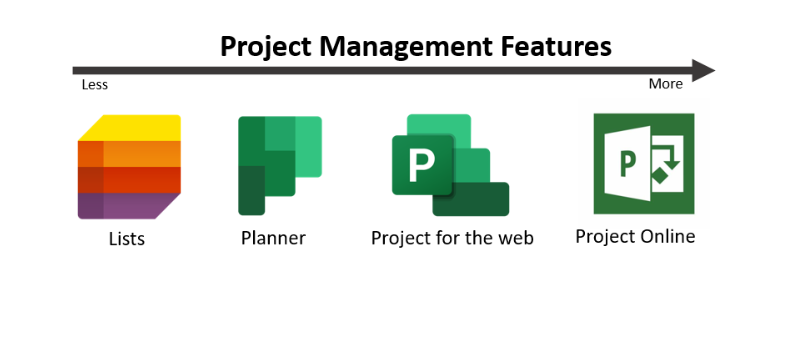
Project for the Web has more features than Planner, but less than Project Online. This makes Project for the Web a logical next step if you are already using Lists or Planner for project management. Below are some high-level features Project for the web offers.
- Task management
- Board view
- Teams and assignments
- Grid view
- Timeline view (Gantt)
- Dependencies
- Scheduling
- Roadmaps
If you’re looking for more advanced features like resource management, financial management, program/portfolio management, baselines/critical path/etc Project for the web isn’t going to get you there and you should consider Project Online instead.
Behind the Scenes
One other thing that might be important for you to understand is that Project for the web isn’t a completely independent application. Like many other Microsoft business productivity solutions, it heavily leverages other Microsoft tools. In the case of Project for the web, it is effectively a solution built on top of the Power Platform and Groups/Teams. In practice, this just means that you will want to become familiar with Power Apps, Dataverse, and Groups/Teams if you want to get the maximum out of Project for the web.
Yes, This Requires an Additional License
I’m going to get into the details below, but I want to be upfront that this tool requires licensing that goes beyond your normal Office 365 license. If you cannot justify an additional license, this tool isn’t for you.
The Basics
One of the best things about Project for the web is just how simple it is. With only a few quick clicks you can create an advanced project with tasks and multiple ways to view the tasks.
Creating a Project
To access Project for the web you can go here or use your Office 365 waffle to find the Project app.
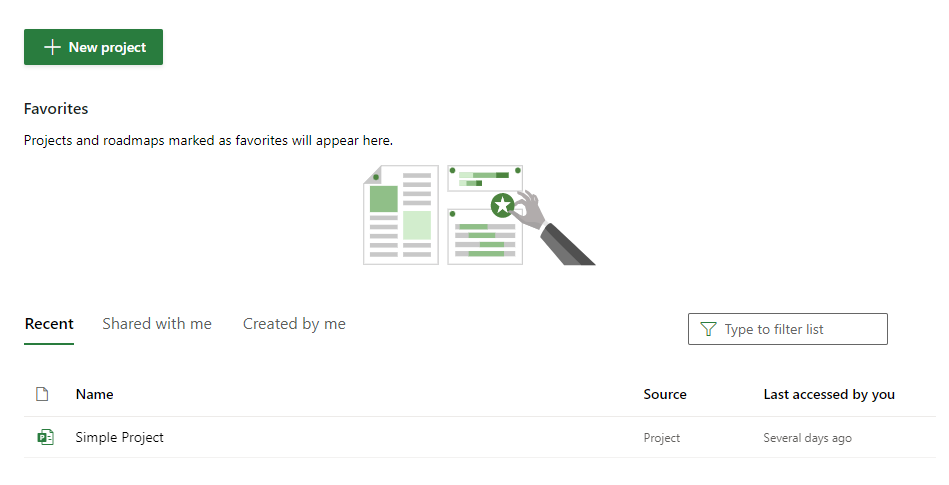
From there you simply click `New project` and select an option to start your new project.
- Blank project: your new project will have no tasks.
- Import project: this option allows you to start from a .mpp file that was created using the Project desktop
- Start with a template: Microsoft provides several templates that will automatically set up your project with tasks, dependencies, etc.

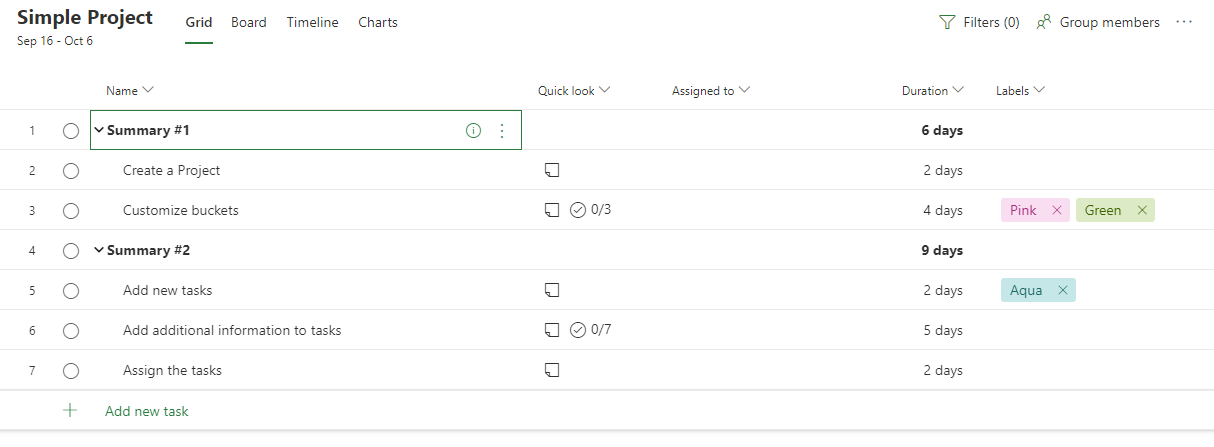
Adding Tasks
Now that we’ve created a new project, we need to start creating tasks. New tasks can be created at the end of your project by using the `Add new task` link at the end of the task list.
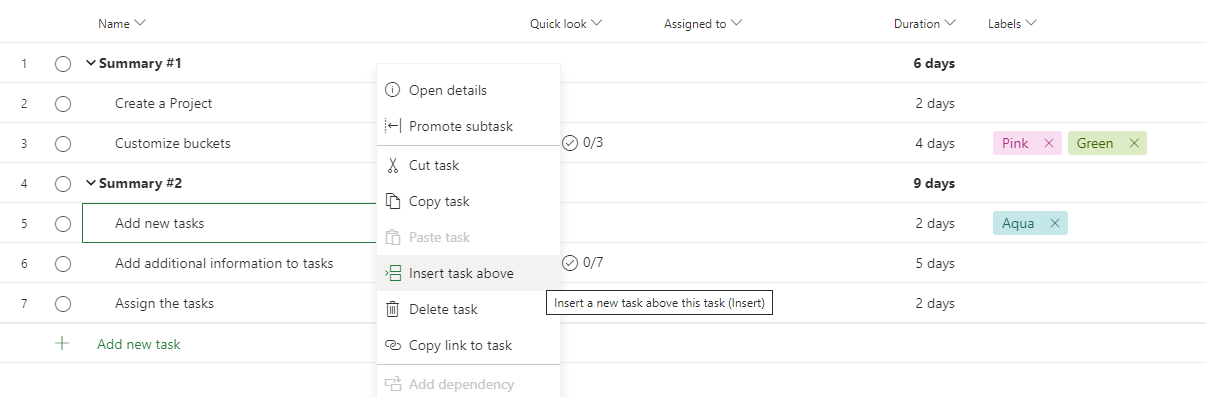
If you’re looking to insert a new task between two existing tasks, you can right-click on the task right below where you would like the new task and click `Insert task above`. Another option is to hover your mouse on the left side of the list and click the `+` between the two tasks where you would like to insert your new task.
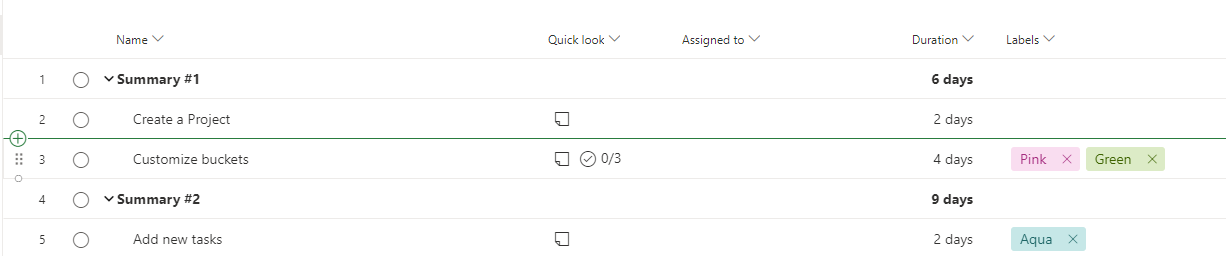
To insert a new task, you just need to enter the name of the task, but you can also enter who the task is assigned to, the duration of the task, and associate labels for the task.

Updating Tasks
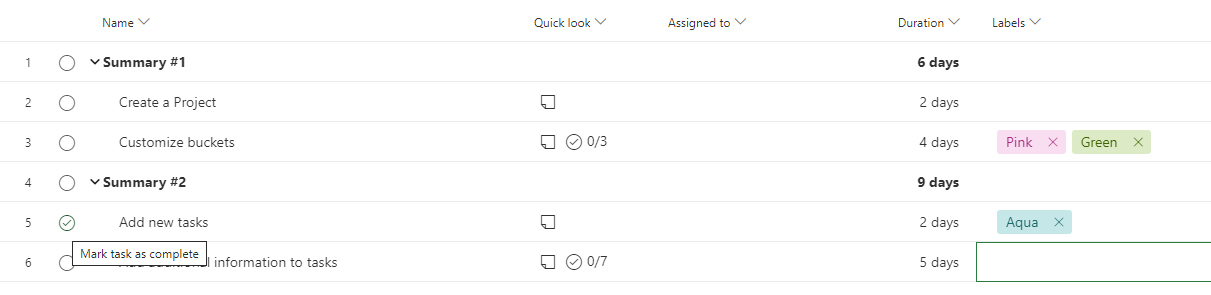
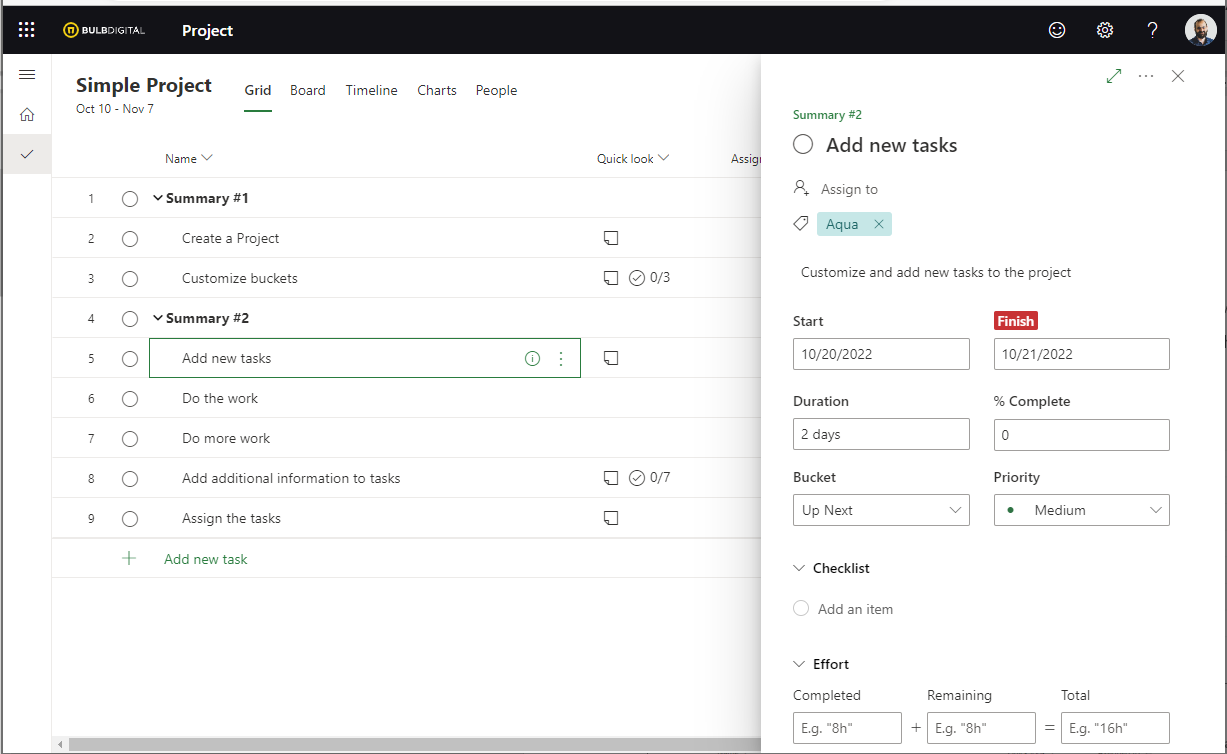
The basic information entered when you created the task can be updated by clicking on the field you want to edit in the list of tasks.
Note: If you check the box next to a task you are marking it complete!
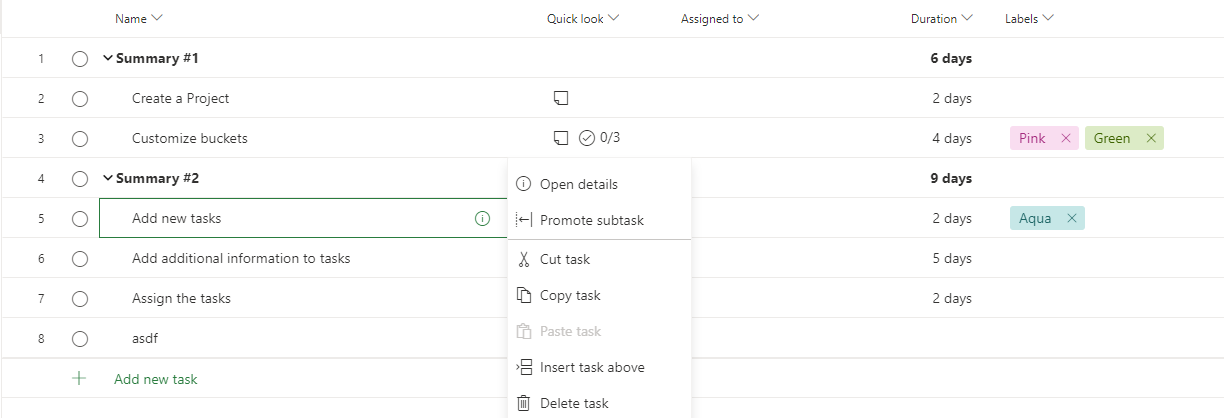
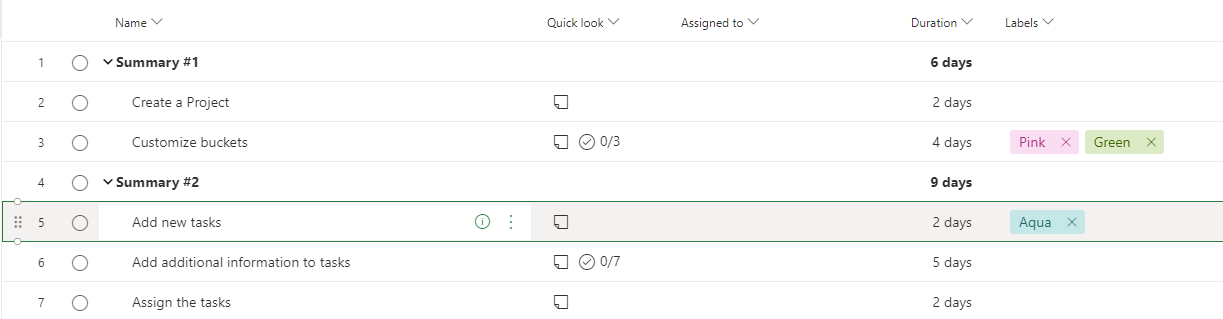
If you need to change the order of tasks or change them from being a subtask you can use the right-click menu, or simply drag and drop the task using the handle on the left side.
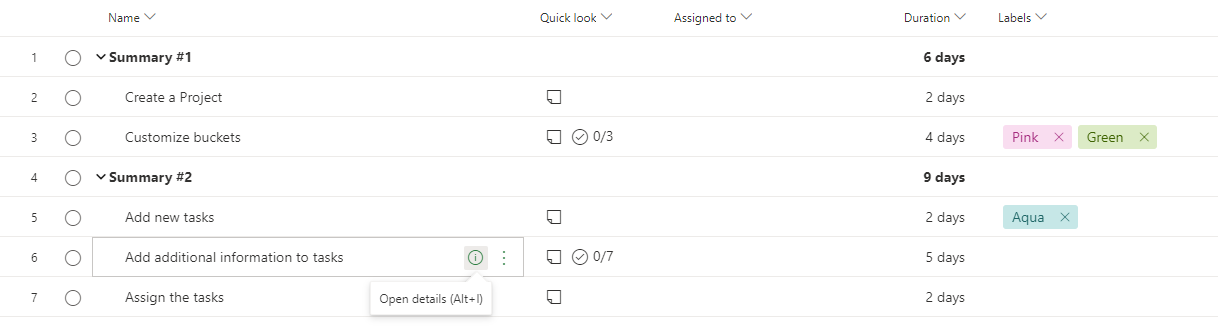
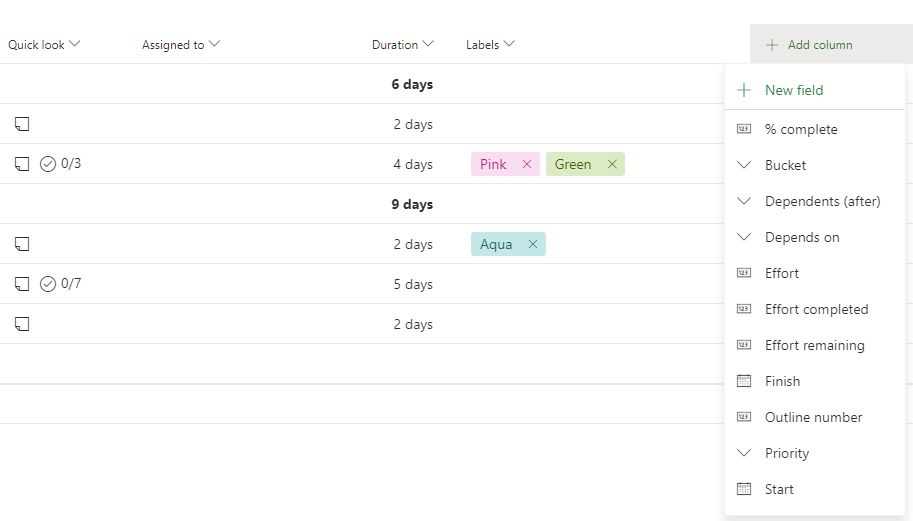
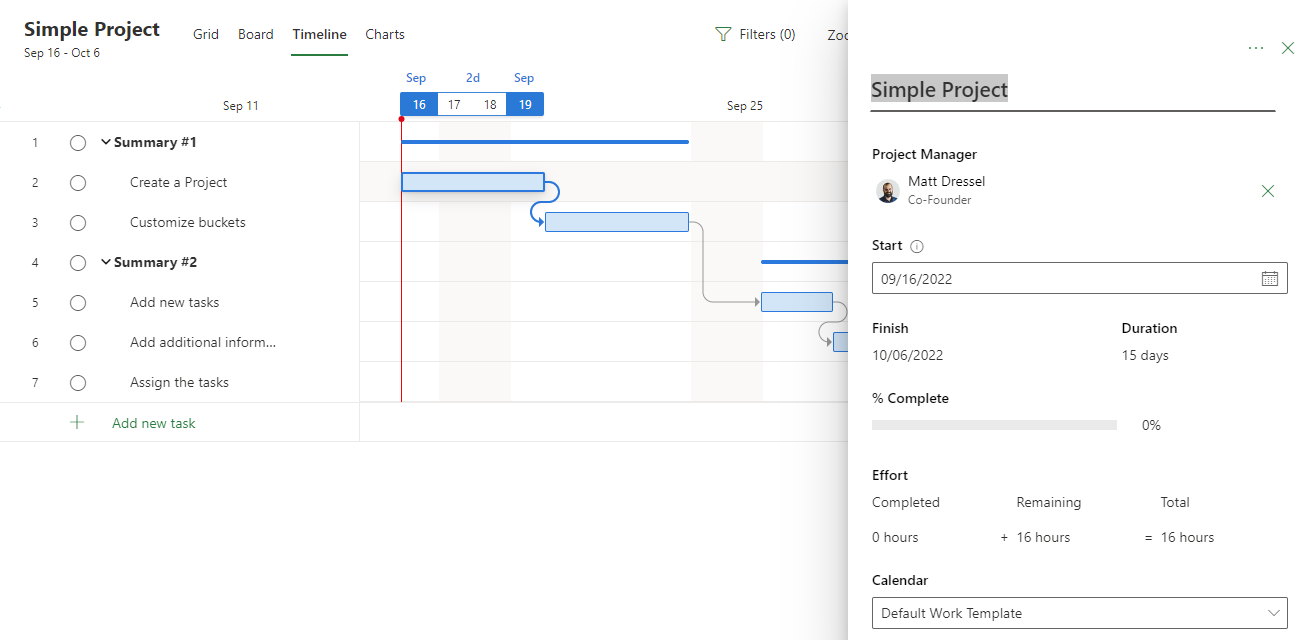
Project for the web includes many additional fields that you can edit and view, they just aren’t displayed in the default grid view. If you want to edit or view these properties, you can either open the details pane for that specific field or add the column directly to the grid view using the `+ Add column` option.

SELF ASSESSMENT
Is your business getting full value from your M365 subscription?
Billions of dollars are wasted each year on underused subscriptions. Take 3 minutes to find out where your tools are driving results, and where they’re holding you back.
Find Out Now
Is Team Communication Holding You Back?
Find Out in Just 2 Minutes.
Take our quick scorecard to uncover communication gaps and hidden barriers within your team.
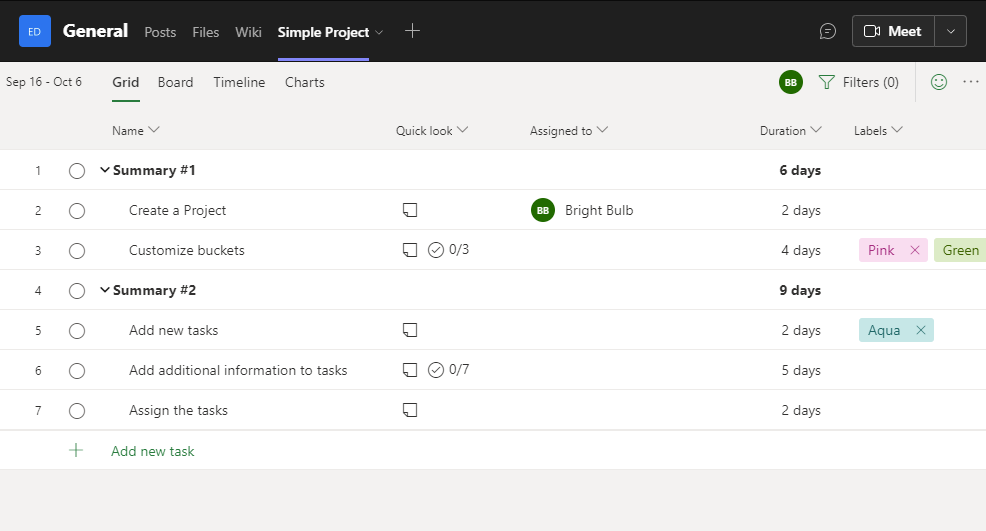
Using Different Views
One of the benefits of Project for the web over Planner is the wide variety of ways you can view tasks in your project.
Grid
This is the view we have used up till now and is great for bulk entering tasks and starting to create your project.
Board

This view is very similar to what is provided by Planner and is great for monitoring and managing tasks that fall into buckets and you want to be able to visually track their status.
Timeline
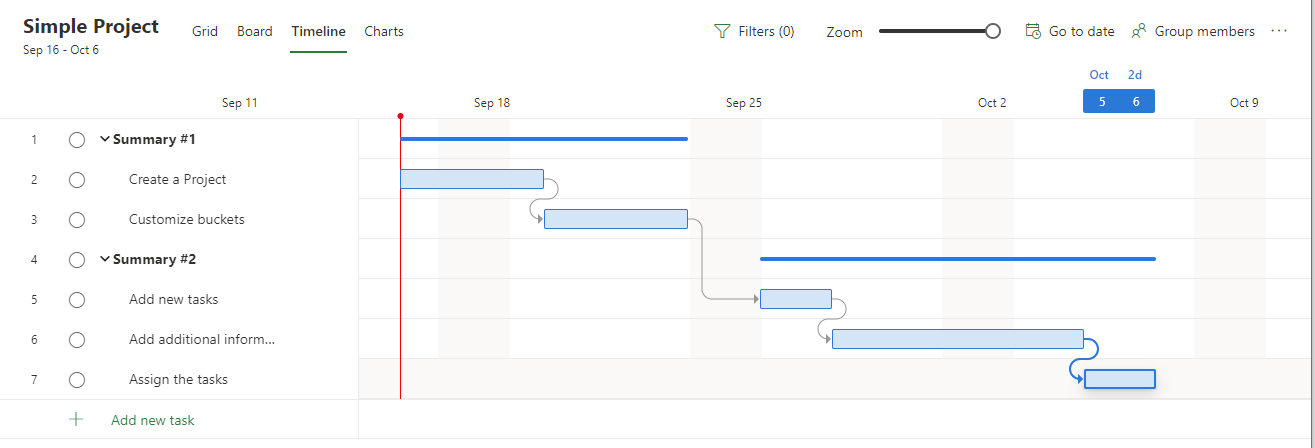
This view is primarily used to see your project tasks relative to the date they are scheduled to occur. You can also easily see dependencies in this view.
Note: The start date for your project will default to the day you created the project. To change this, you can click on the project name in the upper left corner.
Charts
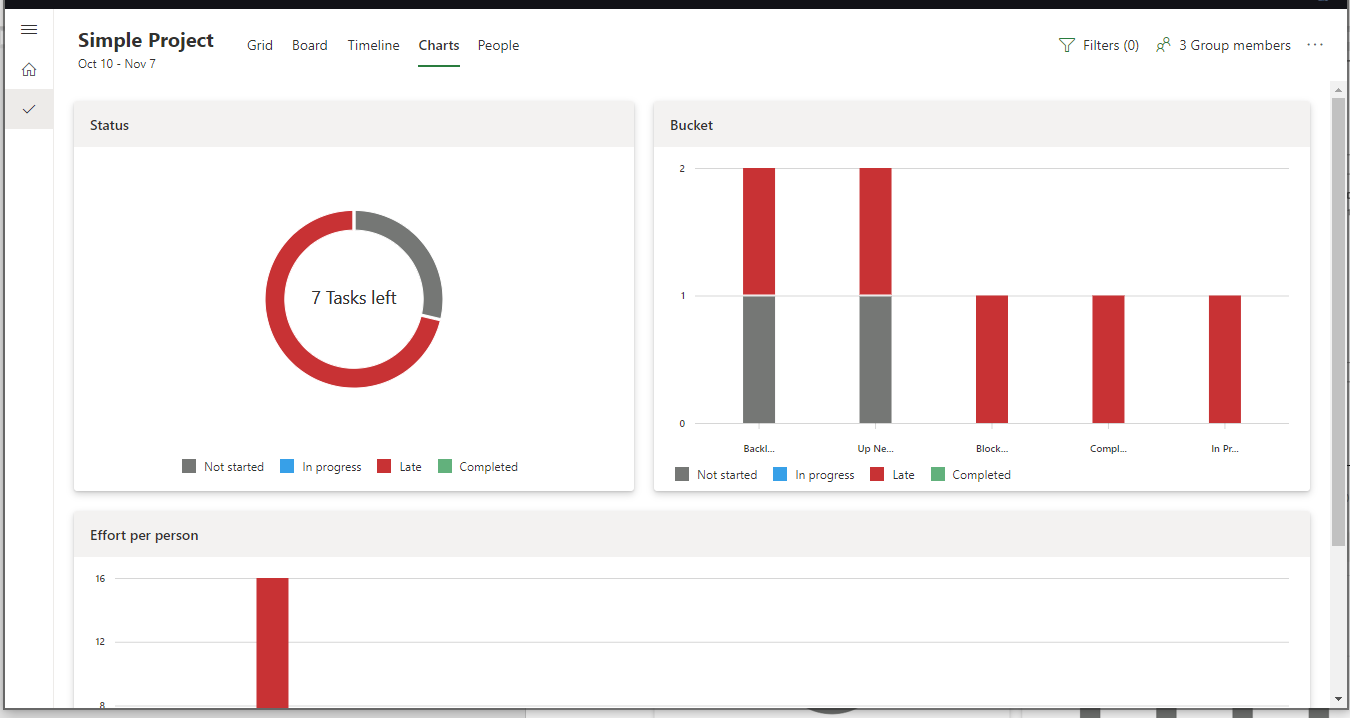
The Charts view provides you with a very basic dashboard view of the tasks in your project. There aren’t a lot of options to customize this view. I believe this is because you can also create your own custom dashboards using Power BI.
Working With Others
Now that we’ve created a project and added some tasks, you will want to include others in your project. Project for the web doesn’t allow you to share the project with individual users. Instead, you have to associate the project with a Microsoft Group, Team, or create a new Microsoft Group or Team.

Once you have associated your project with a Microsoft Group or Team, the members can now see the details of your project.
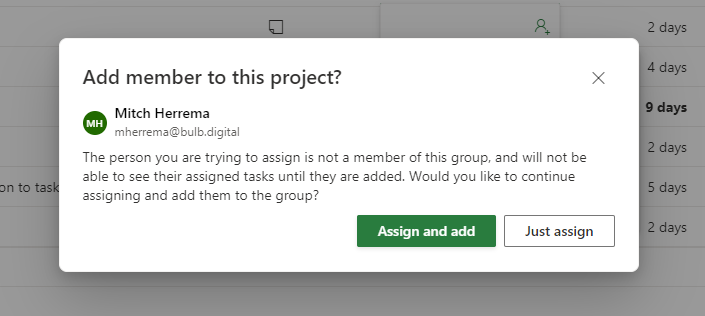
Assigning Tasks
While it’s possible to assign users to tasks without having them be a member of the group, it will show the following warning. Selecting `Just assign` will assign the user but will not allow them to update or view their tasks. If you select `Assign and add` the selected user will be added as a member of the Microsoft Group or Team and will have access to the project as well as the resources of the Group or Team.
What access do regular O365 users have?
Now that we have assigned a few tasks it would be good to understand what access these users have. What a user can do is dependent on the license the user has.
Office 365 license – These users will be able to view all the details of the project and tasks. They will only be able to update and complete the certain percent of tasks they are assigned.
Project license – If a user has a project license, they will have full access to view and update the details for the project and tasks.
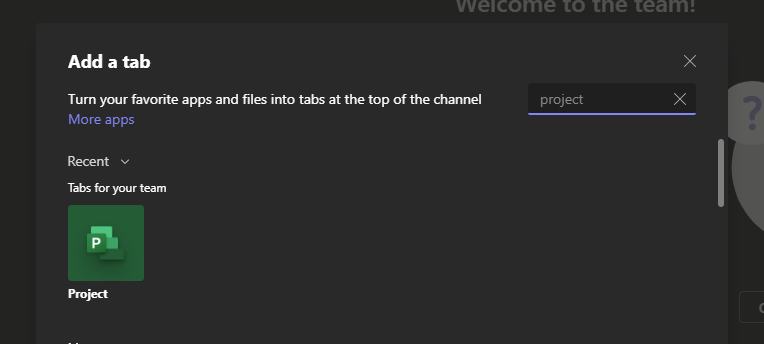
Adding the Project to Teams
One way to make it easy for your users to interact with your project is to add a project tab to a Teams shared workspace channel.
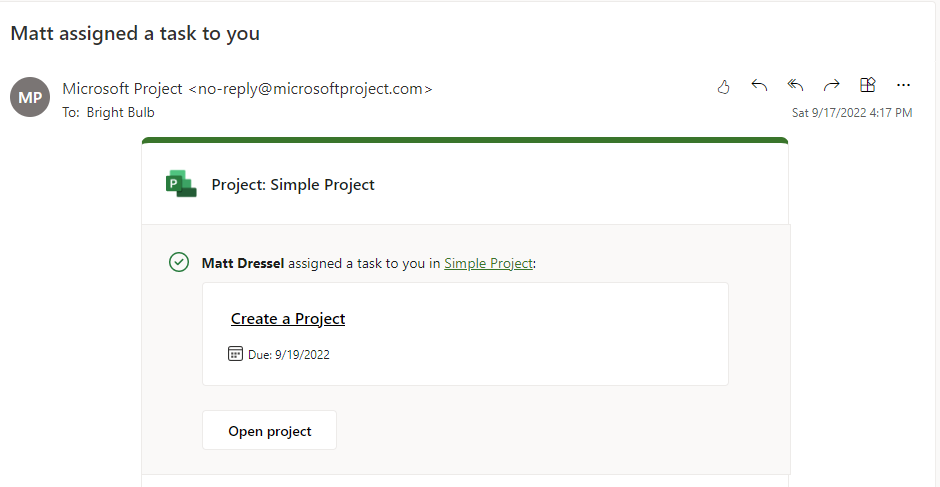
How Notifications Work
When you assign a task to users, they are sent an email notification letting them know the task was assigned to them.
Beyond this initial notification, Project for the web doesn’t produce other notifications. However, with complete access to the data in Dataverse, you could create all sorts of custom notifications.
Note: Because the data is in Dataverse, you need to have a “full” Power Automate and/or Power Apps license to directly work with this data.
How can you get this?
While any Office 365 user can view and update some properties in Project for the web, you need at least a Project Plan 1 license to create and manage projects. There are additional features available if you purchase a different plan.
If you’re concerned about the additional cost associated with Project for the web, you should consider only getting a license for users who need to do project management. With the access that Office 365 users have, they can usually work on the project without issues.
To see all of your Project Plan options visit here.
What are the benefits when compared to Planner?
Probably the closest Office 365 tool to Project for the web would be Planner. Here are a few of the benefits of using Project for the web over Planner:
- Timeline view: While Planner does have a calendar view, what most project managers are more familiar with is a timeline view.
- Grid view: This is probably one of the most requested features of Planner.
- Effort: Planner does allow you to enter a start and end date, but it doesn’t allow you to aggregate this information or include the effort required.
- Task dependencies: Project for the web includes the ability to create complex dependencies between tasks.
- Custom columns: You can create custom columns that are associated with tasks.
- Access to all data: Because the data is all stored in Dataverse you can have direct access to all of your project-related data in tools like Power BI.
When to use Project for the Web
While Project for the web is a powerful tool, it’s not always the right tool for the job. If you are looking for basic task management, Planner and Lists are great tools for you to consider. However, if you are looking for a more formal project management tool you should strongly consider using Project for the web.
Comment below if you would like a deep dive into using Project for the web to manage projects.

.jpg)