


Teams Meeting 101: How to Pick the Perfect Type of Meeting For Your Goals

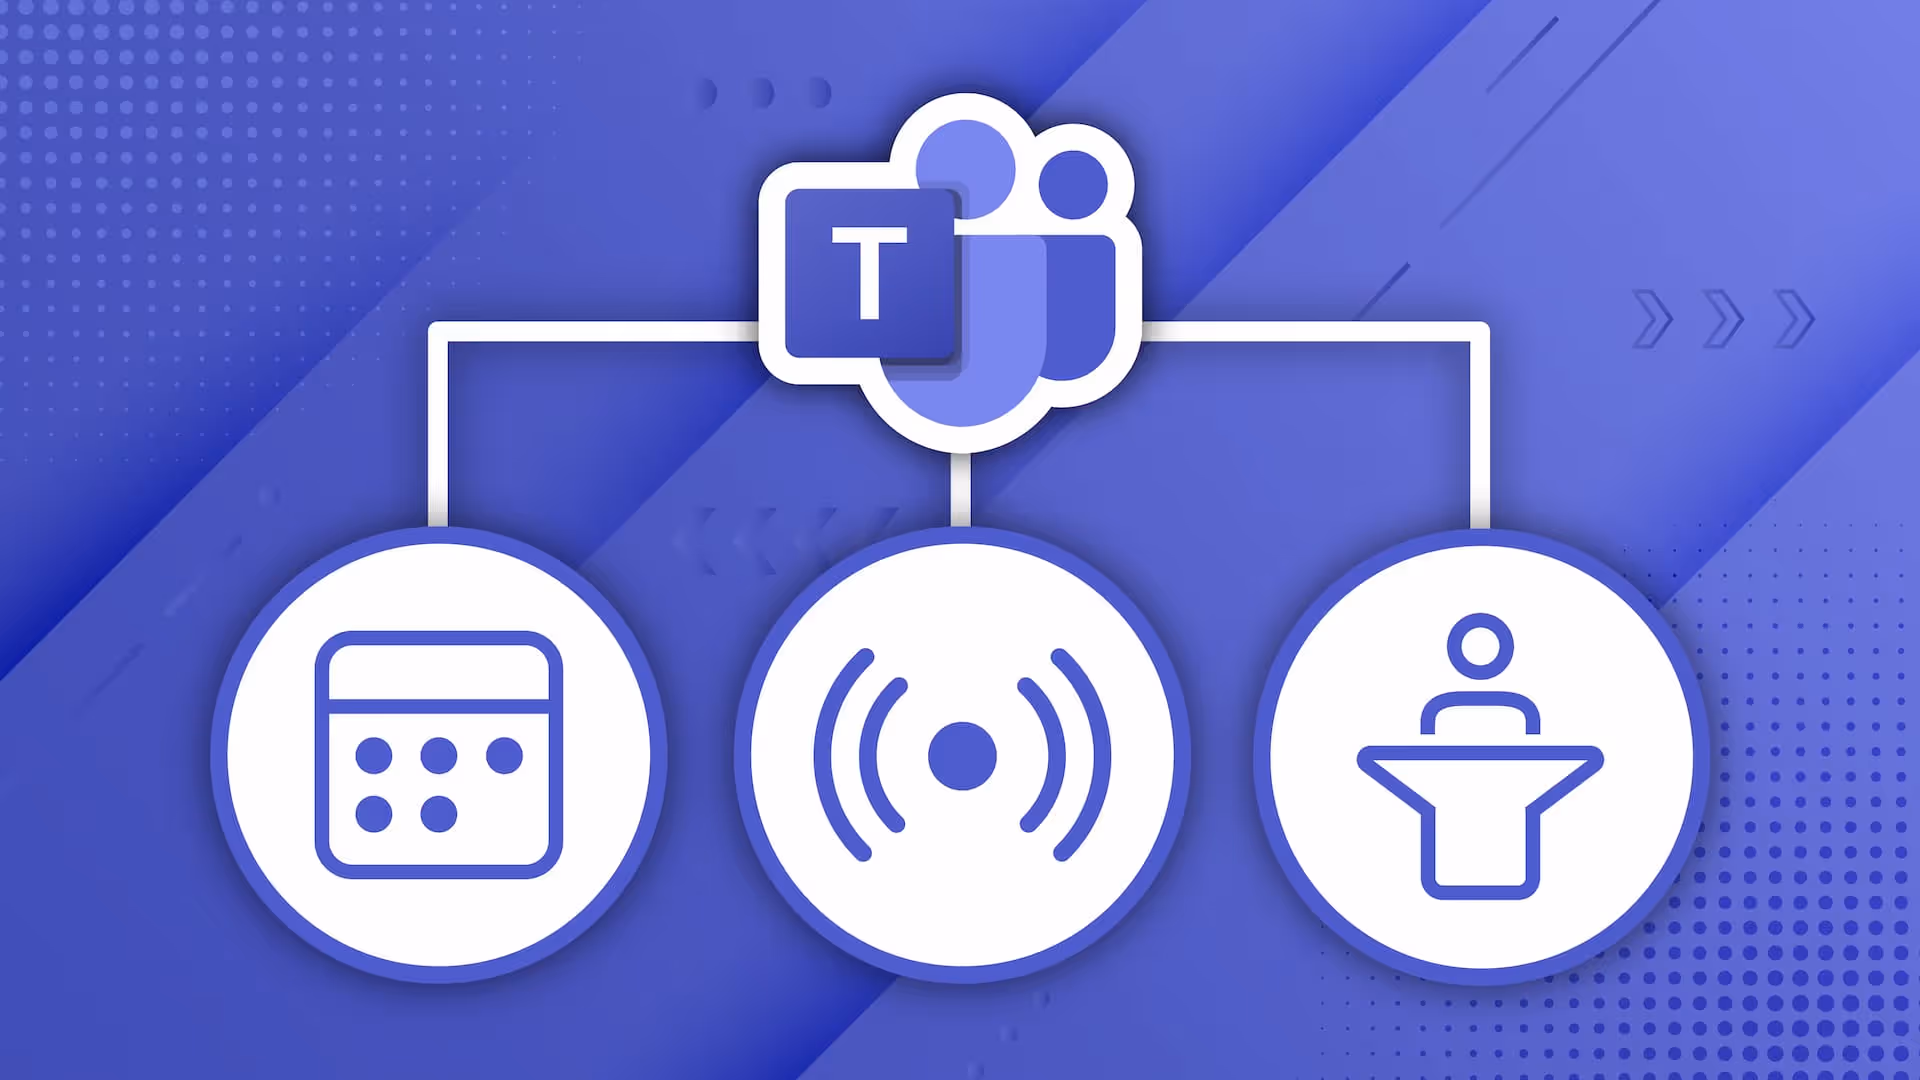
If your organization uses Microsoft Teams, you’ve likely participated in a regular ol’ Teams meeting. But did you know there’s 4 different types of Teams meetings that all serve different purposes? It’s not always clear when you should use one of them over the other, so let’s clear the air.
Regular Teams Meetings
If you’ve been on a virtual meeting in Teams before, odds are this is what you used.
These types meetings are great when you’re collaborating with a team and everyone plays a similar role in the conversation. Think project stand-ups, client meetings, or brainstorming sessions.
While one person “owns” the meeting, everyone in the meeting is on a level playing field. They can all mute/unmute themselves, turn on/off their cameras etc. This is not the meeting to choose if you want some control over what participants can do.
To schedule a meeting, you can either add a Teams meeting to an Outlook event, or schedule right through the Teams app.
Scheduling in Outlook
If you’re more of an Outlook fan, Teams meeting displays as a simple switch when you are creating an event. You can even set it to be on by default if you’re creating Teams meetings a majority of the time.

Scheduling in Teams
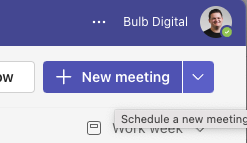
Within the Calendar Tab of Teams, click the + New Meeting button in the top right, or select a time span in your calendar. Add a title, invites, description, and send away.
Webinars
This is the most recent meeting type addition to Teams. For those familiar with webinars, this should be self-explanatory, but they are meant for a small group of people to be presenting to a group of people who have registered for the event.
Fun fact: we use a Teams Webinar every time we do our monthly Office Hours.
These are useful for things like user groups, webinars (obviously), or any time you want one layer of separation from the attendees.
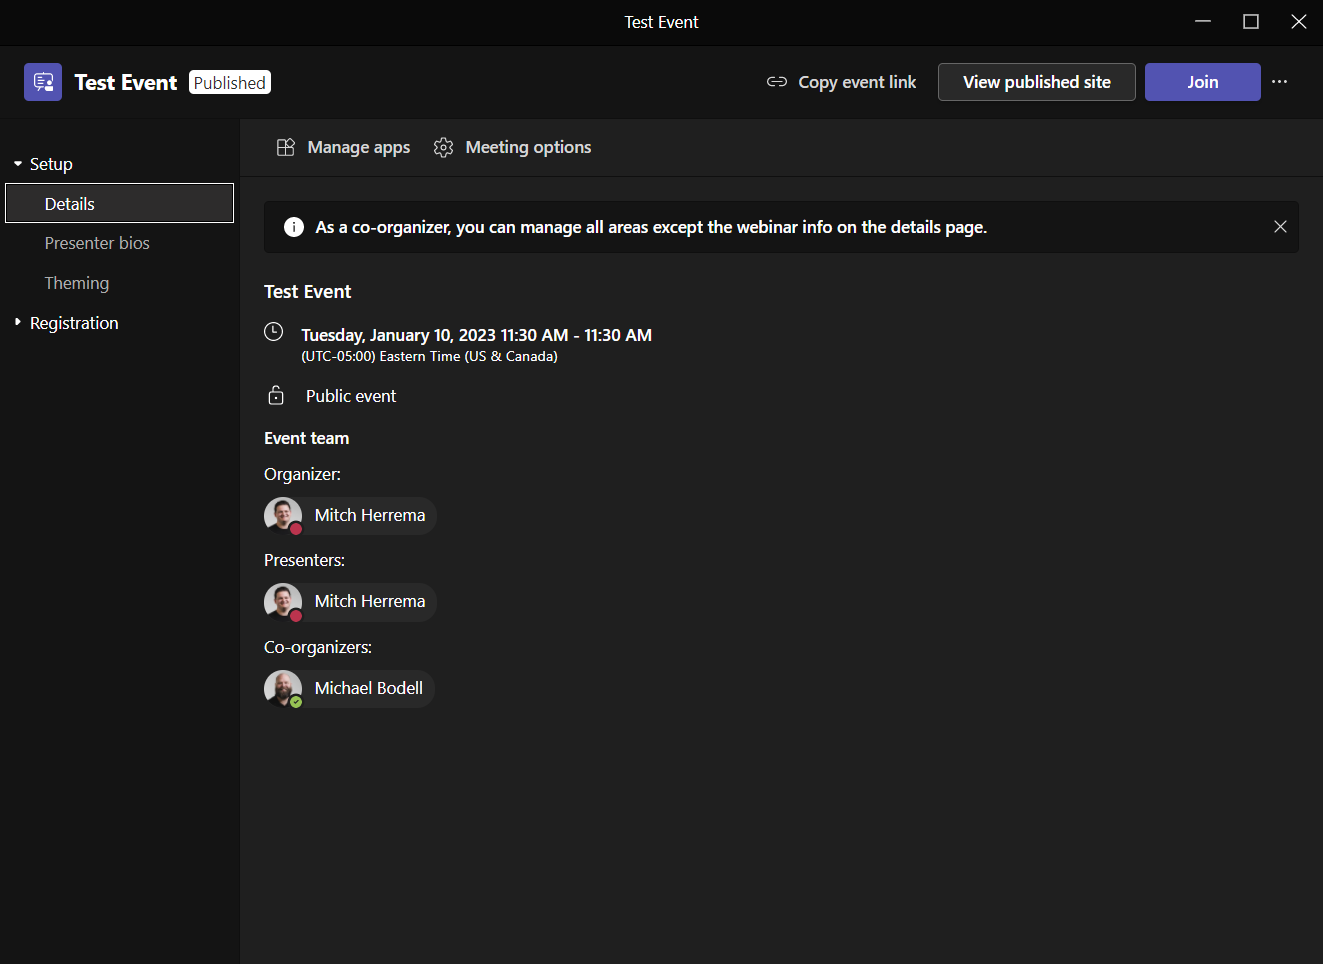
In webinars there is a distinction between the organizer, presenters, and attendees:
- Organizer has full control over the meeting and can edit every aspect of the meeting.
- Co-organizer’s have the ability to “manage” the event as it’s occurring, as well as adjust presenter bios, the registration page theming and configuration, and view attendee status.
- Presenters are by default allowed to turn on cameras, un-mute, and share their screen.
- Attendees have no control over the meeting, but can message in the chat. They also can’t unmute, turn on cameras, or share content unless specifically allowed by a presenter.
Scheduling a webinar
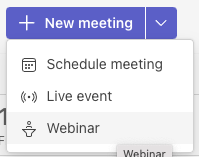
To schedule a webinar, open your calendar in Teams, and select the dropdown arrow to the right of + New Meeting and select Webinar.
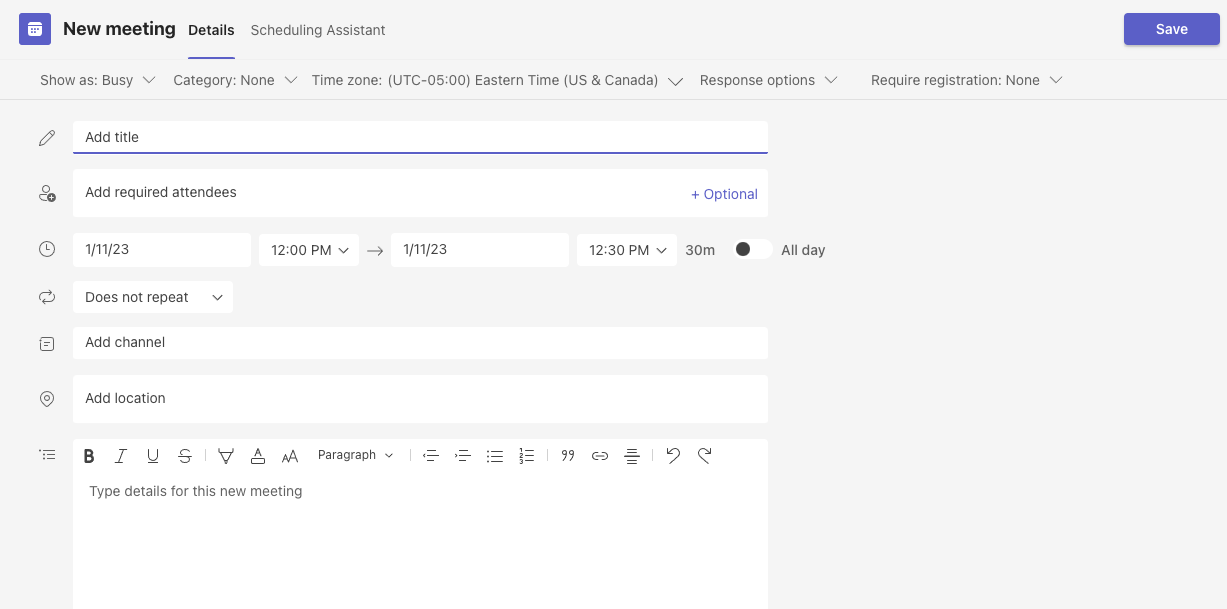
This opens a brand new (2023) window with a form to fill out with your webinar details.

Give it a title, description, set the time, etc.
The main thing to be aware of is the Presenter and Co-organizer inputs. Keeping the roles listed above in mind, choose Presenter for the people who you’d like to be able to unmute, show video, and share screen.
Co-organizers are helpful if you need someone to help manage the event, but not have full control over editing the details.
By default, you (the one scheduling the event) are the Organizer with full control.
Next, choose if you want this event to be private to your organization, or public to allow anyone with the registration link to register. Note: You cannot change this after publishing the webinar.
Click the save button to create a “draft” of the webinar. This will enable some extra settings you can now configure.
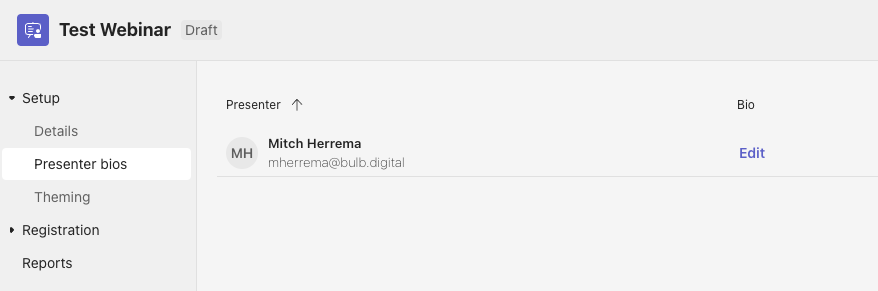
Now you can add presenter bios, where you can add social profiles, job title, and more to each of the presenters.
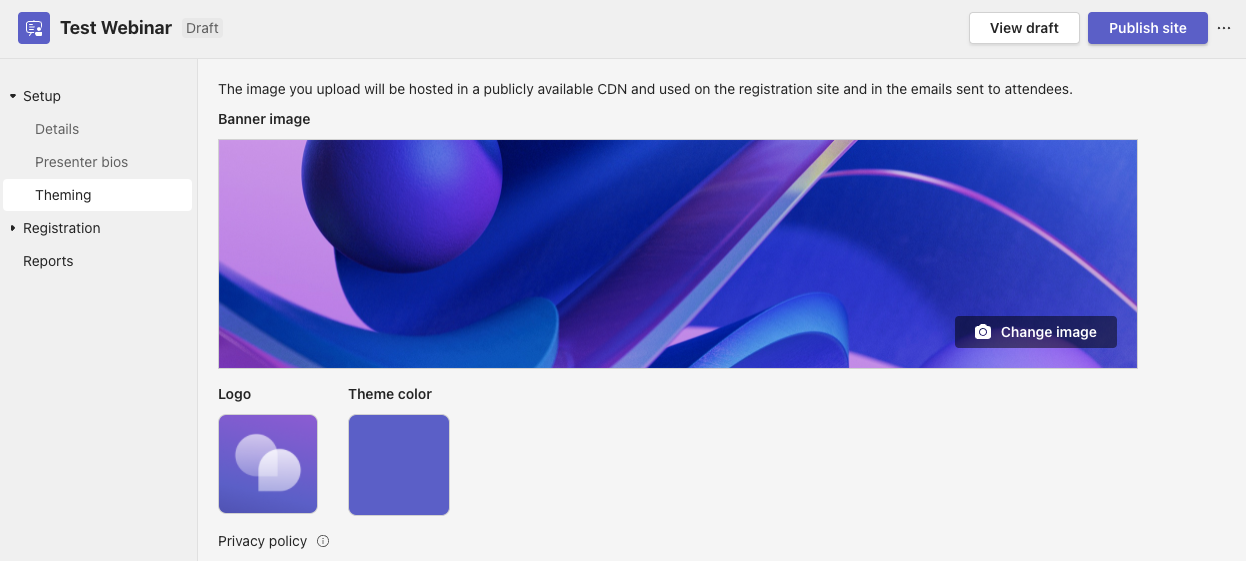
Next you can configure the theming and set a banner image, logo, and theme color.
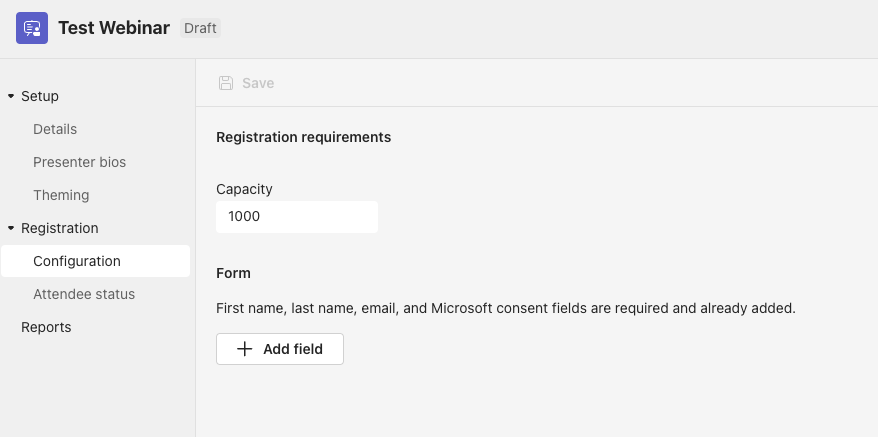
In the registration configuration, you can set a capacity on the webinar, along with add any extra fields to the registration form outside of the default first name, last name, email, and consent fields.
Later on you’ll also be able to open this window to view attendee status, and reports.
Publish the event, and you’ll get a share link you can send to those who you’d like to open registration to.

SELF ASSESSMENT
Is your business getting full value from your M365 subscription?
Billions of dollars are wasted each year on underused subscriptions. Take 3 minutes to find out where your tools are driving results, and where they’re holding you back.
Find Out Now
Is Team Communication Holding You Back?
Find Out in Just 2 Minutes.
Take our quick scorecard to uncover communication gaps and hidden barriers within your team.
Editing the event
The new editing user experience is great, even though it opens in a separate window.
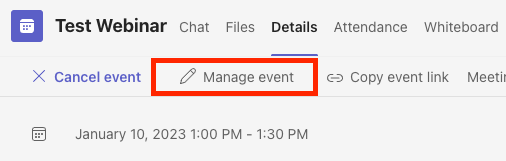
As the event organizer, you just have to click Manage Event in the event details.
As a co-organizer, that action is not there for some reason. The only way for a co-organizer to manage the event at time of writing is below:
When you view your event details, you’ll see a line that says “Organizers & co-organizers: When making edits to your event please use Teams.”
The “please use Teams” portion is a link that opens a web browser, which then opens back up the management window in Teams. A little janky, Microsoft.
Just to document the difference in permissions, the co-organizer can manage all of the tabs of this window except for the Details screen. This is much improved compared to what it was previously (they couldn’t even see a list of attendees before!).
If you go back into the Setup > Details tab, you’ll find a link for “Meeting Options”, which opens a browser to give you many more details/configuration options.
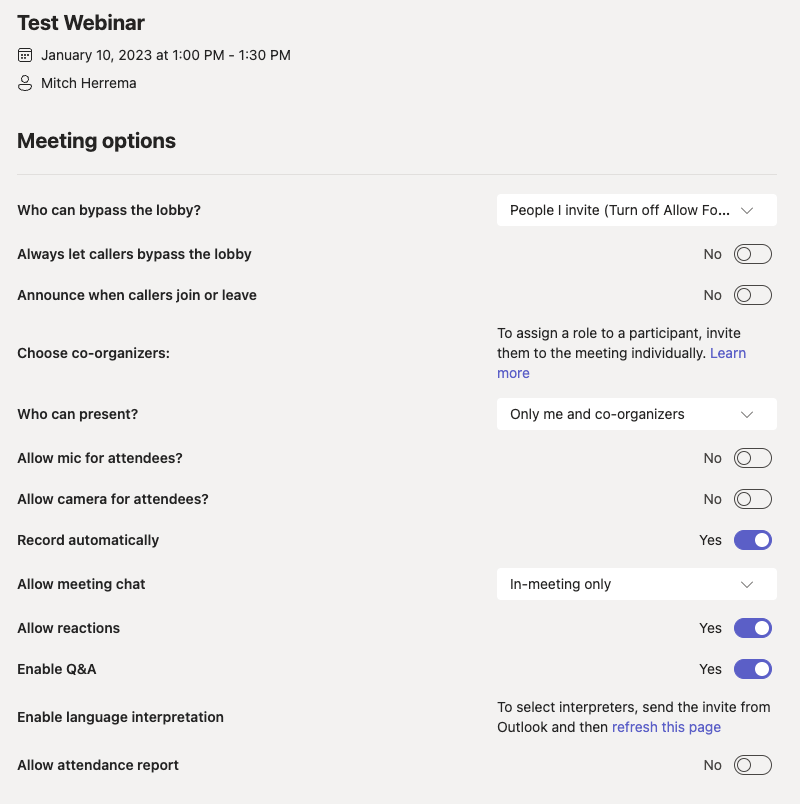
There are a lot of settings we’re not going to explain at length here, but many are self-explanatory, or topics we can dig into another time.
Running the event
Now that the webinar is all set up, all that’s left to do is run the event. You can join the meeting like you would any other Teams meeting, the only difference is the separation between presenters and attendees.
If you’d like to bring an attendee “on stage”, you can right click their profile image and “allow mic” or “allow video” etc, which will give them the capability to toggle those on on their own.
Live Events
The third type of meeting we’re going to cover today is Live Events.
Some may be confused at the difference between a Webinar and a Live Event, but I’ll do my best to draw the distinction.
Live Events are great for meetings with large audiences, where the Producer controls everything that is seen by the audience, and no registration is required. All communication is (few) → (many), with attendees only able to communicate “up” via Q&A if enabled.
There’s a few options to pay attention to when creating an event:
- Recording available to producers and presenters - this will auto-record and deliver to producers and presenters
- Recording available to attendees - This allows the auto-recording to be viewed by attendees after the event
- Attendee engagement report - If you want to get a report with statistics of how attendees were engaged during the event, toggle this on
- Q&A - If you want the audience to be able to ask questions in a Q&A format (not “chat”), you can enable that for the event.
Producing a Live Event
The process of producing a live event is drastically different from a typical Teams meeting or webinar.
Produce Via Teams
If you simply want to produce the event and share content from presenters’ webcams and screens, you can do it all right within Teams.
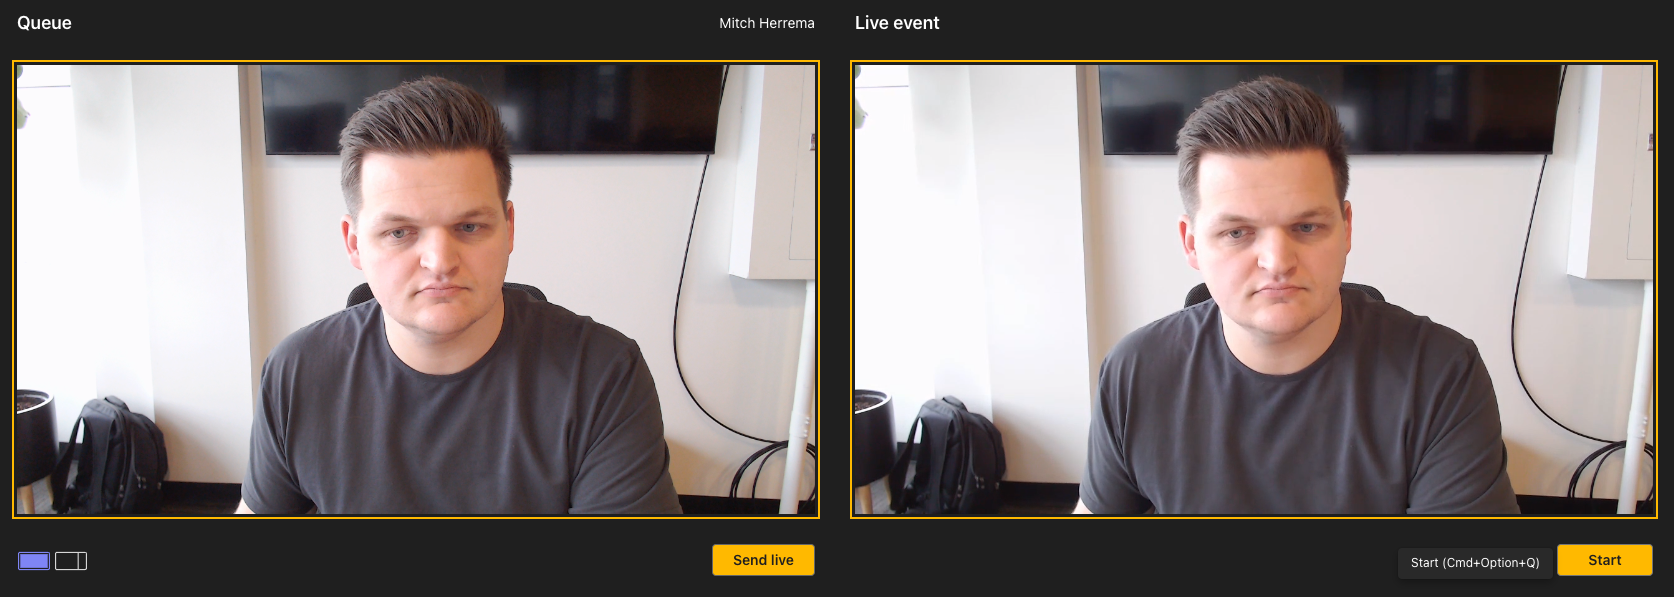
When you go to start the event, you’ll open the producers window. There are three things to make note of on this screen.
- Along the bottom is a grid of content that you can share, varying from your presenters’ webcams, to whatever screen they might be sharing
- On the left side of the screen is the “preview” of what content is being prepared to share
- On the right side of the screen is the content that is live and currently being shared

The role of the producer is to take content from the bottom, move it to the Queue (preview), and “Send live” when desired.
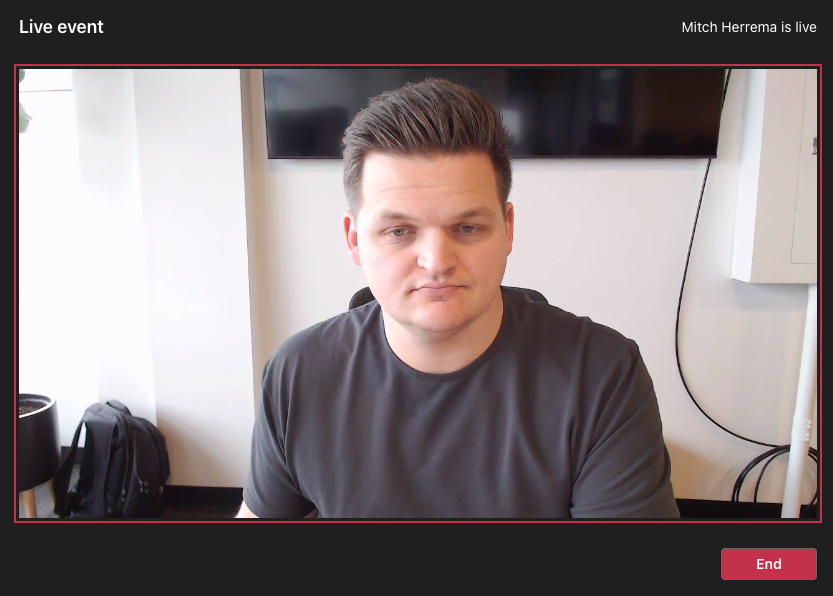
You’ll notice in the image above I was in a “pre-live” state. After I clicked “Send live” below my webcam, it moved to the right side.
All that’s left to do is click “Start”, and you’ll be live!
From then on, effectively all you have to do is prep content to go live, send it live when necessary, and present/answer questions as needed.
Clicking End will end the meeting for everyone watching.
Use an External App or Device
For those of you that have streamed to other platforms before like YouTube and Twitch, you’re likely familiar with the concept of using a “streaming device” that sends your video feed to an address with a secret key for your livestreams.
This allows you to use high quality cameras, audio equipment, video switchers, and more “professional” production equipment. It’s also fairly easy to overlay graphics on your video with that type of setup.
I’m not going to go very deep into the how-to for all of that today, but what you should know is:
- Teams Live Events supports RTMP video streams
- At the time of writing (Jan 2023), it does not support RTMP for anonymous streams. It only supports it when you are streaming only to your organization. Though last I checked this is something they’re working on.
From there you will basically rely on your production equipment to run what is seen/heard on the stream as opposed to controlling it within Teams.
The One You Might Not Know About - Channel Meetings
Do you have a regular meeting with an existing team within Teams? You might want to make it a Channel Meeting.
The main benefit of Channel meetings is that it works “within” the channel. So things like meeting recordings, live captions, and files all live within the channel. It displays the meeting status as a message right in the channel, and after completing it will leave a “log” that a meeting happened and for how long, as well as the messages that went on during the meeting.
The meeting in itself is no different than a regular Teams meeting, it’s just happening within the channel.

There’s two ways to do Channel Meetings:
- Ad-hoc “Meet Now”
- Scheduled
Meet Now
If you want to create a meeting that automatically allows anyone else in the channel to join, you can click Meet in the upper right of any Teams channel. This will kick off a meeting where you can either invite individuals, or copy the meeting link to send to others.
Scheduled
If you want to schedule a future channel meeting, you can again click the dropdown in the top right of any channel and click Schedule a meeting.
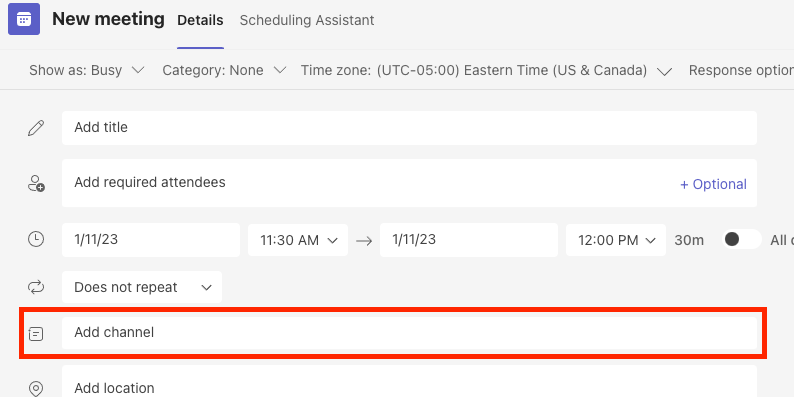
The other way to accomplish this is when you are scheduling a regular Teams meeting, you have an option to add a channel to the meeting. This is functionally the same as the option above, just accessed a different way - you don’t have to schedule it from the channel.
“I don’t see this option”
I’m not an expert on the admin side of all of this, but know that if you don’t see some options listed here, it has likely either been disabled by your IT, or your IT simply hasn’t enabled it. Sometimes government tenants have different restrictions as well.
So which should you choose?
Many organizations get by just fine with regular meetings.
But, if you take an extra step before scheduling to decide if that’s the right choice, you may end up with a better experience.
Size of organization can matter as well. When they get to a certain size, meetings can play a different role than just “a meeting”. Is it to distribute information? Or is it to collaborate?
To boil it down, here’s which to choose when:
- Regular Meetings - When you’re working with your team or a client and you are collaborating. Choose a channel meeting if you want to “host it within a Teams channel with the members of the channel”.
- Webinar - When you have a small team wanting to “host” a meeting, require registration, and allow attendees to “come on stage” if you choose.
- Live Event - When you are trying to disseminate information to a large audience, and most information is going from the host to the audience. Any audience participation is limited to a Q&A structured format.
So think twice before scheduling your next meeting - you may enjoy a suite of features you didn’t know about.


.jpg)


